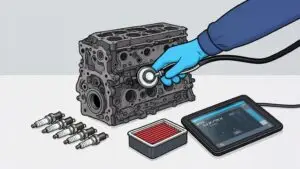

When your battery light comes on and then goes off, your vehicle is almost certainly signaling a charging-system fault — not necessarily a dead battery, but something in the alternator, voltage regulator, serpentine belt, or electrical connections that’s disrupting normal voltage. The light doesn’t always mean you’re about to stall, but it does mean you should not ignore it.
Two immediate steps:
- Right now: Turn off non-essential electrical loads (AC, heated seats, radio) and check for obvious warning signs like dimming headlights or a burning smell.
- Within the hour: Get a voltage check at a shop or run a quick multimeter test yourself. If the light stays on or your lights are visibly dimming, drive straight to a service center rather than waiting.
Key Takeaways
An intermittent battery warning light almost always points to a charging-system fault — alternator, belt, regulator, or connections — not just the battery itself, and it requires a proper load test to confirm the root cause.
| Point | Details |
|---|---|
| Intermittent light = charging fault | The warning light signals voltage outside normal range, often from the alternator, regulator, or a loose connection. |
| Driving window is limited | With the alternator not charging, a vehicle typically runs 30–90 minutes on battery power alone; reduce electrical loads immediately. |
| Multimeter thresholds matter | Resting voltage should be ~12.6V; running voltage should be 13.7–14.7V. Below 13.5V means undercharging; above 15.0V means overcharging. |
| Load test beats voltage reading | A surface charge can mask a failing battery; a dedicated load test is required to confirm battery health before replacing parts. |
| Kwik Kar Oil Change & Auto Care | ASE-certified technicians in Richardson, TX run full charging-system diagnostics with transparent digital reporting and same-day repair options. |
Table of Contents
- How does the charging system actually work?
- What causes a battery light that comes on and off?
- How do you tell if it’s the battery or the alternator?
- Quick, safe checks you can do right now
- Is it safe to keep driving with a flashing battery light?
- What does a shop do, and what will it cost?
- What does a professional diagnostic actually test?
- What intermittent battery lights tell you that most owners miss
- Kwik Kar Oil Change & Auto Care handles charging-system issues fast
- Sources
- FAQ
How does the charging system actually work?
Your car’s electrical system runs on a three-part loop, and understanding it explains why a single fault can make the battery warning light flicker unpredictably.
The battery handles starting the engine and provides reserve power when the alternator can’t keep up. At rest, a healthy battery sits at roughly 12.6 volts. It’s not designed to power the car indefinitely — it’s more like a capacitor that gets recharged constantly while you drive.
The alternator is the real power source while the engine runs. Driven by the serpentine belt, it generates AC current that a built-in voltage regulator converts to a steady DC output, typically between 13.7 and 14.7 volts at the battery terminals. That voltage range keeps the battery topped off and runs every electrical system simultaneously.
The voltage regulator acts as the throttle for the alternator’s output. When it drifts out of calibration, voltage can swing too low (undercharging) or too high (overcharging), and either condition trips the battery warning light.
The serpentine belt connects the alternator to the engine’s crankshaft. If the belt slips, glazes, or loses tension, the alternator spins inconsistently — which is exactly why some charging faults only appear at certain RPMs or under vibration. A loose connector at the alternator can do the same thing: make intermittent contact that the light catches briefly, then loses.
What causes a battery light that comes on and off?
Intermittent battery-light behavior is one of the more frustrating car problems because the fault can appear only under certain conditions, making it tricky to diagnose. Common causes include:
- Failing alternator or worn brushes. The alternator’s internal brushes and slip rings can make inconsistent contact, causing voltage to drop only when the alternator spins at specific RPMs or when the vehicle vibrates. This is the most common source of intermittent charging faults.
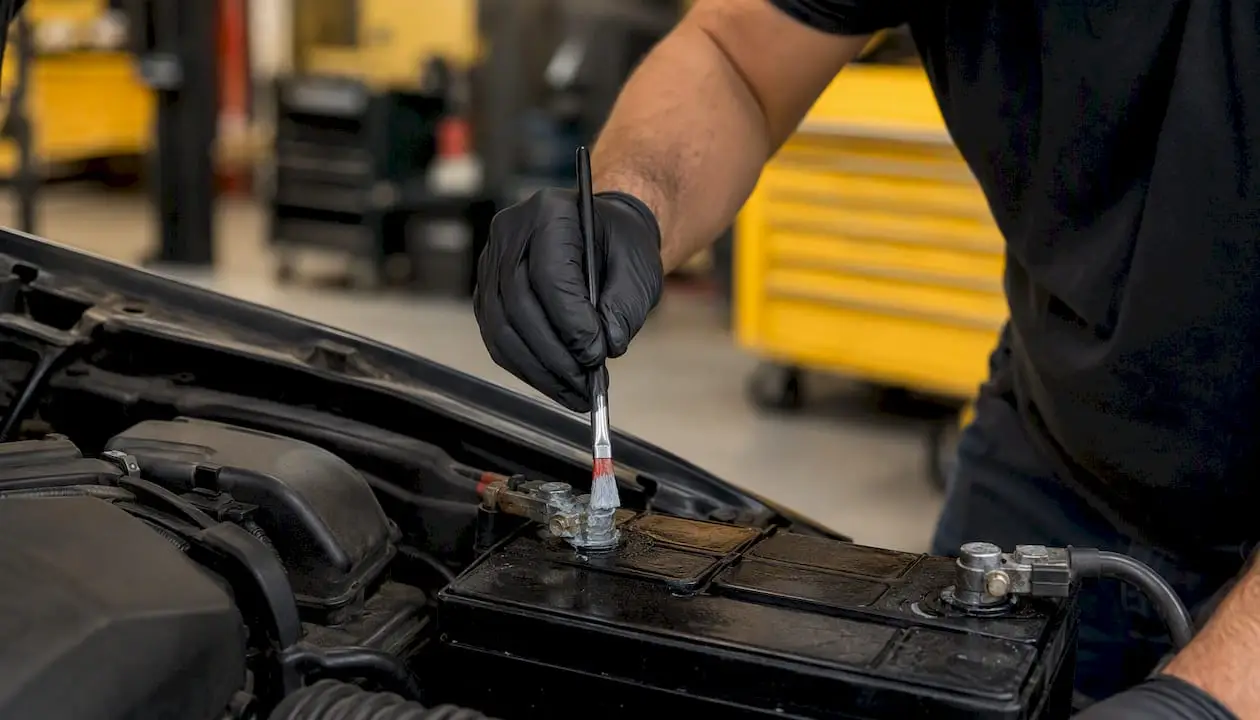
- Loose or corroded battery terminals and cables. Corrosion acts like resistance in the circuit. A terminal that looks connected may be losing contact under load, triggering a momentary voltage drop and a brief flash of the warning light.
- Slipping or glazed serpentine belt. A belt that’s stretched, glazed, or running with insufficient tension will slip under electrical load, reducing alternator output. You may also hear a faint squeal at startup.
- Partially failing battery. A battery with a weak or dead cell can still show an acceptable resting voltage but collapse under load. The alternator works harder to compensate, and the voltage swings trigger the light.
- Wiring faults and intermittent connectors. Vibration-induced connector loosening, chafed wiring, or a corroded ground strap can mimic alternator failure. These are notoriously hard to catch without voltage-drop testing.
- Overcharging from a bad voltage regulator. Less common, but a regulator that’s stuck open can push voltage above 15 volts, which trips the warning light and can damage the battery and electronics quickly.
- Sensor or ECM anomalies. Occasionally, a stored charging DTC (like P0562 or P0620) reflects a sensor misread rather than an actual hardware failure. A scan tool separates these from real faults.
Classic alternator symptoms that often accompany the warning light include headlights that dim at idle and brighten when you rev the engine, accessories cutting in and out, and a battery that keeps dying even after replacement.
How do you tell if it’s the battery or the alternator?
A multimeter is the fastest way to separate a battery problem from a charging-system failure, and you don’t need a shop to run the first two tests. Here’s the step-by-step process, along with what each reading means:
Step-by-step multimeter test
- Set your multimeter to DC voltage (20V range). Connect the red lead to the positive battery terminal and the black lead to the negative terminal.
- Read resting voltage with the engine off (after the car has sat for at least 30 minutes). A fully charged battery reads around 12.6 volts; below 12.2 volts suggests a discharged or failing battery.
- Start the engine and read running voltage. Healthy alternator output sits between 13.7 and 14.7 volts. Below 13.5 volts indicates undercharging; above 15.0 volts indicates a regulator problem.
- Turn on major loads (headlights, AC blower, rear defroster) and re-read. Voltage should stay above 13.5 volts. A significant drop under load points to an alternator that can’t meet demand.
- Request a load test at a shop. A carbon-pile or electronic load tester applies a controlled discharge to the battery and measures how it holds up — something a simple voltage reading can’t replicate. Surface charge can make a failing battery look healthy at rest.
Safety note: Keep hands clear of the belt and fan. Never short the leads together. If you see corrosion or damaged insulation on the cables, stop and take the car to a professional.
| Voltage Reading | Condition | Likely Cause |
|---|---|---|
| 12.6V+ (engine off) | Battery fully charged | Normal |
| 12.2V (engine off) | Battery partially discharged | Charging issue or aging battery |
| Below 12.2V (engine off) | Battery discharged or failing | Dead cell, deep discharge, or alternator not charging |
| 13.7–14.7V (engine running) | Alternator charging normally | Normal |
| Below 13.5V (engine running) | Undercharging | Alternator, belt, or regulator fault |
| Above 15.0V (engine running) | Overcharging | Voltage regulator failure |
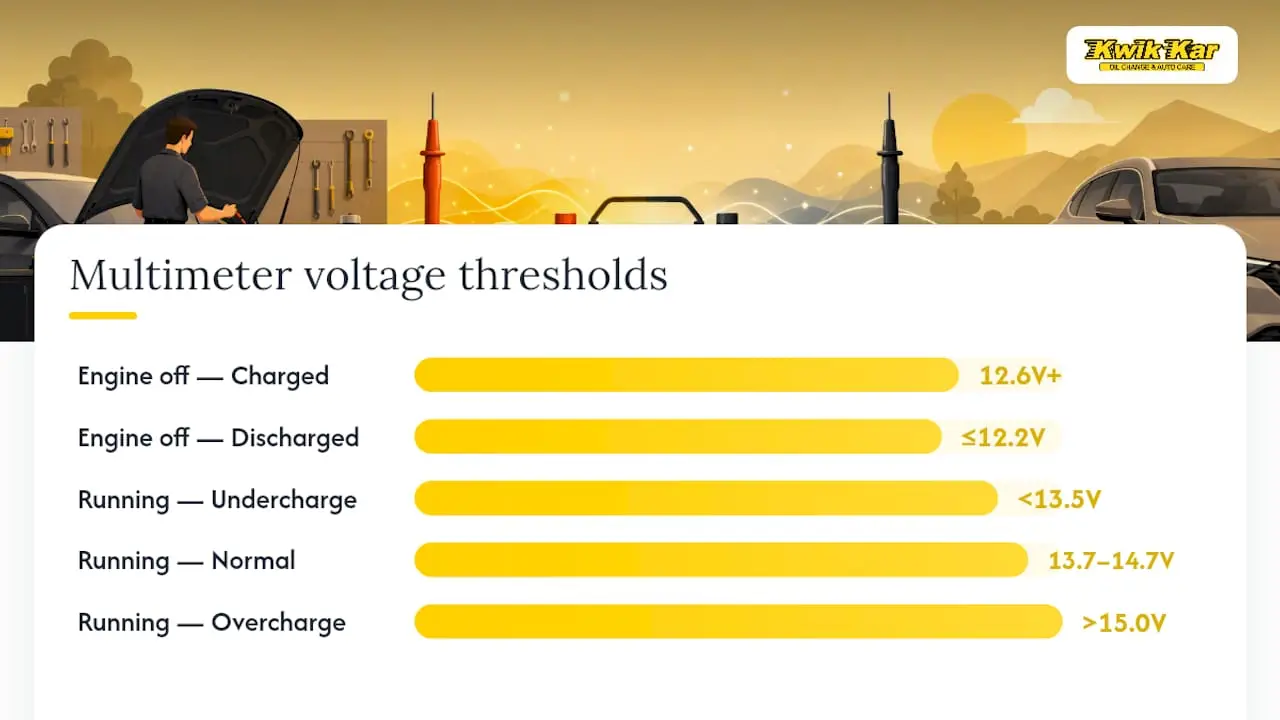
For a detailed voltage reference, the battery voltage chart at Kwik Kar maps out every state of charge at a glance.
Quick, safe checks you can do right now
You don’t need a lift or a scan tool for these. They take about five minutes and can rule out the easiest fixes before you spend money on parts.
- Check the serpentine belt visually. Look for cracks, fraying, glazing (a shiny surface), or obvious slack. A belt that’s visibly damaged or loose needs immediate attention — don’t drive far with it in that condition.
- Inspect the battery terminals. White or bluish-green powder around the terminals is corrosion. Wiggle each cable gently; it should feel completely solid. If a terminal moves, it’s not making full contact.
- Light cleaning of terminals. A paste of baking soda and water neutralizes corrosion. Apply, let it fizz, rinse with a small amount of water, and dry thoroughly. Stop if you see cracked cable insulation or heavy buildup at the cable end — that’s a shop repair.
- Check the alternator connector. The wiring harness plug at the back of the alternator can loosen from vibration. A firm push to reseat it costs nothing and occasionally solves an intermittent flicker.
- On the road: If the light comes on while driving, turn off the AC, heated seats, and audio system. Keep the engine running and drive at a steady speed to the nearest shop. Shutting the engine off and restarting risks not getting it started again if the battery is already low.
Safety warning: Never work near a hot engine or exposed wiring without letting things cool down first. Don’t touch battery terminals with metal tools across both posts simultaneously.
Pro Tip: After cleaning terminals, apply a thin coat of dielectric grease or terminal protector spray before reconnecting. It seals out moisture and dramatically slows corrosion from coming back.
Is it safe to keep driving with a flashing battery light?
The short answer: you can usually drive short distances with the light on, but the window is limited and shrinks fast if you ignore the warning signs.
Once the alternator stops charging, the vehicle runs on battery power alone — typically 30–90 minutes depending on electrical load and battery condition. A newer battery with the AC and radio off buys you more time. An older battery with every accessory running could leave you stranded in under 20 minutes.
Stop driving immediately and call for a tow if you notice any of these:
- Headlights or dashboard lights suddenly dim while driving
- The engine begins to stumble or stall
- A sulfur or burning smell from under the hood
- Voltage reading above 15 volts (overcharging actively damages electronics)
- The serpentine belt is visibly broken or missing
If none of those apply and the light is intermittent, drive directly to a shop at a steady speed with electrical loads minimized. Don’t make extra stops, and don’t shut the engine off until you’re at the service center. For a fuller picture of warning signs that mean the battery is failing, those symptoms often overlap with charging-system faults.
What does a shop do, and what will it cost?
A professional diagnostic goes well beyond a simple voltage check. Here’s what a qualified technician typically works through:
- OBD-II scan for charging-related DTCs (P0562, P0563, P0620–P0625) to identify stored fault codes before touching anything.
- Battery state-of-health and load test using a carbon-pile or electronic tester to confirm whether the battery can hold voltage under a controlled discharge.
- Running voltage and alternator output test at the battery terminals with loads applied.
- Alternator bench or in-vehicle load test to measure actual amperage output against the manufacturer’s rated capacity.
- Voltage-drop testing across the negative cable and alternator output circuit to find high-resistance joints that pass a visual inspection but fail under current.
Diagnostic time typically runs 30–60 minutes. Repairs vary:
| Repair | Typical Cost Range | Time |
|---|---|---|
| Battery replacement | $200–$300 | 30–90 minutes |
| Alternator replacement | $300–$600 | 1–3 hours |
| Serpentine belt replacement | $75–$150 | 30–60 minutes |
| Terminal/cable repair | $100–$150 | 30–60 minutes |
Cost figures sourced from industry repair estimates; actual prices vary by vehicle make, model, and local labor rates.
Shops often recommend replacing the battery and alternator together when the alternator has been overcharging or has repeatedly drained the battery flat. Overcharging and deep-discharge cycles can permanently reduce a battery’s capacity, so installing a new alternator on a compromised battery often leads to a second repair call within months.
What does a professional diagnostic actually test?
A voltage reading at the battery terminals tells you something is wrong. It doesn’t tell you where. That’s why the professional workflow includes several tests that go deeper.
- Alternator load test (bench or in-vehicle). This applies a controlled electrical load while measuring output amperage. An alternator rated at 120 amps that only produces 80 amps under load is failing, even if its no-load voltage looks normal.
- Voltage ripple check. A healthy alternator produces smooth DC. Worn diodes inside the alternator create AC ripple in the DC output — measurable with an oscilloscope or a ripple-capable multimeter. High ripple is a reliable sign of internal alternator damage.
- Voltage regulator and brush inspection. On alternators with accessible brushes, a technician can measure brush length and check slip ring condition. Brushes worn below spec cause exactly the kind of intermittent contact that makes the battery light flicker under vibration.
- Voltage-drop testing on cables and grounds. A drop of more than 0.5 volts across the negative cable or ground strap under load indicates a resistance problem that simple terminal cleaning won’t fix. This test catches corroded ground straps and internally damaged cables that look fine from the outside.
- DTC review. Codes like P0562 (system voltage low) and P0620–P0625 (generator control circuit faults) narrow the diagnosis considerably and help distinguish a sensor fault from a hardware failure.
The reason intermittent faults are so hard to catch is that alternator brushes and slip rings can make inconsistent contact only at specific RPMs or under vibration. A shop that logs voltage data over a real drive — rather than only testing in the bay — catches faults that a static test misses entirely.
What intermittent battery lights tell you that most owners miss
The battery warning light that flickers once and disappears is easy to dismiss. That’s the mistake. An intermittent charging fault is almost always an early-stage problem — worn alternator brushes, a connector beginning to corrode, or a belt losing tension — and catching it early costs a fraction of what a roadside breakdown does.
What surprises most owners is that repeated short drives actually hide alternator decline. The alternator never gets pushed hard enough on a five-minute commute to reveal a weakness that would show up clearly on a 30-minute highway run. If your light comes on during a longer drive or when the AC is running, that’s the load exposing the fault. Ask your technician to replicate those conditions or use a data-logging scan tool to record voltage across a real drive cycle.
The other thing worth knowing: a battery that’s been undercharged for weeks may test at 12.4 volts and seem borderline fine, but fail a load test completely. Surface charge is misleading. A proper battery load test is the only way to know for certain.
Kwik Kar Oil Change & Auto Care handles charging-system issues fast
When the battery warning light has you second-guessing every drive, Kwik Kar Oil Change & Auto Care in Richardson, TX gives you a clear answer without the dealership wait. ASE-certified technicians run a complete charging-system diagnostic — OBD-II scan, battery load test, alternator output check, and voltage-drop testing on cables and grounds — and hand you a transparent digital report of exactly what they found.

Battery replacement, alternator repair, serpentine belt service, and full electrical system repairs are all handled in-house, with warranty coverage on parts and labor. Most diagnostics wrap up in under an hour, and same-day repairs are common for battery and belt work. Military personnel and first responders receive special discounts, and the shop is recognized by both CARFAX and RepairPal. Schedule your charging-system diagnostic at Kwik Kar Oil Change & Auto Care before an intermittent flicker becomes a roadside call.
Sources
The technical thresholds, diagnostic workflows, and cost ranges in this article draw from the following sources. If you’re heading to a shop, printing or screenshotting the relevant voltage readings can help your technician understand what you observed before the visit.
- What the Battery Warning Light Could Be Telling You | Midtronics
- Battery Light On While Driving: Full Diagnosis Guide – Steer
- Battery vs Alternator: How to Tell Which One Is Actually Failing | Mr Automotive Repair — Gainesville, GA
- Battery vs. Alternator: Which Is the Problem | AutoZone
FAQ
Why did my battery light come on and then go off?
The battery warning light comes on when charging-system voltage is outside the normal range, and goes off when voltage returns to normal. Common causes include a failing alternator, worn brushes, loose connections, or a slipping serpentine belt — often appearing only under specific loads or vibration.
Can I still drive when my battery light is flickering?
You can usually drive short distances with the light on, but reduce electrical loads immediately and head straight to a shop. If the alternator has stopped charging, the vehicle typically runs on battery power alone for roughly 30–90 minutes before stalling.
Does a battery light always mean a bad alternator?
Not always. While alternator failure is the most common cause, the light can also indicate a failing battery, corroded terminals, a slipping serpentine belt, wiring faults, or a bad voltage regulator. A proper diagnostic — including a load test and OBD-II scan — is needed to confirm the root cause.
How do I tell if it’s my battery or my alternator?
Run a multimeter test: resting voltage around 12.6 volts (engine off) points to a charged battery, while running voltage between 13.7 and 14.7 volts confirms the alternator is charging. If running voltage drops below 13.5 volts or headlights dim at idle and brighten when you rev the engine, the alternator is the likely problem. A load test at a shop confirms which component is actually failing.