Protect a $200 Repair: How Richardson Pros Find AC Refrigerant Leaks
If your car’s AC blows warm air, you spot an oily residue near the fittings, or cooling fades soon after a recharge, your vehicle most likely has an AC refrigerant leak. Refrigerant lives in a sealed loop and doesn’t burn off or wear out, so any drop in cooling means the system is losing charge somewhere. Skip the DIY top-off can and get a proper leak test and repair before the compressor pays the price.
TL;DR:
- Most AC refrigerant leaks originate from worn O-rings, damaged condensers, or failing compressor seals, which require precise detection methods.
- Visual inspection, dye tracing, and electronic sniffers are used together to accurately locate leaks that are often small or hidden inside the evaporator.
- Proper repair involves leak pinpointing, part replacement, system evacuation, and refrigerant recharging to factory specifications for long-lasting results.
- Topping off refrigerant without fixing the leak only provides temporary relief and risks compressor damage due to oil starvation.
- Always ask shops if they perform comprehensive leak testing and system evacuation, as superficial recharges are unreliable and can lead to repeated repairs.
Table of Contents
- What Are the Signs of an AC Refrigerant Leak?
- How Do Technicians Find a Refrigerant Leak?
- What Does a Proper AC Repair and Recharge Look Like?
- Why Topping Off Refrigerant Never Actually Fixes the Problem
- When Should You Call a Shop About Your AC?
- Kwik Kar Perspective: Why Documented Diagnostics Matter
- Schedule an AC Refrigerant Leak Diagnosis in Richardson
- Sources
- FAQ
What Are the Signs of an AC Refrigerant Leak?
A leaking system rarely announces itself with one obvious symptom. It shows up in small, connected clues that add up once you know what to watch for.
Vent behavior is usually the first tip-off. Cold air fades gradually, or the AC blows cool for a minute before drifting warm, especially at idle or in stop-and-go traffic. That pattern points to a system running low on charge rather than a total compressor failure.
Visual and residue clues confirm it. Refrigerant carries oil through the system, so a leak leaves an oily film at hose connections, the condenser, or around the compressor shaft seal. Frost or ice buildup on the low-side line, wet stains on hoses, or bright dye visible near the evaporator drain tube are all classic markers technicians look for during inspection.
Sound and timing matter too. A loud hiss near the firewall or under the hood, especially right after the compressor engages, often signals a larger leak rather than a slow seep. And if you’ve recharged the system before and it’s already blowing warm again within weeks or months, that’s not bad luck. It’s a leak that was never actually fixed.
- Cooling weakens gradually or fades a few minutes after startup
- Oily residue, wet spots, or frost on AC lines and fittings
- Hissing near the compressor, hoses, or firewall
- Cooling loss returns shortly after a previous recharge
- Sweet or musty smell from the vents, which can suggest an evaporator core leak
How Do Technicians Find a Refrigerant Leak?
Finding the exact leak point takes more than a guess and a can of refrigerant. Shops layer several detection methods depending on where the leak is likely hiding and how fast it’s losing pressure.
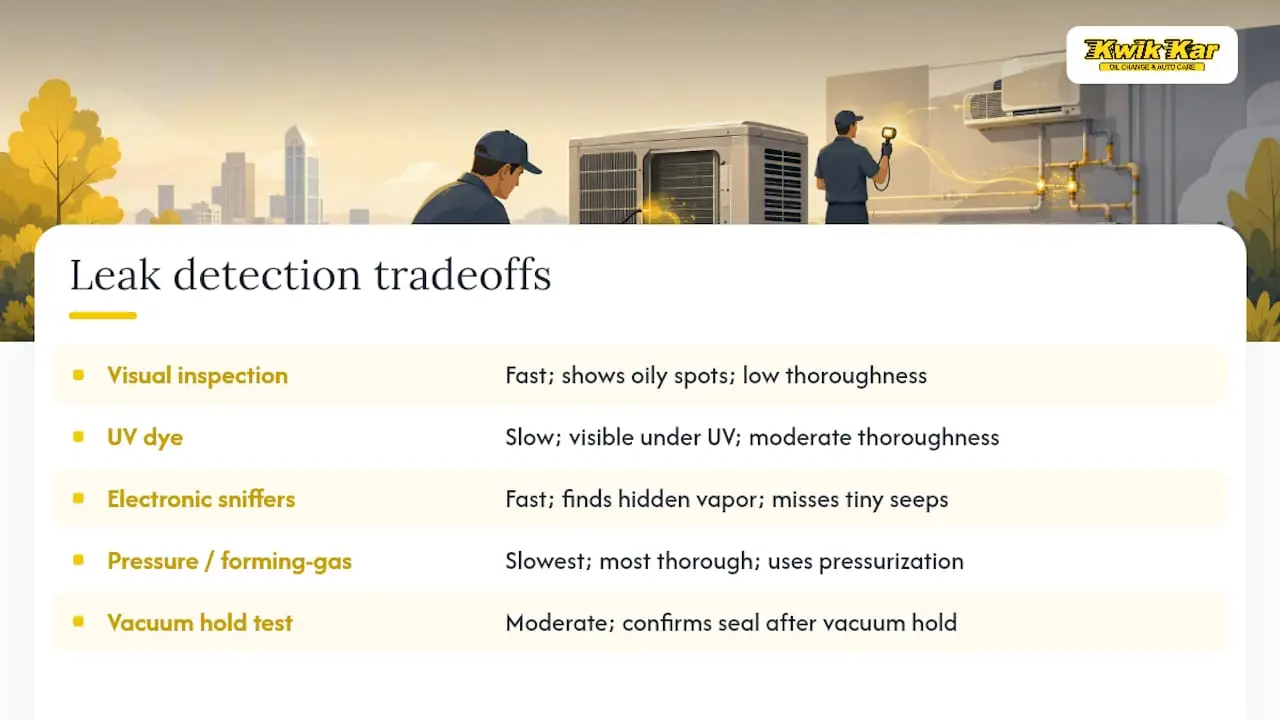
Visual inspection comes first. A technician checks the usual failure points: condenser fins (vulnerable to road debris and stone impacts), rubber hose crimps, O-rings at fitting connections, Schrader service ports, and the compressor shaft seal. Oily buildup at any of these spots is often visible before any special equipment comes out.
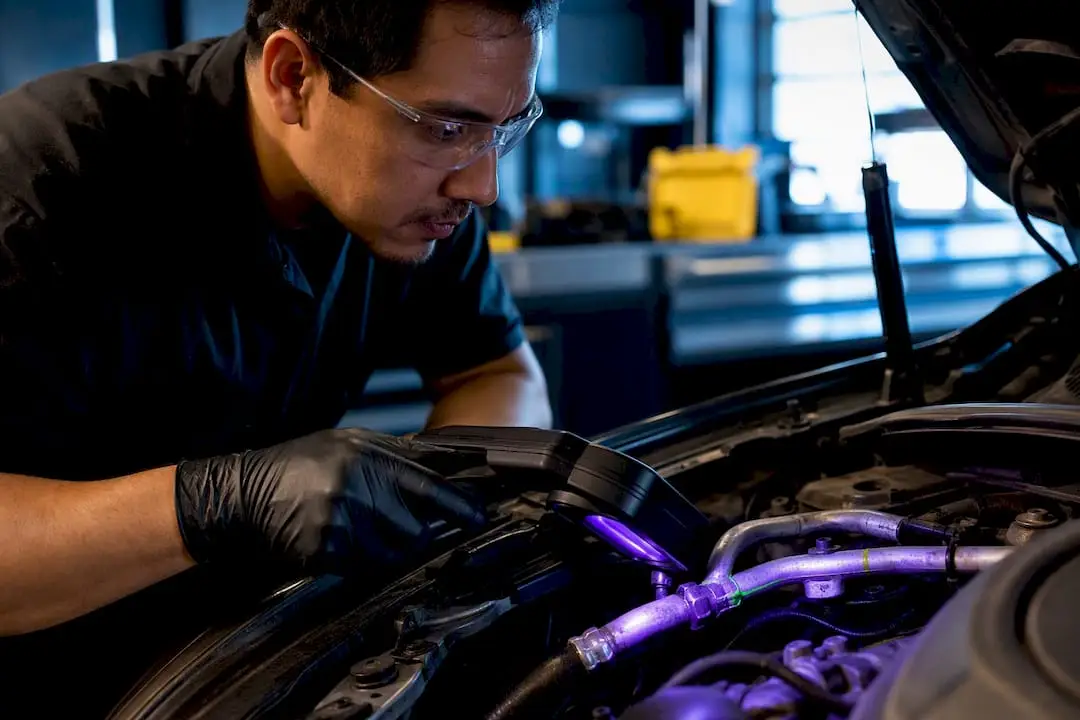
UV dye leak detection handles leaks that don’t show themselves easily. A fluorescent dye gets added to the system, the car is driven for a day or so to circulate it, and then a UV lamp reveals the exact leak point as a glowing stain. This method works well for external leaks but also helps confirm suspected evaporator core leak symptoms when dye shows up in the condensation draining under the dashboard.
Electronic refrigerant sniffers pick up where dye struggles. These handheld detectors sample air near suspected areas and alarm on refrigerant vapor, making them the tool of choice for hidden leaks inside the evaporator housing, tucked behind the dash where dye can’t easily be seen.
Pressure, vacuum, and forming-gas testing confirm the whole system is airtight. Technicians pressurize the loop with nitrogen or a nitrogen/hydrogen “forming gas” blend, then use bubble solution or a sniffer to find the escape point, according to Hella TechWorld’s leak detection guide. A vacuum hold test afterward proves the seal.
Each method has a tradeoff. Dye is cheap but slow, sniffers are fast but can miss tiny seeps, and pressure testing is the most thorough but takes longer. Stubborn or intermittent leaks often need two of these methods together before the source shows up.
Pro Tip: Ask whether the shop circulates UV dye for at least a full day of driving before checking it. Pulling the light out too soon is the most common reason a real leak gets missed on the first visit.
What Does a Proper AC Repair and Recharge Look Like?
A correct repair follows a sequence, not a shortcut. Skipping steps is exactly how a “fixed” AC system ends up warm again three months later.
- Verify the charge with manifold gauges. Before anything gets disassembled, a technician confirms low system pressure on both the high and low side, ruling out other causes like a bad clutch relay or blend door issue.
- Locate and repair the actual leak. Using the detection methods above, the technician pinpoints the failed component, whether that’s a cracked condenser, a worn O-ring, a corroded hose fitting, or a compressor shaft seal, and replaces it. A shop that skips this step and reaches for a stop-seal additive instead is setting up a bigger repair bill later, since those sealants can contaminate recovery machines and gum up new components.
- Replace the receiver/drier or accumulator. Whenever the system has been opened for a meaningful repair, this component gets swapped. It’s hygroscopic, meaning it absorbs moisture, and reusing an old one risks acid formation inside the loop.
- Evacuate the system with a vacuum pump. Pulling a deep vacuum boils off any trapped moisture before recharge, since water in a pressurized refrigerant system can freeze at the expansion valve or corrode metal parts from the inside.
- Recharge by weight to factory specification, then verify performance. The technician measures high-side and low-side pressures against a target chart and checks vent temperature, aiming for cooled air well below cabin ambient. A documented vacuum hold test and recharge-by-weight readout is the clearest proof the repair actually held.
A healthy AC system should reach vent temperatures significantly below the cabin ambient temperature on a hot day, and any shop worth using will provide those performance numbers in writing rather than just a verbal “it’s cooling fine now.”
Why Topping Off Refrigerant Never Actually Fixes the Problem
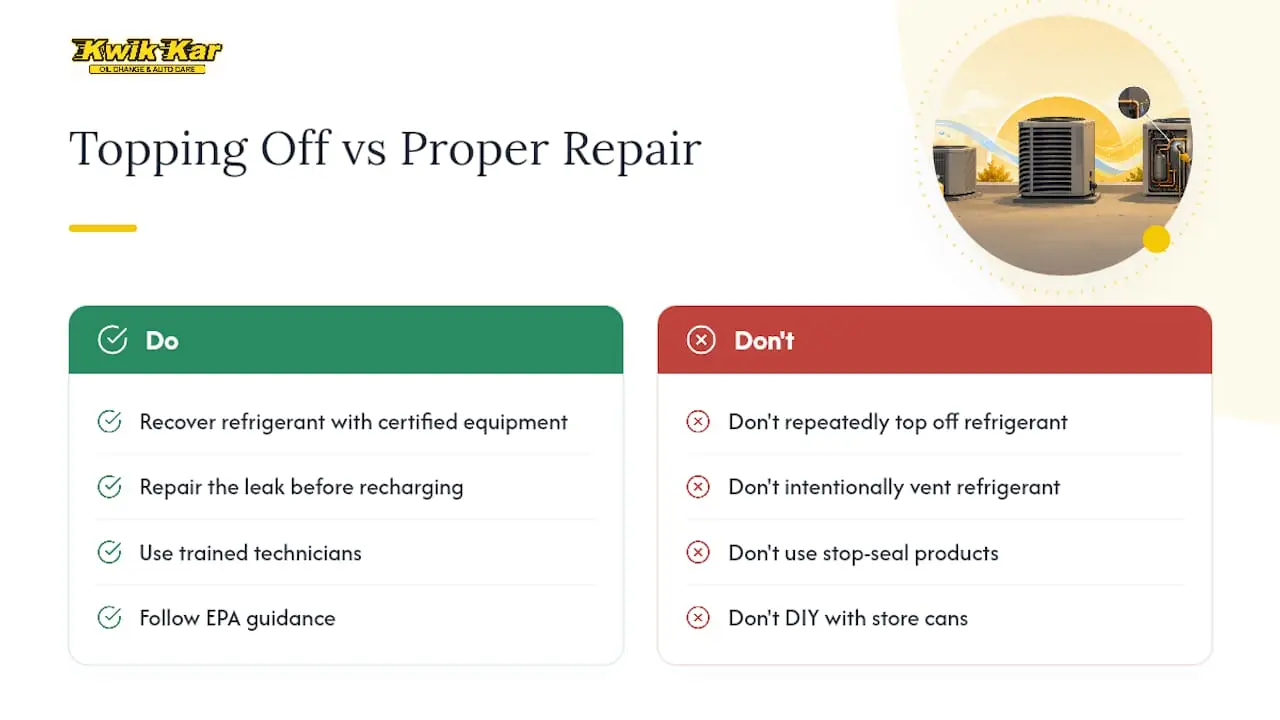
An AC system is a closed loop. It doesn’t consume refrigerant the way an engine burns oil, so if the charge is low, refrigerant escaped somewhere, and adding more only buys a few weeks before it happens again.
The EPA’s guidance on recharging vehicle air conditioners is direct on this point: refrigerant should be recovered using certified equipment, never intentionally vented, and repeatedly topping off a system without repairing the leak isn’t an appropriate long-term fix. There’s a mechanical cost too. Refrigerant carries the oil that lubricates the compressor, so a system running low is also running dry, which accelerates internal wear and can lead to a full compressor replacement. Stop-seal products marketed as an easy fix carry their own risk, since they can clog orifice tubes and contaminate the same recovery machines shops use on other vehicles. Handling pressurized refrigerant safely takes trained technicians and recovery equipment, not a store-bought can and a prayer.
When Should You Call a Shop About Your AC?
Book a diagnostic appointment as soon as you notice warm air returning after a recent recharge, visible oily residue on the lines, unusual compressor noise, or cooling that has faded more than once this season. Waiting usually turns a $200 leak repair into a compressor replacement.
Before your appointment, jot down when the symptoms started, whether the system has ever been recharged before, and any prior AC repairs. That timeline helps a technician narrow down likely leak points fast.
At the shop, ask direct questions:
- Do you perform electronic leak detection and UV dye tracing, not just a recharge?
- Will you evacuate the system with a vacuum pump and recharge by weight?
- Is the receiver/drier being replaced if the system is opened?
- What’s the warranty on the repair, and can I get documented pressure readings?
If a shop’s answer is “let’s just top it off and see,” that’s a red flag. So is a refusal to run a leak test or a vague, undocumented estimate.
Kwik Kar Perspective: Why Documented Diagnostics Matter
A recharge without documentation is a guess with a receipt. Our ASE-certified technicians run gauge readings, dye traces, and vacuum hold logs on every AC repair, the same standard recognized by RepairPal and CARFAX. For fleet managers, that paperwork isn’t paperwork for its own sake. It’s the record that keeps the same vehicle from cycling back into the bay with the same complaint two months later, and it’s why we extend special pricing for military and first responder customers who trust us with their daily-driver vehicles.
— Kwik Kar
Schedule an AC Refrigerant Leak Diagnosis in Richardson
Kwik Kar Oil Change & Auto Care is the direct path to a fixed AC system, not another recharge that fades by next month. Our ASE-certified technicians run UV dye tracing, electronic leak detection, and pressure testing to find exactly where your system is losing charge, then repair the failed part, evacuate the loop, and recharge to factory weight with documented pressure and vent temperature results.

We’re recognized by RepairPal and CARFAX for reliable, transparent auto care, and we offer special pricing for military and first responders. Whether you’re a Richardson commuter tired of warm air in July or a fleet manager who needs vehicles back on the road fast, our AC and heating repair service covers the full diagnostic and repair workflow, and our AC recharge service handles the recharge-by-weight step correctly the first time. Schedule your appointment today and get your AC diagnosed properly instead of topped off again.
Sources
For more background, see the EPA’s recharging guidance, Hella TechWorld’s leak detection breakdown, and Kwik Kar’s guide on diagnosing an AC that won’t blow cold.
- EPA — Options for recharging your air conditioner
- Car air conditioning leak detection — Hella TechWorld
FAQ
What causes an AC refrigerant leak in a car?
Most leaks come from worn O-rings, corroded hose fittings, a damaged condenser (often from road debris), a failing compressor shaft seal, or a pinhole in the evaporator core.
How much does an AC leak test cost?
Cost varies by vehicle and how many detection methods are needed, so ask your shop for a specific quote after they’ve looked at your symptoms and leak history.
Why does my car AC smell sweet?
A sweet smell from the vents often points to a coolant leak into the cabin air system, though musty or chemical odors can also suggest a refrigerant or evaporator leak worth having checked.
Can I use UV dye to find a leak myself?
You can buy dye kits, but spotting faint traces, especially inside the evaporator housing, usually requires a UV lamp and trained eyes; a professional dye and electronic sniffer combination finds hidden leaks DIY kits often miss.
Is it safe to keep adding refrigerant myself?
No. The EPA advises against repeated topping off without a proper repair, since it masks a leak, risks compressor damage from lost lubrication, and can involve improper venting.