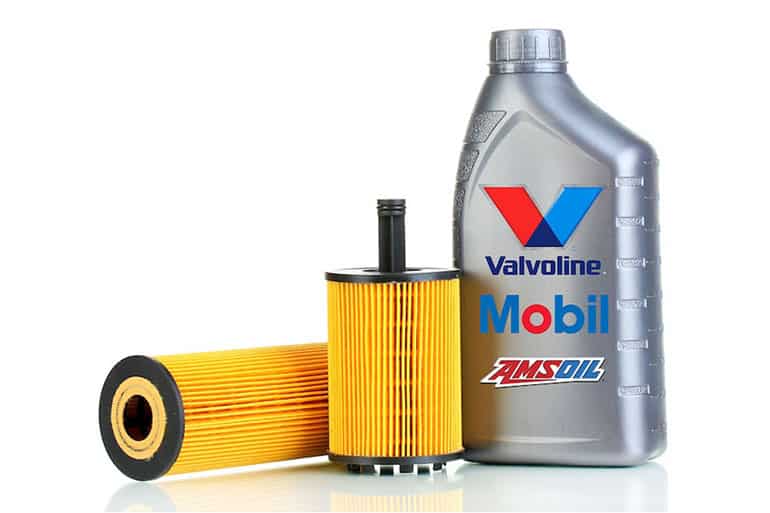
When your car’s air conditioning decides to blow warm air on a scorching Richardson day, it’s not just an inconvenience—it’s a major problem. Most of the time, the culprit is low refrigerant, and a quick air conditioner recharge car service is all it takes to get back to frosty cool.
But while those DIY kits look tempting, they can sometimes just put a band-aid on a bigger issue, like a refrigerant leak. Getting a professional diagnosis first is always the smarter move.
Why a Cold AC Is Non-Negotiable in Texas Heat
Let's be honest, in a Texas summer, a working car AC isn't a luxury, it's a necessity. When it starts to fail, knowing the common symptoms can help you decide whether to grab a DIY kit or head straight to a certified shop like Kwik Kar.

Telltale Signs of Low Refrigerant
The most obvious sign, of course, is air that just isn't cold. You might notice it takes forever to cool down the cabin, or the air feels lukewarm even when you have it cranked to the max. This is a classic symptom that your AC's lifeblood—the refrigerant—is running low.
A few other clues can point to low refrigerant:
- A Clicking Compressor: Listen for a rapid clicking sound from under the hood. This is the AC compressor clutch engaging and disengaging over and over as it struggles to build pressure with not enough refrigerant.
- Weak Airflow: If the air blowing from your vents feels weak or has less force than usual, it can also be a sign. The system can’t generate enough pressure to push a strong, steady stream of cool air.
Key Takeaway: If you’re getting warm air, hearing a clicking compressor, or feeling weak airflow, your car definitely needs an AC inspection. A recharge often fixes it, but only after you’ve confirmed there isn’t a leak causing the problem in the first place.
Before you make a decision, it's helpful to see a side-by-side comparison of what you get with a DIY kit versus what a professional service offers.
DIY Recharge Kit vs Professional Service Quick Comparison
| Feature | DIY Recharge Kit | Professional Service (Kwik Kar) |
|---|---|---|
| Diagnosis | Basic pressure check only. Cannot find the source of leaks. | Full system diagnostic, including electronic leak detection and UV dye. |
| Refrigerant Fill | Imprecise "topping off" can lead to over or under-charging. | Fills the exact amount of refrigerant specified by the manufacturer. |
| Leak Repair | Kits may contain "stop-leak" additives that can damage AC components. | Identifies and repairs the source of the leak (hoses, seals, compressor). |
| System Health | Does not address moisture or contaminants in the system. | Evacuates the entire system to remove moisture before recharging. |
| Cost | Lower upfront cost, but can lead to more expensive repairs later. | Higher initial cost, but addresses the root cause for a lasting repair. |
| Expertise | Relies on user knowledge and following instructions. High risk of error. | Performed by certified technicians with specialized tools and experience. |
Ultimately, while a DIY kit might seem like a quick, cheap fix, it often just kicks the can down the road. A professional service ensures the problem is fixed right the first time.
The Growing Demand for Reliable Car AC
Your comfort on the road is a big deal. The U.S. automotive HVAC market was valued at $8.38 billion in 2023 and is on track to hit a massive $17.87 billion by 2032.
This explosive growth shows just how vital a working AC has become, especially for Richardson commuters stuck in traffic on I-75 in the middle of July. You can read more about this trend in the Fortune Business Insights analysis.
Choosing the Right Tools and Refrigerant for Your Car
Trying to tackle an air conditioner recharge without the right gear is a surefire way to waste your time and maybe even damage your car's AC system. Before you even think about popping the hood, you’ll need to gather a few essential tools to get the job done right. The most important piece of equipment you'll need is an AC recharge kit that comes with a reliable pressure gauge.
Think of the gauge as your window into the system’s health—you can't work without it. You'll also need a good pair of safety glasses and gloves. Refrigerant is a pressurized chemical that can cause instant frostbite on your skin and serious eye damage, so don't even think about skipping the safety gear.
Identifying the Correct Refrigerant
Once you have your safety equipment ready, your next move is critical: figuring out the exact type of refrigerant your vehicle needs. Grabbing the wrong can isn't a simple mistake. It can wreck your AC system, it’s illegal in many areas, and it’s bad for the environment.
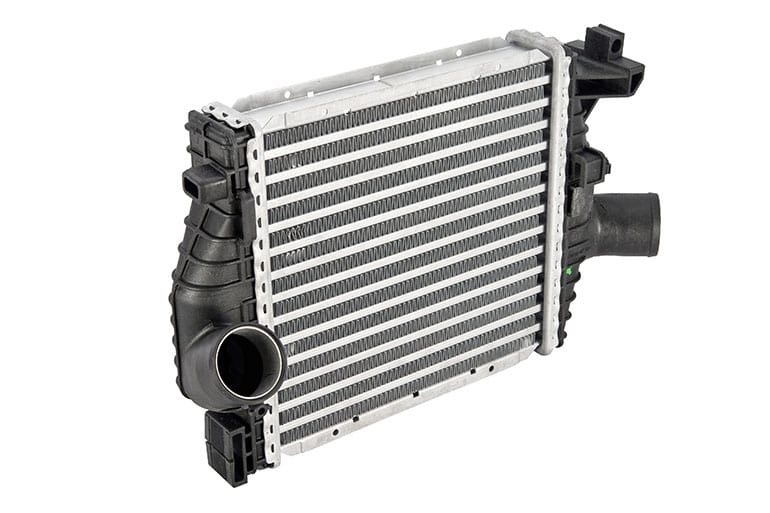
Luckily, your car tells you exactly what it takes. Just pop the hood and look for a sticker, which is usually found on the radiator support or one of the fenders. This label will clearly state the refrigerant your car was designed for.
- R-134a: This was the go-to standard for most vehicles made from the mid-1990s until about 2015.
- R-1234yf: You'll find this newer, more environmentally friendly refrigerant in almost all cars manufactured after 2015.
For example, a 2013 Ford Escape will almost certainly take R-134a, while a 2021 Toyota Camry is going to require the newer R-1234yf. These two are not interchangeable, and the service ports are even designed differently to stop you from accidentally mixing them.
Why Refrigerant Type Matters So Much
The shift in automotive refrigerants is a pretty big deal. You might remember the old R-12 (Freon), which was phased out in the ‘90s because it was damaging the ozone layer. Today, environmental regulations are pushing the industry toward options with low global warming potential, like R-1234yf. This change is a major reason why the global automotive refrigerant market is projected to grow by $1.81 billion between 2026 and 2029. You can learn more about this trend and its effects by exploring automotive technology insights from Technavio.
For a small business owner running a fleet of delivery vans, this is about more than just staying cool. A poorly maintained AC system can lead to 20-30% higher vehicle downtime during the sweltering summer months, which directly hits productivity and profits.
Expert Tip: Steer clear of any refrigerant that includes "stop leak" additives. While they sound like an easy fix for a small leak, these sealants are notorious for clogging up the tiny passages inside your AC system. This can quickly lead to a fried compressor—a repair that is far more expensive than just fixing the leak properly in the first place. Always stick with pure refrigerant for a clean, reliable recharge.
How to Safely Recharge Your Car AC System
Alright, you've got your tools and the right refrigerant. Now for the most important part: actually recharging the system. This is where patience and precision really count. We’re not just trying to cram more refrigerant in; the goal is to do it safely and accurately. A common mistake is overcharging, and that can cause some serious damage.
First, you need to find the low-pressure service port. Your car’s AC system has two of them—a low-pressure side and a high-pressure side. The good news is the recharge kit is designed to only fit on the low-pressure port, but you still need to know which is which. The cap for the low-pressure port is almost always marked with an 'L', while the high-pressure one will have an 'H'. Never, ever try to connect the recharge kit to the high-pressure side. It’s extremely dangerous.
Preparing for the Recharge
Before you even think about connecting the can, let's get your vehicle—and yourself—prepped.
- Start the car and crank the AC to the highest fan speed on the coldest setting. Make sure the recirculation button is on.
- Give the refrigerant can a good shake, just like you would with a can of spray paint. This gets all the contents properly mixed.
Now you’re ready to get a baseline reading. With the engine and AC still running, connect the recharge hose coupler to the low-pressure port you just found. You should hear a little click as it locks on. Take a look at the gauge. This initial reading is going to tell you just how low the system really is.
The pressure reading on the gauge will jump around a bit, and that's completely normal. The AC compressor cycles on and off, which causes the needle to rise and fall. You're looking for the average pressure when you hear the compressor kick on.
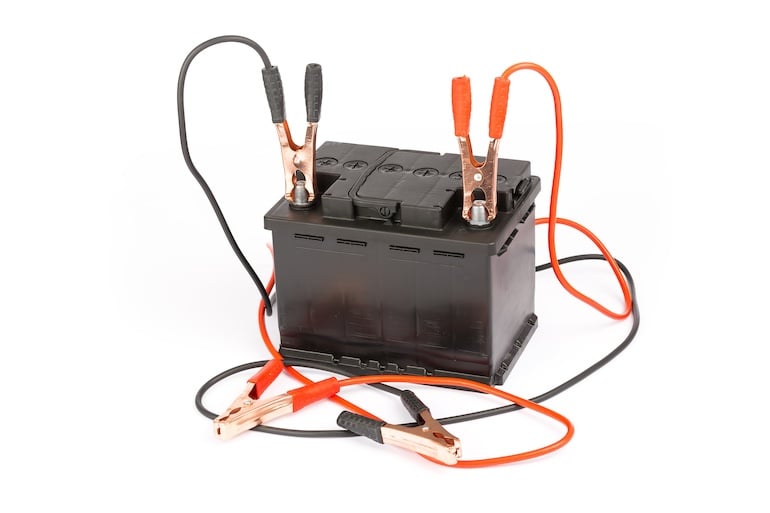
Knowing what refrigerant to use is half the battle. This simple guide visualizes the process of getting the right tools, identifying the correct type under the hood, and selecting the matching can.
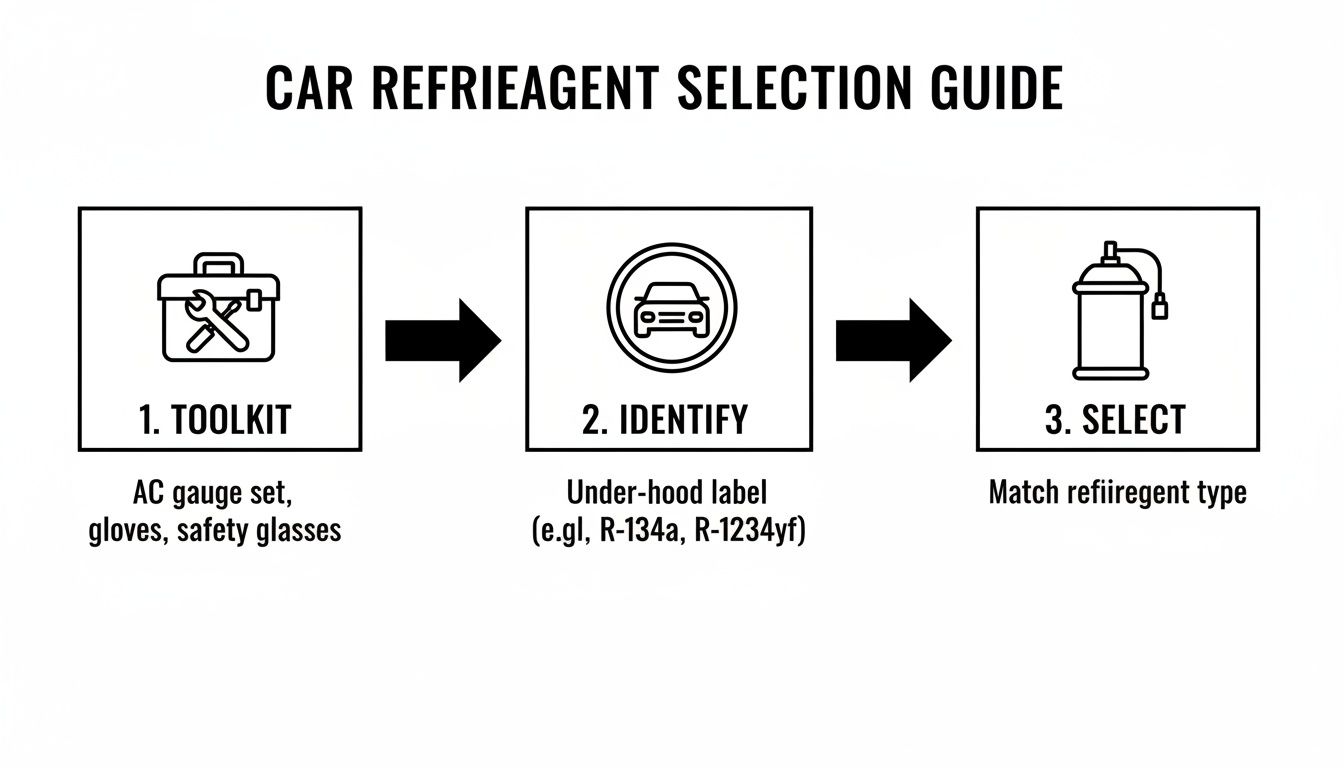
This process flow highlights that the first step is always preparation, followed by careful identification to prevent costly mistakes.
Adding Refrigerant Carefully
With the coupler attached and the engine running, it’s time to start adding refrigerant. Don't rush this part. You'll add it in short, controlled bursts.
Hold the can upright and squeeze the trigger for about 5-10 seconds at a time. After each short burst, let go of the trigger and just watch the pressure gauge for about 30 seconds. This lets the system stabilize and gives you an accurate reading. While you're charging, gently rotate the can back and forth between the 12 o'clock and 3 o'clock positions to keep everything flowing smoothly.
Keep repeating this process—short burst, wait, check the gauge—until the pressure reading moves into the green "filled" zone on your gauge. It is absolutely critical not to let that needle creep into the red or "overcharged" zone. Overcharging is probably the most common DIY mistake, and it can easily lead to a failed compressor.
If you're finding this process more involved than you expected, our guide on when to call in the pros might be helpful. You can learn more about how to fix AC in car issues that go beyond a simple top-off.
Once the gauge is holding steady in the proper range, you're done. Disconnect the coupler from the service port and screw the 'L' cap back on securely. Let the car run for another five minutes or so to circulate the new refrigerant and oil, then feel the air coming from the vents. It should be noticeably colder.
Diagnosing Problems Beyond Low Refrigerant
So, what happens when you’ve added refrigerant, but the air coming from your vents is still lukewarm? While low refrigerant is the most common culprit behind a weak AC, it’s far from the only one. Sometimes, a DIY recharge kit just won't cut it because you’re dealing with a deeper mechanical or electrical problem.
For instance, maybe your AC compressor won't engage at all. You turn the AC on, but you never hear that telltale "click" from the engine bay. This almost always points to an electrical issue, such as a blown fuse, a faulty relay, or a bad pressure switch that’s preventing the compressor from kicking on.
On the other hand, if you hook up the gauge and the needle immediately slams into the red "overcharged" zone, stop what you're doing. This is a clear sign of a blockage in the system, or it means a previous recharge attempt went way overboard. Adding more refrigerant is a recipe for disaster.
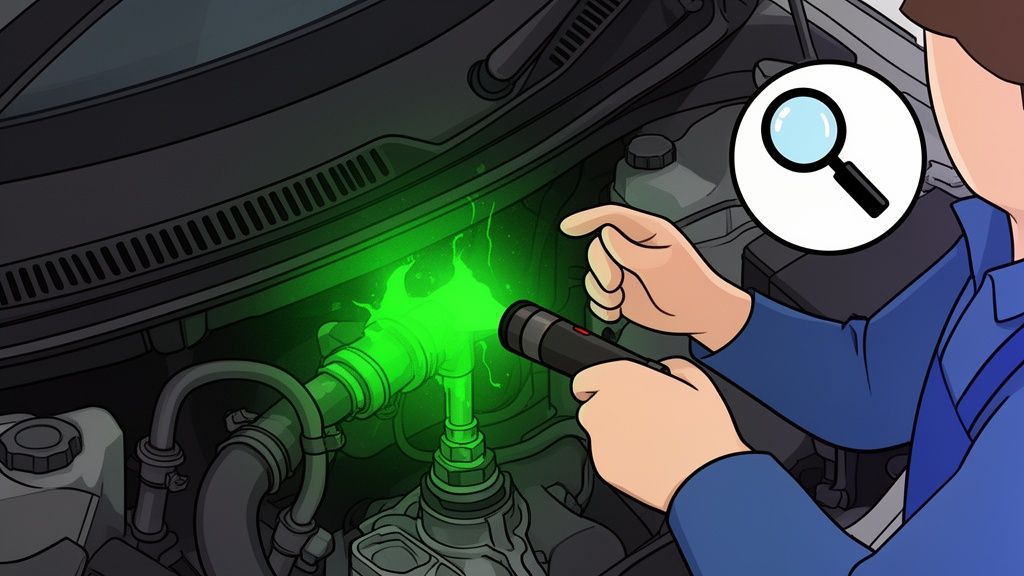
Hunting for the Real Culprit: A Refrigerant Leak
One of the most frequent underlying issues is a simple refrigerant leak. If your AC works great for a few days or weeks after a recharge and then slowly goes back to blowing warm air, you almost certainly have a leak. Topping it off is just a temporary band-aid until all the new refrigerant escapes.
This is where the UV dye included in many recharge kits really proves its worth. After running the car with the dye-infused refrigerant, let it circulate for a day or so. Then, park in a dark garage, grab a UV flashlight, and start inspecting the AC lines. The dye will glow an unmistakable, bright green right at the source of the leak.
Common places to check for these glowing signs include:
- Hose Fittings and Connections: Inspect every point where a hose connects to the compressor, condenser, or evaporator.
- The Condenser: This part sits at the very front of your car, making it a prime target for rocks and road debris. Look for oily spots or the telltale green glow.
- Compressor Seals: The front seal on the compressor itself is a common failure point on older vehicles.
Pro Tip: Don't forget to trust your nose. A musty odor usually points to mold growth, but a distinct chemical smell could mean refrigerant is leaking into your cabin. If you're dealing with unpleasant odors, see our guide on what to do when your car AC smells bad.
The Limits of a DIY Recharge
The A/C recharge kit market offers a window into the broader car AC service industry, which was projected to hit $1.14 billion globally by 2026. While these DIY kits are popular, industry data suggests they only resolve AC problems effectively about 60-70% of the time.
This is often because of improper use—like overcharging or introducing air and moisture—which can quickly destroy a compressor that costs over $1,000 to replace. With the average vehicle age in the U.S. now at 12.5 years, AC work is a common job, but it has to be done right. You can find more about the recharge kit market at Dataintelo.
When to Call a Professional for AC Service
Knowing your limits is one of the smartest parts of any DIY project, and that’s especially true when you’re working on your car’s complex systems. A DIY air conditioner recharge car kit can be a great solution for a simple top-off, but there are clear signs it’s time to put the can down and let a professional take over.
Ignoring these red flags won't just waste your time and money; it can turn a minor hiccup into a major, costly component failure. Some problems simply can't be fixed with a can of refrigerant and require specialized tools and real expertise.
Clear Signs It's Time for a Pro
If you've run a UV dye test and spotted a significant refrigerant leak, that's your first major clue. A DIY kit isn't going to fix a cracked hose, a worn-out seal, or a punctured condenser. Trying to continuously add refrigerant is like pouring water into a bucket with a hole in it—you're just wasting money and venting chemicals into the atmosphere.
Another unmistakable signal is the sound coming from your AC compressor. If you hear loud grinding, squealing, or knocking noises whenever the AC kicks on, you’re likely hearing an internal mechanical failure in the making. The compressor is the heart of your AC system, and those sounds often mean it’s on its last legs.
You should also head to a shop if your vehicle uses the newer R-1234yf refrigerant. These modern systems are more complex and operate at different pressures than the older R-134a systems. Handling it correctly requires specific training and expensive, specialized recovery and recharging equipment that you won’t find in a consumer kit.
Critical Takeaway: A DIY recharge is only meant for a system that is slightly low on refrigerant. If you're dealing with major leaks, alarming noises from the compressor, or a car that requires R-1234yf, professional service isn't just recommended—it's essential for a lasting and safe repair.
The Kwik Kar Difference
Bringing your vehicle to a certified shop like Kwik Kar for AC service is a completely different world from a quick DIY top-off. Our ASE-certified technicians don’t just add more refrigerant; they perform a comprehensive service designed to restore your entire system to factory specifications.
Here’s what a professional service truly involves:
- Full System Evacuation: We start by using a specialized recovery machine to safely and completely remove all the old refrigerant and oil from your system.
- Pulling a Vacuum: Next, we pull a deep vacuum on the system for at least 30 minutes. This is a critical step that boils off any moisture that has found its way inside, which is a leading cause of internal corrosion and component failure.
- Precise Recharge: Finally, we recharge the system with the exact weight of refrigerant specified by your vehicle’s manufacturer. This level of precision is crucial for preventing the damage that overcharging or undercharging can cause.
This isn’t just a patch-up job; it's a meticulous process that guarantees optimal cooling performance and long-term reliability. If you’re experiencing any of these issues, learning more about professional heating and cooling services can help you understand the true value of expert care.
Got Questions About Your Car's AC? We've Got Answers.
Even after you’ve done your homework, it's totally normal to have a few more questions about getting an air conditioner recharge car service. We get these all the time from drivers right here in Richardson, so let's tackle some of the most common ones head-on.
How Often Does My Car AC Need a Recharge?
In a perfect world, never. Your car's AC system is designed to be sealed, much like the refrigerator sitting in your kitchen. It shouldn't just "lose" refrigerant over time. If you’re finding that your air isn't cold anymore, it’s a sure sign that there's a leak somewhere.
That said, over many years and thousands of miles, it's possible for tiny, microscopic amounts of refrigerant to seep out through the various seals and hoses. A good rule of thumb is to have your AC system checked out every couple of years as a preventive step. A gradual loss of cooling over several years might just need a top-off, but if your AC goes from ice-cold to warm overnight, you’re definitely looking at a new leak that needs fixing.
What's a Professional Recharge Going to Cost Me?
The final price tag can really swing depending on your vehicle and what’s actually wrong with the system. For a straightforward inspection and recharge on a car that uses the common R-134a refrigerant, you can typically expect to pay between $150 and $300. This usually covers the technician's time and the refrigerant itself.
However, if your car is a newer model that uses the more modern, eco-friendly R-1234yf refrigerant, the cost can jump significantly, often landing in the $400 to $800 range, sometimes more. And remember, if the technician finds a leak, the cost to repair it will be on top of the recharge service. Fixing a leaky hose might add another $100 to $200, while a major component like a new compressor could easily run over $1,000.
Paying a little more for a professional service that includes a full system evacuation and a proper leak check is almost always cheaper than buying multiple DIY kits only to face a massive repair bill when a major part finally fails.
Are Those AC "Stop Leak" Cans a Good Idea?
In a word: no. We strongly recommend steering clear of any product that comes in a can and promises to magically seal leaks. These products work by pumping a thick, gummy sealant through your entire AC system.
While they might—and that’s a big might—plug a tiny pinhole leak for a little while, they are infamous for causing much bigger problems. This gunk can easily clog up critical, sensitive components like the expansion valve, orifice tube, or the tiny, delicate passages inside your condenser. This creates a major blockage, which often leads to catastrophic compressor failure. The right way is always the best way: find the leak and fix it properly.
When you need straight answers and service you can rely on, Kwik Kar Oil Change and Auto Care is here to help. Our certified technicians have the tools and expertise to find the real source of your AC troubles and get you back to driving in comfort. Schedule your AC inspection with us today at https://www.kkrichardson.com.