Getting your hands dirty and learning to change synthetic oil yourself is one of the most empowering things you can do for your car. It’s not just about saving a few bucks on labor; it's about taking direct control over your engine's health and really understanding what makes your vehicle tick. With the right know-how, you can get professional-level results right in your own garage.
Why a DIY Synthetic Oil Change Is a Smart Move
Rolling up your sleeves and changing your own synthetic oil connects you to your vehicle in a new way. You're the one choosing the oil, you're the one turning the wrench, and you’re the one ensuring the job is done right. Beyond that sense of accomplishment, the practical benefits are hard to ignore.
The biggest win is performance. Synthetic oil is engineered to provide incredible protection against heat, sludge, and friction. Compared to conventional oil, a good synthetic can slash engine wear by as much as 40%. That's a huge deal for avoiding expensive repairs down the road. It's no wonder the synthetic oil market is expected to hit $18.8 billion by 2026.
When you do the change yourself, you guarantee that a top-quality, manufacturer-approved synthetic oil and the right filter go into your engine. That means you’re giving it the absolute best protection every single time.
Building Confidence and Saving Money
Of course, saving money is a great motivator. While a jug of synthetic oil costs more upfront, you make up for it with much longer drain intervals—often 7,500 to 15,000 miles between changes. By cutting out the labor cost, you turn a routine service into a smart, budget-friendly task.
And honestly, this project isn't as tough as it looks. Once you have the basic tools and a clear guide, you’ll find it’s a pretty straightforward process. Plus, the skills you pick up will help you become a more confident car owner, especially when it comes to knowing what triggers an oil change warning.
Gathering Your Tools and the Right Synthetic Oil

Any good DIY project starts long before you ever get under the car. Having everything you need laid out and ready to go is the difference between a smooth job and a frustrating mid-project dash to the auto parts store. Think of it as setting up your garage workstation for total efficiency.
The first move is to gather your essentials. You’ll definitely need a new oil filter and the right type and amount of synthetic oil. Beyond that, make sure you have the correct wrench for your engine’s drain plug, an oil filter wrench, a sturdy drain pan, a funnel, and plenty of shop rags. Trust us, you’ll be glad you have them.
Choosing the Right Gear
Not all tools are created equal, and using the right one can save you a world of hurt. For the oil filter, a simple strap wrench is fine if you have plenty of room to work. But if the filter is tucked away in a tight spot—which is common in modern cars—a socket-style filter wrench that snaps onto your ratchet is a true lifesaver. It gives you far better grip and leverage.
The same goes for your drain plug. Whatever you do, avoid using an adjustable wrench. It’s a surefire way to round off the bolt head and turn a simple task into a major repair. Your best bet is a six-point box-end wrench or a socket that fits the plug perfectly.
Your owner's manual is the single most important tool in your arsenal. It will tell you the exact oil viscosity your engine needs (like 0W-20 or 5W-30) and the total oil capacity, taking all guesswork out of the equation.
Selecting Your Oil and Filter
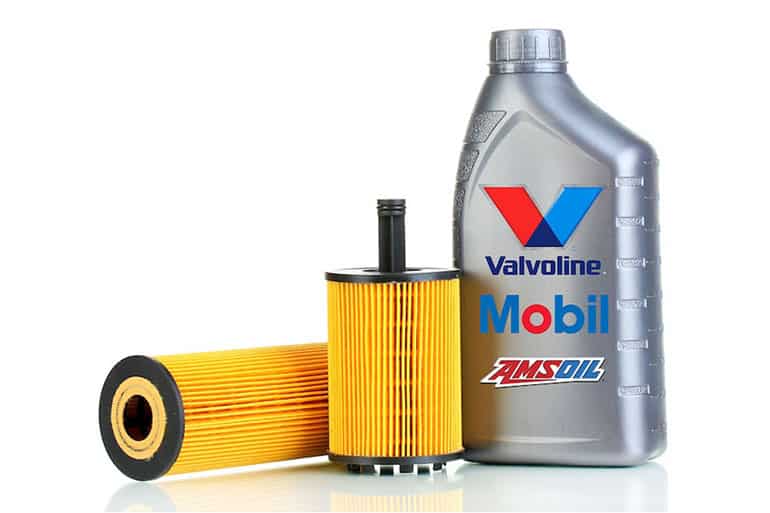
When you change synthetic oil, the quality of your supplies directly impacts how well your engine is protected. Your owner's manual is the ultimate guide here, specifying the exact oil viscosity and API (American Petroleum Institute) certification your engine was designed for. Using the wrong type can mess with performance and even fuel economy.
Just as important is pairing that premium synthetic oil with a high-quality filter. Look for filters made specifically for synthetic oils. They usually have better filter media and tougher construction to handle the longer service intervals, keeping your engine clean and protected for 7,500 miles or more. If you want to get into the weeds on this, you can learn more about synthetic vs. conventional oil in our detailed guide.
Essential Tools and Materials Checklist
To make sure you're fully prepared, we've put together a comprehensive checklist of everything you'll need for a successful DIY synthetic oil change. Having these items ready beforehand will make the entire process go smoothly.
| Item Category | Specific Item | Pro Tip/Specification |
|---|---|---|
| Fluids & Filters | New Full Synthetic Oil | Check owner's manual for correct viscosity (e.g., 5W-30) and quantity. |
| Fluids & Filters | New Oil Filter | Choose a high-quality filter designed for synthetic oil's longer life. |
| Tools | Wrench Set | A six-point box-end or socket wrench is best for the drain plug. |
| Tools | Oil Filter Wrench | A socket-style wrench is ideal for tight spaces. |
| Tools | Oil Drain Pan | Get one with a capacity larger than your engine's oil volume. |
| Tools | Funnel | A clean funnel prevents messy and wasteful spills when refilling. |
| Safety Gear | Jack and Jack Stands | Never work under a car supported only by a jack. |
| Safety Gear | Wheel Chocks | Block the wheels to prevent any chance of rolling. |
| Safety Gear | Nitrile Gloves & Safety Glasses | Oil is a chemical irritant, and eye protection is a must. |
| Cleanup | Rags or Paper Towels | For wiping down surfaces and catching inevitable drips. |
With this gear collected, you're well on your way to tackling the job with the confidence of a pro.
Prepping Your Vehicle for a Safe Oil Change

Before you even think about grabbing a wrench, the first and most critical step is setting up a safe workspace. When you change synthetic oil, you're working directly under a two-ton machine. Shortcuts on safety are simply not worth the risk.
Start by parking your car on a solid, completely level surface. Your best bet is a concrete garage floor or a flat, paved driveway. You should never try to lift a vehicle on soft ground like grass or dirt—the jack or stands could sink in and create a dangerously unstable situation.
Warming the Oil for a Smooth Drain
Here’s a pro tip that makes the whole job cleaner and quicker: warm the engine up just a little. Let your car run for only two to three minutes before you park it. That brief runtime is just enough to thin out the oil, helping it drain faster and more completely.
Don't run it any longer than that. A fully hot engine will make parts like the oil pan and exhaust manifold way too hot to touch safely. The goal is warm, free-flowing oil, not a nasty burn. This small step ensures you get as much of that old, dirty oil out as possible.
Lifting and Securing Your Vehicle Safely
Now you’re ready to get the car in the air. The first thing you need to do is check your owner's manual to locate the factory-specified lift points. These are reinforced spots on the car’s frame designed for this purpose, and using them prevents damage to the underbody.
Slide your floor jack under one of the front lift points and raise the vehicle high enough to get a jack stand into position. Place the jack stand at the secure frame point recommended in your manual, then slowly lower the car until its weight is resting squarely on the stand. Do the exact same thing on the other side.
Never, ever work under a car that is only held up by a jack. Jacks are made for lifting, not for holding weight long-term. A hydraulic jack can fail suddenly and without any warning. Always use two sturdy jack stands to secure the front of the vehicle.
Once the car is securely on the stands, give it a firm push from the side. You want to be sure it doesn’t rock or shift at all. For an extra layer of security, place wheel chocks behind both rear tires. This "belt-and-suspenders" approach is what separates a smart DIYer from a reckless one. With your vehicle safely secured, you’re ready to get to work.
The Step-By-Step Process to Change Synthetic Oil
Alright, with your car safely prepped and all your gear within arm's reach, it's time to get your hands dirty. This is the rewarding part where you get into a good rhythm and see the job through.
First things first, slide your oil drain pan under the engine. You’re looking for the oil drain plug—it’s a large bolt at the lowest point of the engine's oil pan. A good tip is to position the pan slightly toward the rear of the plug, because the oil will shoot out at an angle when you first loosen it.
Draining the Old Engine Oil
Grab the right-sized box-end wrench or socket that fits your drain plug. I always recommend a six-point socket because it gives you the best grip and dramatically lowers the chance of stripping the bolt head. Turn the plug counter-clockwise to loosen it. Don't be surprised if it takes a bit of a grunt to break it free, especially if it was over-tightened last time.
Once it's loose, you should be able to unscrew it the rest of the way by hand. As you get to the last few threads, keep some inward pressure on the plug. This little trick stops oil from leaking out before you’re ready. When you feel the threads disengage, pull the plug away quickly and let the old, warm oil flow into the drain pan.
Pro Tip: That initial gush of oil comes out faster and farther than most people expect. Getting your drain pan in just the right spot is the secret to keeping your garage floor clean.
Let the oil drain until it slows to a steady drip, which usually takes about five to ten minutes. While that’s happening, it's a perfect time to clean the drain plug with a shop rag. Be sure to inspect the gasket or crush washer—it's a small but critical part. Best practice is to replace it every single time to guarantee a leak-free seal.
Removing and Replacing the Oil Filter
As the last of the oil drips out, you can shift your focus to the oil filter. It's that metal canister (usually black, blue, or white) screwed into the side of the engine block. Make sure to slide your drain pan underneath it, because a decent amount of oil will spill out when you take it off.
Use an oil filter wrench to turn the filter counter-clockwise and break it loose. Once you can turn it by hand, unscrew it the rest of the way. Lower it carefully, keeping it upright as much as possible to avoid a mess, and then tip it over to drain the remaining oil into your pan.
Now for one of the most important steps: pre-lubrication. Before you screw on the new filter, dip a finger into your new synthetic oil and run a thin, even coat onto the new filter’s rubber gasket. This ensures the gasket creates a perfect seal and won't get twisted or torn as you tighten it.
Gently screw the new filter on by hand. Once the gasket makes contact with the engine, tighten it another three-quarters of a turn by hand. That's it. Never use a wrench to tighten the oil filter; hand-tight is all you need. Overtightening can crush the gasket or make it a nightmare to remove next time.
Refilling with Fresh Synthetic Oil
By now, all the old oil should have drained out. Wipe the area around the drain plug opening clean, then put the plug back in with its new washer. Tighten it with your wrench until it's snug, but be very careful not to over-torque it. Stripping the threads on an oil pan is a costly and frustrating mistake.
Finally, it’s time for the good stuff. The industry shift to synthetics is huge—fully synthetic and semi-synthetic oils now make up over 40% of all lubricant use in passenger cars. That's because they can slash sludge buildup by 50% and reliably support drain intervals of 10,000 miles or more. You can dive deeper into this trend in this synthetic motor oil market analysis.
Pop the hood, find the oil filler cap (it usually has an oil can symbol on it), and remove it. Place your funnel in the opening and start pouring, but hold back about one quart from your car's total capacity. This simple step helps prevent overfilling.
Give the oil a minute to settle down into the pan, then pull the dipstick, wipe it clean, and check the level. Add the remaining oil in small amounts, checking the dipstick each time, until you hit the "Full" mark. Don't go past it. Screw the filler cap back on, and you're all set for the final cleanup.
Finishing Touches And Responsible Disposal
Alright, you've got fresh synthetic oil in the engine and you’re on the home stretch. But don't start cleaning your tools just yet. A few final checks are what separate a good DIY job from a great one, ensuring your car runs perfectly after you change synthetic oil.
First, carefully lower your car off the jack stands. Once it's safely back on level ground, start the engine and let it idle for about a minute. This is your chance to circulate that new oil through the engine and into the new filter. While it’s running, take one last peek underneath for any drips around the drain plug and the filter seal.
Now, shut off the engine and give it a minute for the oil to settle back into the pan. Pull the dipstick one last time. You might notice the level has dropped just a bit—that’s because the new filter soaked up some oil. If it's not right at the "Full" mark, top it off. We have a whole guide on when to check your oil level if you need a more detailed breakdown.
Resetting Your Oil Life Monitor
Most modern cars have an oil life monitor, and you'll need to tell it you've done the job. This system doesn’t actually test the oil; it’s just a smart calculator using mileage, engine hours, and driving style to guess when a change is due. If you skip this, that "Oil Change Required" light will become a constant, annoying reminder.
The reset process is different for almost every car, but here are a couple of common examples:
- GM/Ford: You'll often turn the key to the "On" position (without starting the engine) and then press the gas pedal three times within a few seconds.
- Honda/Toyota: This usually involves clicking through the menu on your vehicle’s information screen using the buttons on your steering wheel.
Your owner's manual is your best friend here. It will have the exact, step-by-step procedure for your specific model. It’s usually a quick process that syncs your car’s computer with the fresh service you just performed.
Properly Disposing Of Used Oil And Filters
What you do next with the old oil and filter is just as important as the oil change itself. Used motor oil is considered hazardous waste, and it can do serious damage to soil and groundwater. Whatever you do, never pour it down a drain, into a sewer, or onto the ground.
Responsible disposal is a non-negotiable part of a DIY oil change. A single gallon of used oil can contaminate one million gallons of fresh water.
Fortunately, recycling used oil is simple and usually free. Most auto parts stores like AutoZone or O'Reilly will take used motor oil from DIY mechanics at no charge. Just pour the old stuff from your drain pan back into the empty synthetic oil jugs. Pop the old filter into a plastic bag to stop any drips, and take both items to a designated collection center. Proper disposal is a legal requirement in many places, as detailed in frameworks like the UK Hazardous Waste Disposal Regulations. It’s a key part of responsible car ownership, especially since synthetic oils can help reduce engine failures in high-mileage cars by 18%.
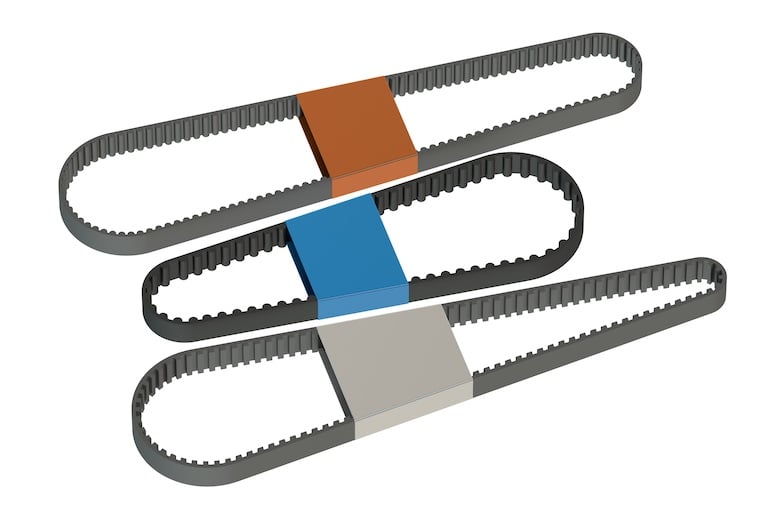
This simple diagram really boils the whole job down to its core.

As you can see, it all comes down to those three key actions: getting the old, dirty oil out, swapping in a fresh filter, and refilling with clean, new oil.
When a Professional Oil Change Makes More Sense
While there's a real satisfaction in changing your own synthetic oil, sometimes handing the keys to a pro is the smarter call. Being a responsible car owner means knowing when a DIY job is a great idea—and when it’s better left to an expert.
Not everyone has the ideal setup. A safe, level garage and a full set of quality tools aren't always accessible, and that's perfectly fine. Time is another huge piece of the puzzle. A DIY oil change, especially your first time, can easily eat up an hour or more. If your schedule is already tight, the convenience of a quick, professional service is hard to beat.
When DIY Hits a Wall
Even with the best intentions, a routine job can go south fast. That’s when a technician's experience—and specialized tools—become invaluable. Here are a few common scenarios where you’ll be glad you called a pro:
- A Stripped Drain Plug: This is the stuff of DIY nightmares. A professional has the right extractors and know-how to remove a stripped plug without wrecking your oil pan, saving you from a much more expensive repair.
- A Seized Oil Filter: An over-tightened filter can feel like it's welded on. Without the proper cap wrench and leverage, you risk damaging the filter housing. A tech can pop it off in minutes without causing any collateral damage.
- Unexpected Discoveries: What happens if you’re under the car and spot a strange fluid leak or a badly frayed belt? A certified technician can immediately diagnose the problem and tell you what needs to be done.
Choosing a professional service like Kwik Kar isn't just about swapping out old oil. It's about getting a trained set of eyes on your entire vehicle. Our ASE-certified technicians perform a multi-point inspection with every service, which helps catch small issues before they turn into major headaches.
That added value is really about peace of mind. A professional service also gives you proper documentation for your vehicle's maintenance history, something that’s a big deal when it comes to resale value. When you add up the expert inspection, guaranteed work, and the time you save, letting an expert handle it is often the most practical choice you can make.
Common Questions About Synthetic Oil Changes
Even with a step-by-step guide in hand, it's natural to have a few lingering questions before you dive into your first synthetic oil change. We get it. Let’s tackle some of the most common ones to make sure you feel completely confident before grabbing that wrench.
One of the first things people ask is how long synthetic oil really lasts. The old 3,000-mile rule for conventional oil is a thing of the past. Synthetics have completely changed the game.
A full synthetic oil can reliably protect your engine for 7,500 to 15,000 miles. However, your owner's manual is the ultimate authority, as it accounts for your specific engine and its needs.
Your driving style also plays a huge role here. If your daily routine involves a lot of short trips, towing heavy loads, or navigating extreme heat or cold, it's a smart move to stick to the lower end of that mileage range.
Switching Oils and Is It Worth It
Another question we hear all the time is whether it's safe to switch from conventional to synthetic oil. The answer is a resounding yes. Making the switch is not only perfectly safe but often a great move for your engine's health.
The advanced detergents in synthetic oil can actually help clean out sludge and deposits left behind by older, conventional oils. There’s no special process needed—just drain the old stuff and fill it with the new synthetic.
So, is the higher price tag for a synthetic oil change actually worth it? For most drivers, absolutely. The longer time between changes means fewer appointments per year, saving you time and money over the long haul. More importantly, the superior protection against engine wear can lead to a longer, healthier engine life and fewer expensive repairs. To learn more about modern service intervals, it's always good to check a guide on how often to change oil.
If you'd rather leave it to the pros, you can trust the ASE-certified technicians at Kwik Kar Oil Change and Auto Care. We provide dealership-quality service with the convenience and care you deserve. Schedule your appointment today at https://www.kkrichardson.com.