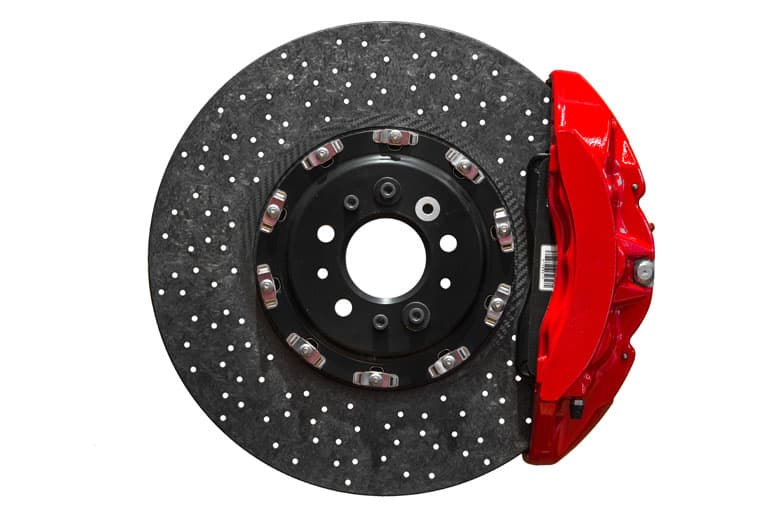
Brake rotors are supposed to have a slightly rough, textured surface to work properly. When that surface becomes hardened and shiny from extreme heat, it's called glazing, and it seriously compromises your ability to stop safely. A glazed rotor is slick and smooth, preventing the brake pads from getting the grip they need to do their job.
What Happens When Brake Rotors Become Glazed

Think of your brake rotors like the coarse striking surface on a matchbox. It's designed for one thing: creating friction. When you strike a match, that texture provides the grip needed to create a flame. Glazed brake rotors are what happens when that textured surface gets polished down until it’s as slick as glass.
This transformation from a healthy, grippy surface to a slick, dangerous one is a direct result of intense heat. When your brakes get too hot, material from the brake pads can actually melt and fuse onto the rotor, creating a hardened, crystalline layer. This process is known as glazing.
The Impact on Braking Performance
Once a rotor is glazed, the brake pads can't bite into the surface anymore. They just slide right over the top. This has immediate and dangerous consequences for your vehicle's stopping ability.
You'll likely notice the problem in a few distinct ways.
Drivers often first notice something is wrong when they hear or feel a change in their braking. Here's a quick guide to what those symptoms mean.
Quick Guide to Glazed Brake Rotor Symptoms
| Symptom | What It Feels or Sounds Like | Why It Happens |
|---|---|---|
| Reduced Stopping Power | Your car takes longer to stop than it used to; the brakes feel weak. | The smooth, glazed surface prevents the pads from generating friction. |
| High-Pitched Squeal | A loud squealing or screeching noise when you press the brake pedal. | The brake pads are vibrating against the slick rotor instead of gripping it. |
| Hard Brake Pedal | The pedal feels stiff and requires more effort to push down. | The pads can't compress effectively against a surface that has no grip. |
Each of these symptoms points to a serious reduction in braking efficiency that shouldn't be ignored.
Glazing is a fairly common issue, often showing up after 30,000 to 50,000 miles, particularly for drivers in heavy stop-and-go traffic where heat builds up fast. This condition can slash friction by as much as 50%, which could add 20-30 feet to your stopping distance from 60 mph.
The core problem with glazed brake rotors is simple physics: no friction, no stop. It turns your most critical safety system into an unpredictable liability.
Understanding how your pads and rotors work together is key. Our guide on the difference between brake pads and rotors can give you more detail. Ultimately, glazing isn't just a minor noise—it's a clear warning that your braking system's integrity is compromised and needs immediate attention.
The Telltale Signs Your Brakes Are Glazed

Your car has its own way of telling you when something’s wrong, but you have to know what to listen—and feel—for. When it comes to glazed brake rotors, the signs are all about your senses. What you hear, feel, and see when you press the brake pedal are the clues that can help you figure out what's going on.
Catching these signs early is the first step toward diagnosing the problem and keeping yourself safe on the road.
A High-Pitched Squeal When Braking
A piercing, high-pitched squeal is the classic calling card of glazed brakes. It's a sound that's hard to ignore, almost like nails on a chalkboard.
This happens because the rotor’s surface has been heated to the point where it becomes glassy and smooth. The brake pads can no longer get a solid grip. Instead of pressing firmly, they skitter and vibrate against that slick surface, creating that awful squealing noise.
This sound is a direct result of lost friction. It’s a clear signal that your pads and rotors aren’t working together like they should. While other brake issues can cause noise, the squeal from glazed brake rotors is often especially sharp and happens consistently every time you brake.
Changes in Your Brake Pedal and Stopping Power
Beyond the noise, you’ll probably start to feel some strange feedback through the brake pedal. How the pedal feels under your foot is a critical diagnostic tool you use every time you drive.
When your brake pedal’s feel changes, it’s a direct message from your braking system. A hard or vibrating pedal indicates a serious friction problem that needs immediate attention.
Two specific feelings often point to glazing:
- A Hard or Stiff Pedal: The pedal might feel unusually firm, making you push harder than normal to get the car to slow down. This happens because the pads are struggling to bite into that non-grippy, slick rotor surface.
- Vibrations or Pulsing: You might feel a shudder or vibration through the brake pedal or even the steering wheel. This is a common sign when the glazed surface isn't perfectly even, causing the pads to skip and grab erratically. If this sounds familiar, our guide on a front-end shaking when braking can give you more insight.
The most dangerous symptom, by far, is a noticeable decline in your car's stopping ability. You'll find yourself needing more room to come to a stop, which can be especially scary in traffic or during an emergency. This increased stopping distance is the direct result of the brake pads failing to create enough friction on the glazed rotor, turning a simple stop into a potential hazard.
What Causes Brake Rotors to Glaze Over
That slick, glassy finish on a glazed brake rotor doesn’t just appear out of nowhere. It's the direct result of extreme heat—way more heat than your braking system is designed to handle. Think of it like putting a ceramic pan on a burner that’s way too hot; the surface changes, and it stops working as it should.
Your brakes work by converting motion into heat through friction. But when that heat gets too intense, the materials themselves start to break down and transform. Understanding what pushes your brakes past their thermal limit is the key to preventing this dangerous glazing effect.
The Role of Aggressive Driving
Hard, last-minute braking is probably the biggest contributor to glazed brake rotors. If you’re constantly darting through traffic, accelerating hard and then slamming on the brakes, you’re creating huge, sudden bursts of heat.
This intense heat doesn't have a chance to escape. Instead, it soaks into the rotors and pads, causing the resins in the brake pad material to literally melt and smear onto the rotor's surface. With enough heat and repetition, this cooked-on layer hardens into a polished, slick film that sabotages your stopping power.
It’s a simple formula: the harder and more often you brake, the more heat you generate. Aggressive, stop-and-go driving is a fast track to overheating and glazing your brakes.
"Riding the brakes" is another common culprit. This usually happens on long, steep downhill stretches where drivers keep light but constant pressure on the pedal. This sustained friction creates a steady, intense heat that essentially bakes the pads and rotors over several miles.
Component Quality and Proper Installation
Your driving habits aren't the only thing to blame. The quality of your brake parts plays a huge part, too. Opting for cheap, low-quality brake pads is a recipe for trouble. These pads often use inferior binders and materials that can't take the heat, causing them to break down and glaze far more easily than premium-quality pads.
An often-overlooked cause is skipping the "bedding-in" process for new brake pads and rotors. This is a crucial break-in procedure where a series of controlled stops transfers an even layer of friction material to the rotor. If you skip this, you can end up with uneven deposits and hotspots, creating the perfect conditions for glazing right from the start.
In fact, glazing from overheating is a common problem we see in safety inspections, often showing up after just 20,000-40,000 miles for those in heavy urban traffic. It's an issue that can slash brake pad life by 25% and increase accident risk. With electric vehicles, which are growing 20% annually in the US, this is becoming an even more frequent conversation due to the different braking dynamics involved. You can learn more about brake market trends at Fortune Business Insights.
How Professionals Diagnose Glazed Brake Rotors
While you can often feel the signs of a brake problem through the pedal or hear them as you slow down, those clues don't always tell the whole story. Symptoms like squealing or vibration can point to several different issues, which is why a professional inspection is the only way to get the right fix the first time.
A certified technician won’t just guess; they follow a systematic process to confirm if your rotors are glazed and figure out the safest way to get you back on the road.
The Visual and Tactile Check
The first thing an experienced mechanic will do is perform a thorough visual inspection, either by looking through the wheel spokes or by removing the wheel for a closer look. They're searching for tell-tale signs of glazing that are obvious to a trained eye but easy for a driver to miss.
Mirror-Like Shine: A healthy rotor has a dull, slightly cross-hatched finish. The most obvious sign of glazing is a smooth, highly reflective surface that looks polished or glassy.
Bluish or Dark Discoloration: Dark blue or purple spots on the rotor are a dead giveaway of extreme overheating, which is the primary cause of glazing. This color change means the heat has actually altered the metal's structure.
Surface Feel: A technician will often run a gloved finger across the rotor's surface. A glazed rotor feels slick and smooth to the touch, lacking the slightly rough texture it needs to create proper friction with the brake pads.
A professional diagnosis goes beyond just looking. It involves precise measurements to determine not only if the rotor is glazed, but if it can be safely repaired or must be replaced.
Precision Measurement with a Micrometer
After the visual check comes the most critical step: measuring the rotor’s thickness. This isn’t a job for a tape measure. It requires a specialized tool called a micrometer, which can measure with an accuracy of one-thousandth of an inch.
A technician takes measurements at several points around the rotor to check for both overall thickness and any uneven wear. Every brake rotor has a minimum thickness specification stamped directly onto the metal by the manufacturer. This number is the absolute thinnest the rotor can be and still dissipate heat safely.
If the rotor's current thickness is well above this minimum spec, it’s a good candidate for resurfacing. But if the measurement is at or below that number, replacement is the only safe option. This measurement is non-negotiable—it’s what ensures your braking system won’t fail when you need it most.
Your Repair Options: Resurfacing Versus Replacement
So, a professional has confirmed you have glazed brake rotors. Now what? You’re at a fork in the road, facing a decision: can they be repaired, or is it time for a full replacement? The right answer balances safety, cost, and the actual condition of your rotors. Essentially, you have two paths—resurfacing or replacement—and each has its own trade-offs.
This is where a good technician’s diagnosis is key. A careful visual check and some precise measurements will tell us whether we’re looking at a straightforward repair or if a replacement is non-negotiable for your safety.

Option 1: Resurfacing Your Rotors
Think of resurfacing—also known as “turning” or “machining”—as giving your rotors a fresh face. A technician uses a specialized brake lathe to carefully shave off that slick, hardened top layer. This process gets rid of the glaze and restores the perfectly textured surface your brake pads need to grip effectively.
Resurfacing is a fantastic, budget-friendly solution, but there’s a catch. It’s only an option if your rotors are thick enough to remain safely within the manufacturer’s minimum thickness specification after being machined.
Option 2: When Full Replacement Is Necessary
While resurfacing is a great fix, it’s not a magic wand for every situation. Sometimes, the only safe and effective solution is a full replacement, especially when the rotors are too worn or damaged to be saved.
A technician will always recommend replacement if a rotor's thickness is at or below the minimum specification stamped on the component. This isn't a suggestion—it's a critical safety standard.
Full replacement becomes mandatory if your rotors show any of these signs:
- They are too thin. If a rotor doesn’t have enough metal to be resurfaced without going below its minimum thickness, it’s done. A thin rotor can’t handle heat properly and is at risk of cracking or failing completely.
- They are warped or cracked. Machining can’t fix deep structural problems. Warping or stress cracks compromise the rotor's integrity, and replacement is the only safe bet.
- The glazing is too deep. In severe cases, the glazing has penetrated so far into the metal that removing it all would make the rotor too thin to be safe.
Brake Rotor Repair Comparison: Resurfacing vs. Replacement
Choosing between resurfacing and replacing your rotors can feel complicated, but breaking it down helps clarify the best path forward for your vehicle and your wallet. This table compares the two options side-by-side.
| Factor | Resurfacing (Turning) | Full Replacement |
|---|---|---|
| Best For | Minor glazing, light scoring, sufficient rotor thickness. | Thin rotors (below minimum spec), deep scoring, warping, or cracks. |
| Cost | Lower cost. Saves money on parts. | Higher upfront cost due to new parts. |
| Lifespan | Shorter remaining lifespan since metal is removed. | Brand new component with maximum lifespan. |
| Safety | Perfectly safe if rotor remains above minimum thickness. | The safest option for damaged or worn rotors. |
| Time | Can be done relatively quickly at a well-equipped shop. | Generally a straightforward and quick parts swap. |
Ultimately, resurfacing is a great way to save money if your rotors are in good enough shape. However, when safety is on the line due to excessive wear or damage, a full replacement is the only responsible choice.
Brake glazing is more widespread than you might think. In the USA, roughly 1 in 5 vehicles deals with it annually, often caused by heat cycles that push rotors past 500°F. This adds up to a staggering $5-7 billion in repairs each year. The good news? Technicians can often resurface rotors in about 70% of cases, which can save drivers up to 50% compared to the $200-400 per axle cost of new rotors.
No matter which route you choose, always replace your brake pads at the same time. Putting fresh pads on newly serviced rotors ensures the two components bed in together properly. This gives you the best possible performance and helps prevent that new rotor surface from glazing over again. Often, that initial squeal is the first cry for help from your brakes. To learn more, check out our guide on how to fix squeaky brakes.
How to Prevent Your Brake Rotors from Glazing
When it comes to your brakes, the best repair is always the one you don't have to make. While it’s helpful to know how to fix glazed rotors, preventing the issue in the first place is what really saves you time, money, and hassle. A few small, conscious adjustments to your driving and maintenance routines can keep your vehicle stopping safely and consistently.
At the end of the day, preventing glazed rotors boils down to one thing: managing heat. Since extreme heat is the number one enemy, developing smoother driving habits will make an immediate and significant difference. Instead of slamming on the brakes at the last second, try to look farther down the road to anticipate stops. This gives you plenty of time to brake gently and gradually, allowing heat to escape properly instead of building up.
Adopt Proactive Driving Habits
One of the most powerful tools at your disposal, especially on long, steep hills, is engine braking. By simply downshifting into a lower gear, you let your engine and transmission take on some of the work of slowing the car down. This takes a massive amount of pressure off your brakes, keeping them cool and dramatically reducing the risk of overheating and glazing.
A handful of simple changes can make a world of difference:
- Look Ahead: Scan the road far ahead so you can brake smoothly instead of reacting abruptly.
- Increase Following Distance: Leaving more room between you and the car in front gives you more time and space to avoid sudden stops.
- Use Engine Braking: On descents, shift to a lower gear to let the engine help control your speed and save your brakes.
Proactive driving isn't just a safer way to get around—it's a form of preventative maintenance. By generating less heat, you directly extend the life of your brake pads and rotors.
Invest in Quality and Regular Care
Your driving style is only half the battle; the quality of your brake components is just as critical. Make sure you’re using high-quality brake pads that are specifically designed for your vehicle's make and model. Cheaper, off-brand pads are often made with materials that can't handle high temperatures, making them far more likely to cause glazing.
Regular maintenance is your final line of defense against brake problems. A certified technician should inspect your brakes during routine services, like oil changes. Keeping the entire brake system clean is also vital. Specialized products like an iron fallout remover can help dissolve the stubborn metallic brake dust that builds up on your components. Taking these simple steps ensures your brakes are always ready to perform exactly when you need them.
Frequently Asked Questions About Glazed Brakes
Once you learn about glazed brake rotors, a lot of questions usually pop up. Getting clear, straightforward answers is the first step toward making a safe decision for your vehicle. We've gathered some of the most common questions we hear from drivers right here.
Is It Safe to Drive with Glazed Rotors?
Simply put, driving with glazed brake rotors is not recommended. That smooth, glass-like surface drastically cuts down on the friction your brakes need to stop effectively. This can dangerously increase your stopping distance, especially when you need to stop suddenly.
Think of it like trying to run on a sheet of ice—you just can't get the grip you need. Continuing to drive puts you, your passengers, and others on the road at unnecessary risk.
Can Glazed Brake Rotors Fix Themselves?
No, glazed brake rotors will not fix themselves. This is a common myth we hear, but unfortunately, it’s not true. The glazing process creates a physically hardened, crystalline layer on the rotor that won’t just wear away with more driving.
The condition requires a mechanical fix—either resurfacing the rotors or replacing them entirely—to get back a proper, friction-ready surface.
Do High-Performance Brake Pads Prevent Glazing?
High-performance brake pads can definitely help, but they aren't a magic bullet. These pads are built with compounds that are much better at managing and dissipating heat, which lowers the odds of glazing under tough conditions.
However, aggressive driving habits like slamming on your brakes or riding them down a long hill can still overheat and glaze even the best components on the market. At the end of the day, your driving style is the single biggest factor.
How Often Should I Get My Brakes Checked?
A great rule of thumb is to have your brakes professionally inspected with every oil change, or at least twice a year. Tying this critical safety check to your car’s routine maintenance schedule makes it easy to remember.
Regular inspections give a technician the chance to spot the early signs of wear, glazing, or other problems before they turn into serious safety hazards.
If you're dealing with any of these symptoms or just want the peace of mind that comes with a professional check-up, the ASE-certified technicians at Kwik Kar Oil Change and Auto Care are here to help. Schedule your professional brake inspection today and drive with confidence.