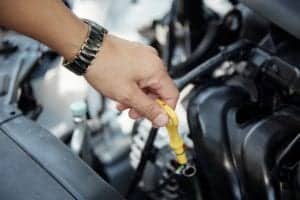
To bleed the air out of a cooling system, the classic method is pretty straightforward: park your car on a hill (nose up), pop the radiator cap, turn the heater on full blast, and let the engine run. You just wait for the bubbles to stop coming up. A good spill-free funnel makes this job a lot cleaner and easier, ensuring coolant can circulate properly and prevent your engine from overheating. It's an absolutely essential step any time you've done work on the cooling system.
Why Trapped Air in Your Cooling System Is a Major Problem
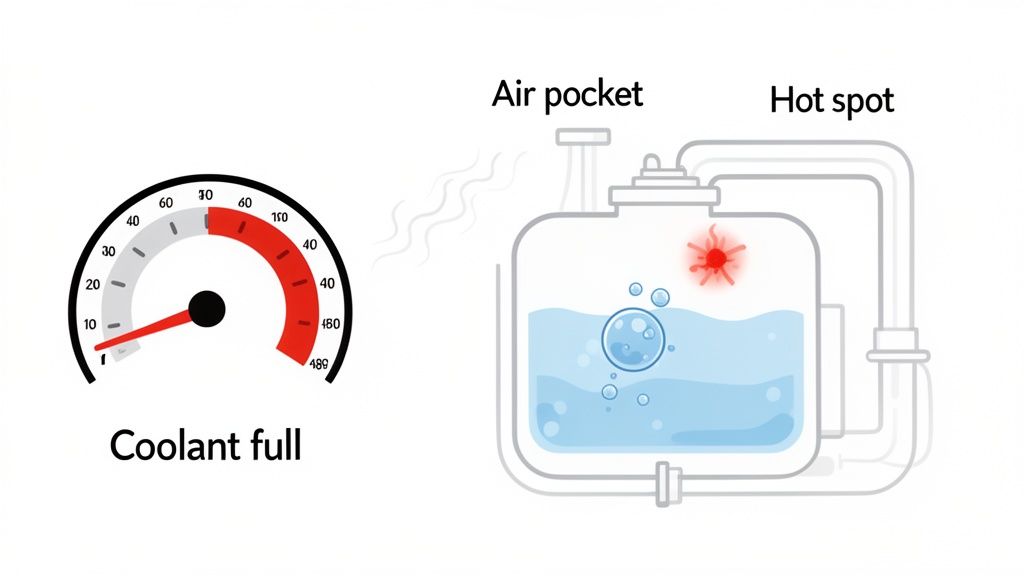
Have you ever been stuck in traffic and watched your car's temperature gauge start creeping toward the red zone, even though you know the coolant tank is full? Or maybe you've heard a strange gurgling sound coming from behind the dashboard when you hit the gas. These aren't just little quirks your car has developed; they're classic signs of trapped air in the cooling system.
You definitely don't want to ignore this. Air is a terrible heat conductor compared to liquid coolant. When an air pocket gets stuck somewhere in the engine or hoses, it creates a "hot spot" that coolant simply can't reach.
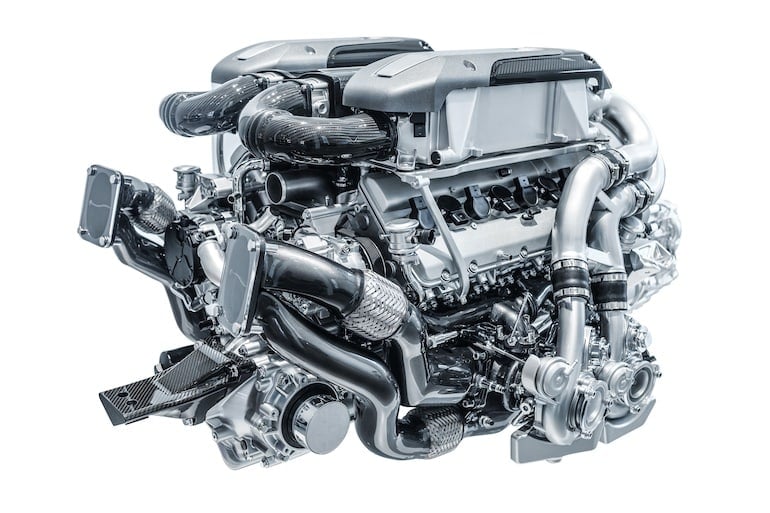
The Science Behind the Overheating
Your engine depends on a nonstop flow of coolant to pull heat away from critical metal parts and carry it to the radiator to be dissipated. An air bubble is like a dam in a river, blocking that essential flow and disrupting the entire cycle. The engine components around that air pocket can heat up to dangerous levels, kicking off a whole chain of potential problems.
Think of it like a clog in a drain pipe. The water stops flowing, and pressure builds up. In your engine, that "clog" means heat builds up instead, and that can lead to some seriously expensive damage.
The consequences of these air pockets can range from annoying to catastrophic:
- Engine Overheating: This is the most common and obvious symptom. The trapped air cripples the system's ability to get rid of heat.
- Heater Not Working: Your car's cabin heater relies on hot coolant flowing through a small radiator called a heater core. If an airlock forms there, you get no hot coolant, which means no heat on a cold winter morning.
- Weird Temperature Readings: An air pocket lingering near the coolant temperature sensor can throw off the readings sent to your car's computer, leading to erratic engine performance.
I've seen this happen countless times. A customer comes in after a simple hose replacement, complaining their car is now overheating on the freeway. They pull over, check the coolant, and the level is perfect. The culprit? A stubborn air bubble introduced during the repair, blocking flow and turning a normal commute into a roadside headache.
Trapped air can quickly turn a minor annoyance into a major repair bill. To help you diagnose the issue, here's a quick rundown of the common symptoms, what they mean, and what you're risking by ignoring them.
Common Symptoms of Air in Your Cooling System
| Symptom | What It Signals | Potential Long-Term Damage |
|---|---|---|
| Engine Overheating | Air is blocking coolant circulation, creating hot spots. | Warped cylinder head, blown head gasket, complete engine failure. |
| No Heat from Vents | An airlock is likely trapped in the heater core. | Inconvenience, but signals a larger circulation issue. |
| Gurgling Sound from Dash | Coolant is struggling to flow past an air bubble in the heater core. | A clear sign of an air pocket that needs to be bled out. |
| Erratic Temp Gauge | Air near the temperature sensor is causing false readings. | The engine may run poorly and overheat without warning. |
| Coolant Odor | Air pressure can force coolant out of the overflow, causing a sweet smell. | Loss of coolant, leading to more severe overheating. |
As you can see, what starts as a small issue can escalate quickly. Don't let a simple air bubble lead to thousands of dollars in repairs.
From Annoyance to Catastrophe
While a weak heater is just an inconvenience, an engine that's constantly running hot can lead to catastrophic failure. Sustained high temperatures can cause a cylinder head to warp or crack—a repair that easily runs into the thousands. It's also the number one cause of a failed head gasket, which lets coolant mix with oil and can quickly destroy an engine.
The problem is even more serious in high-performance cars. For instance, trapped air can cause operating temperatures to spike by 25-30% under heavy load. This is a well-known issue when upgrading cars, like the BMWs that use CSF triple-pass radiators. There are service reports of drivers mistakenly replacing a perfectly good radiator because they thought it was faulty when the real issue was just trapped air from an improper installation. You can learn more about how crucial proper bleeding is for these systems over at BimmerWorld.
Learning how to bleed air from your cooling system is more than just a maintenance chore. It's a fundamental skill that protects your investment and keeps your vehicle running reliably, whether you're just driving to work or heading out for a spirited weekend drive.
Gathering the Right Tools for a Clean Job
Before you even think about twisting a radiator cap, let's talk prep. A smooth, successful coolant bleed starts with having everything you need within arm's reach. I've seen it a hundred times: fumbling for the right tool mid-process can turn a simple task into a messy, frustrating ordeal. Proper preparation is the bridge between a potential headache and a job well done.
This isn’t just about making your life easier; it’s about safety. You're dealing with hot, pressurized fluids that demand respect. Having the right gear on hand ensures you stay safe, keep your garage floor clean, and get the job done right the first time.
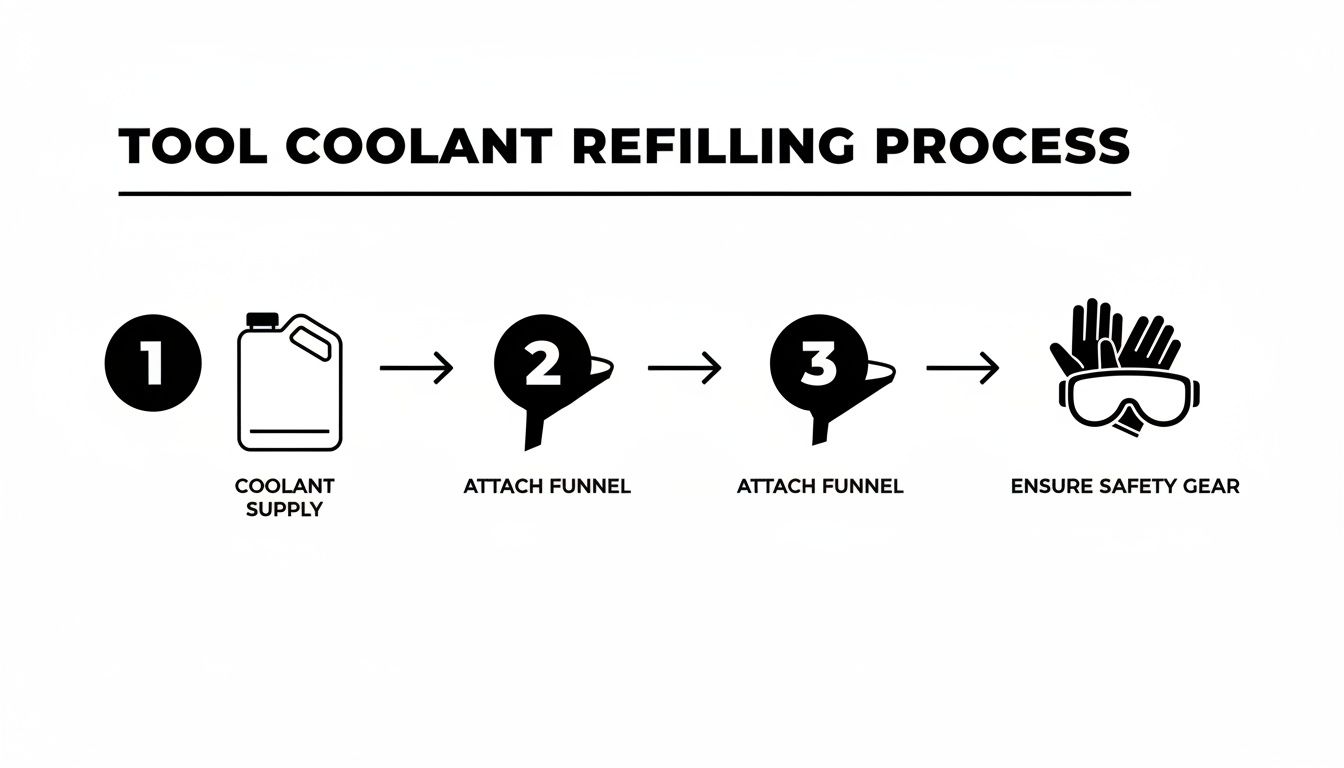
Essential Tools and Materials
Think of this as your pre-flight checklist. There's nothing worse than getting halfway through a job only to realize you're missing something crucial. Run through this list and gather everything before you start.
- Fresh Coolant: Never, ever reuse old coolant. Make sure you have the correct type specified for your vehicle's make and model. Using the wrong kind is a fast track to corrosion and internal damage. You'll need enough for a full flush or a hefty top-off.
- Distilled Water: If your coolant is concentrated, you absolutely must mix it with distilled water. Tap water is full of minerals that build up inside your radiator and engine, leading to clogs and overheating down the road.
- Spill-Free Funnel Kit: This is the MVP of bleeding a cooling system, no question. A good spill-free funnel locks onto the radiator or expansion tank, creating a high point that makes it incredibly easy for air bubbles to escape. It also saves you from a massive cleanup job.
- Drain Pan: You’ll need a large, sturdy pan to catch the old coolant. Don't skimp here—look for one with a capacity of at least 5 gallons to be safe.
- Basic Hand Tools: A good socket set, a few screwdrivers (both flathead and Phillips), and a set of pliers will handle almost any hose clamp or bolt you'll run into.
- Safety Gear: This is completely non-negotiable. Get a pair of safety glasses and some chemical-resistant gloves. Hot coolant can cause serious burns, and you don't want it on your skin or in your eyes.
It's also a good idea to start with a clean work area. A tidy engine bay makes it much easier to spot fresh leaks and keep track of your tools. If you're curious about the best way to clean your engine bay, it’s worth a read.
Setting Up Your Workspace for Success
Where you work is just as important as the tools you use. A good setup can make all the difference in getting every last bubble of air out of the system.
First, park your car on a level surface. That said, a lot of old-school mechanics (myself included) swear by pointing the vehicle's nose slightly uphill. Parking on a gentle incline can encourage air bubbles to travel naturally toward the radiator cap, which is exactly where you want them to go.
Pro Tip: No sloped driveway? No problem. Use a floor jack to safely raise the front of the vehicle. Just make sure you secure it with jack stands—never, ever work under a car supported only by a jack.
Next, make sure you can see what you're doing. A headlamp or a portable work light is perfect for peering into the engine bay to find those sneaky bleeder screws or check for leaks.
Finally, keep a roll of shop towels or old rags handy. Spills are almost inevitable, and you want to be ready. Coolant is slippery and highly toxic to pets, so keeping things clean is a serious safety issue. If you're new to working under the hood, our guide on how to check car fluids is a great place to get more comfortable.
The Spill-Free Funnel Method for Bleeding Your System
If you ask me, this is the single best way for any DIYer to bleed a cooling system. Hands down. Using a spill-free funnel kit takes what can be a messy, frustrating job and turns it into a clean, controlled process. It's a total game-changer because you can physically see the air escaping, ensuring you get every last bubble out.
So, how does it work? The funnel essentially creates a temporary high point for your cooling system. Since we all know air rises, this gives it a perfect, direct path to escape. At the same time, it provides a ready reservoir of coolant to fill the void left behind. It’s a simple but brilliant principle that makes it far more effective than just topping off the radiator and hoping you got it all.
This diagram breaks down the essentials for doing the job safely and correctly.
Getting your coolant, funnel, and safety gear ready beforehand is the key to a smooth and efficient process.
Securing the Funnel and Filling the System
First things first: make sure your engine is completely cool to the touch. Once it is, remove the radiator cap. A good spill-free funnel kit will come with a variety of adapters. Your job is to find the one that fits snugly onto your radiator or coolant expansion tank, creating a tight, leak-proof seal.
With the funnel attached, you can start pouring in your premixed 50/50 coolant and distilled water solution. Fill the funnel about halfway. That column of coolant is now your air exit and your fluid reservoir, automatically feeding the system as air gets pushed out.
This is what makes the funnel method so effective—the visual confirmation. You're not just guessing if air is coming out; you can literally watch the bubbles rise up through the coolant in the funnel.
This idea of using a specialized tool for clean fluid transfer is common in auto repair. For example, using a funnel with tube for safe fueling helps prevent spills and air pockets in a different system, but the principle of controlled transfer is the same. It’s all about preventing messy "burps" that signal trapped air.
Starting the Engine and Running the Heater
Alright, time to get things circulating. Put the car in Park or Neutral and engage the parking brake. Now, start the engine and let it start warming up.
Hop in the driver's seat and turn your heater on full blast—highest temperature setting, but keep the fan speed on low. This is a crucial step that many people forget. It opens the valve to the heater core, letting coolant flow through and push out any air trapped inside. If you skip this, you’ll likely end up with a heater that only blows cold air.
As the engine idles and gets closer to normal operating temperature, the thermostat will open up. You'll know it happened because you'll see a sudden drop in the funnel's coolant level, usually followed by a big gush of bubbles. That's the main event—the system is now fully circulating, and the real bleeding process has begun.
Watching for Bubbles and Helping Them Along
Now, just keep an eye on the funnel. You'll see all sorts of bubbles, from a tiny fizz to large "burps," making their way to the surface. That’s the trapped air escaping, which is exactly what you want to see. Let the engine run until the bubbles stop completely, which could take anywhere from 15 to 30 minutes.
To speed things up or dislodge stubborn air pockets, here are a couple of tricks we use in the shop:
- Squeeze the Upper Radiator Hose: Find the big hose running from the top of your radiator to the engine and give it a few firm squeezes. You should see a corresponding surge of bubbles in the funnel.
- Briefly Rev the Engine: With the car still in Park, gently bring the RPMs up to around 1500-2000 for 15-20 seconds at a time. This spins the water pump faster, forcing coolant through the system and helping push out any stubborn pockets of air.
As air comes out, the coolant level in the funnel will drop. It's critical to keep the funnel at least one-third full the entire time to make sure you don't suck fresh air right back into the system.
Finishing the Job
Once the engine has been running for a few minutes and you haven't seen a single bubble, you're done. You've successfully bled the system. Turn off the engine and let it cool down completely—this can take an hour or two, so be patient.
Once it's cool, use the stopper that came with your funnel kit to plug the funnel. Now you can remove it and pour the leftover coolant right back into the bottle. No mess. Finally, put the radiator cap back on securely, double-check the coolant level in the overflow tank, and top it off to the "COLD" line if needed. That's it—you've just done a professional-grade cooling system bleed.
Handling Systems With Bleeder Screws and Expansion Tanks
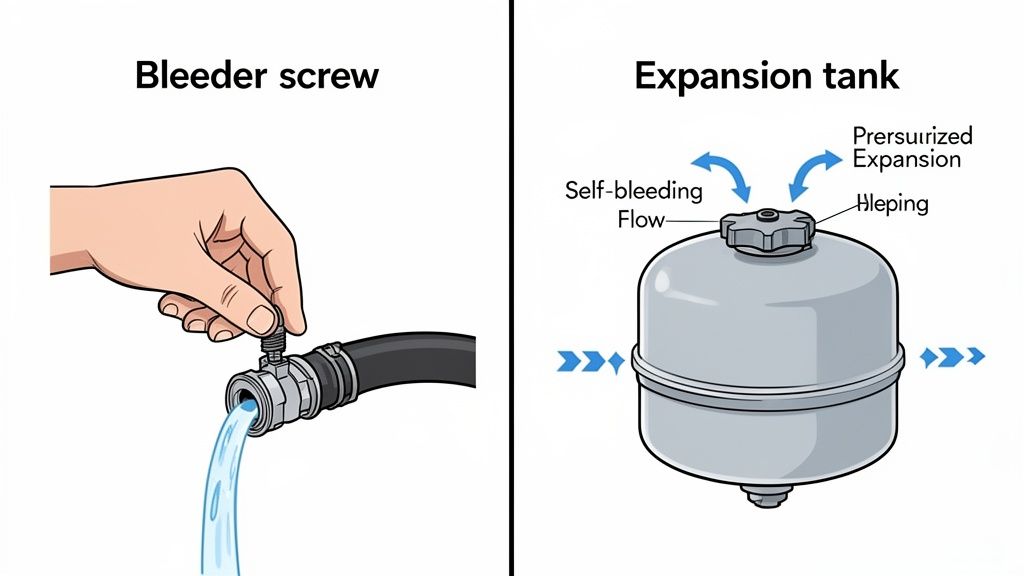
While a spill-free funnel is a fantastic tool for many cars, it's not a universal solution. Plenty of vehicles, especially those from European brands, come with built-in features designed to make bleeding the cooling system a more straightforward job. The two most common are bleeder screws and pressurized expansion tanks.
Knowing how to work with these systems is key. If you try a one-size-fits-all approach on a car with a dedicated bleed point, you'll likely leave stubborn air pockets behind, leading to those overheating headaches you were trying to fix in the first place.
Locating and Using Bleeder Screws
Bleeder screws (or valves) are exactly what they sound like: small screws, usually plastic or metal, placed at the highest points of the cooling system. Engineers put them there for a reason—air rises, so these spots are where bubbles naturally get trapped.
Look for them in a few common areas:
- On top of the thermostat housing
- Along an upper radiator hose
- Directly on the radiator itself
To use one, start with a cool engine. Top off the coolant at the radiator or expansion tank, but leave the cap off for now. Next, grab a screwdriver or the right socket and just crack the bleeder screw open a turn or two. You don't need to take it all the way out.
With the screw loose, start the car and let it warm up. You'll probably hear a hiss as the first pocket of air escapes. Soon, that hiss will turn into a sputtering mix of coolant and air.
The job is done when you see a solid, steady stream of coolant with no more sputtering. As soon as that happens, quickly but carefully tighten the screw back down. Be gentle—overtightening can strip the threads, especially on plastic housings.
These little valves are becoming more common. The global coolant bleeder valve market is projected to grow from USD 420 million in 2026 to over USD 717 million by 2036. This is largely because modern cars, especially hybrids and EVs, have multiple complex cooling loops for batteries and electronics, creating more places for air to hide. Manual bleeder valves still hold a dominant 53.2% market share because they offer a reliable, cheap way for pros and DIYers to get the air out. You can find more details on this growing trend in automotive thermal management.
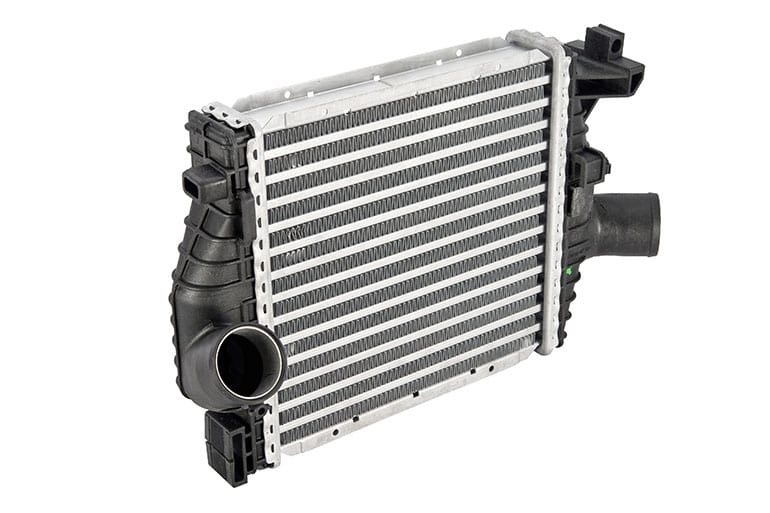
Bleeding Pressurized Expansion Tank Systems
Many modern cars, particularly from brands like BMW, Volkswagen, and Audi, have ditched the traditional radiator cap. Instead, they use a sealed, pressurized expansion tank (or coolant reservoir) that operates under higher pressure. Getting the air out of these systems requires a different technique.
You'll start by filling the expansion tank up to the "MAX" line while the engine is cold. From there, the process can vary quite a bit, so checking your owner’s manual is always the best first step.
The good news? Many of these vehicles have an electronic self-bleeding procedure. It’s a slick feature that uses the car's electric water pump to circulate coolant and push air out without you even having to start the engine.
The procedure usually follows these general steps:
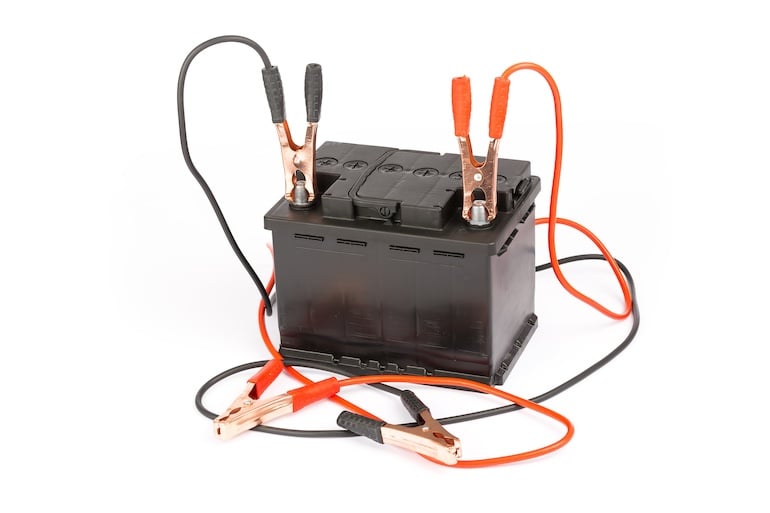
- Hook up a Battery Charger: The cycle can take 10-15 minutes, and a dead battery mid-bleed is a real pain.
- Turn the Ignition On (But Don't Start the Engine): Just put the key in and turn it to the "ON" position.
- Set Your Climate Controls: Crank the heater up to the highest temperature and set the fan to its lowest speed.
- Activate the Bleed Cycle: This is the tricky part that varies by model. Often, it involves pressing the gas pedal to the floor for about 10 seconds. You should hear the electric water pump kick on and see coolant begin to circulate in the tank.
Just let the car do its thing. Once the pump stops, the cycle is complete. Check the coolant level one last time and top it off if needed. It’s an incredibly effective way to purge air from today’s complex systems.
Knowing When to Call a Professional Mechanic
Doing your own car maintenance can be incredibly rewarding, but a smart DIYer also knows when to hang it up and call in a pro. Sometimes, no matter how carefully you follow the steps to bleed the air from your cooling system, the problem just won't go away.
If you’ve tried a couple of times and your engine is still running hot or the heater is only blowing cold air, that’s your car telling you it's time to put down the tools. Continuing to drive an overheating vehicle is a massive gamble, and your engine is the unfortunate stake.
Recognizing Signs of a Deeper Issue
When a cooling system refuses to bleed properly, it's often a symptom of a much more serious failure. You need to keep an eye out for specific warning signs that mean it's time to get a certified technician involved.
These symptoms can point to anything from a bad water pump or a stuck thermostat to the dreaded blown head gasket. Don't ignore them.
Pay close attention to these red flags:
- Persistent Overheating: If that temperature needle keeps creeping into the red zone even after you’ve bled the system, there’s an underlying problem that needs a professional diagnosis.
- White Exhaust Smoke: Sweet-smelling white smoke puffing out of your tailpipe is a classic sign coolant is leaking into the engine's combustion chambers. This often points straight to a blown head gasket.
- Milky Engine Oil: Pull your dipstick. If the oil looks frothy or has the consistency of a chocolate milkshake, coolant and oil are mixing. This is a critical issue that needs immediate professional help to prevent catastrophic engine damage.
A professional mechanic isn't just there to replace parts; they're a diagnostician. They have the experience to tell the difference between a stubborn air pocket and the early signs of a major engine failure, which could save you thousands of dollars in the long run.
The Advantage of Professional Grade Equipment
Beyond just years of experience, professional shops have access to specialized tools that make bleeding a cooling system practically foolproof. One of the most effective pieces of equipment is a vacuum-fill machine.
This device is a game-changer. It first pulls a complete vacuum on the entire cooling system—which doubles as a great leak test. Then, it uses that vacuum to suck fresh coolant back in, filling every single nook and cranny without letting a single air bubble get trapped.
This technology makes a huge difference. For example, these machines can get 90-95% of the old coolant out, which is a massive improvement over the 40-50% you'd get from a simple drain and fill at home. This is especially important for tricky systems, like the one in a Toyota MR2, or for ensuring modern long-life coolants, which can last 100,000 miles, start their life in a perfectly bled system. For a closer look at what the pros do, you can check out discussions by seasoned mechanics on specialized automotive forums.
For complex vehicles like hybrids, high-performance cars, or simply when you want the job done right with guaranteed peace of mind, professional service is the smartest move. If you're running into persistent cooling system trouble, you can learn more about our professional heating and cooling services and let us get it sorted out for you.
Common Questions About Cooling System Bleeding
Even with the best instructions, you're bound to have questions when tackling a new car maintenance job. Getting the details right when you bleed air from the cooling system is absolutely crucial for your engine's health. To clear up any confusion, we’ve put together answers to the most common questions we hear.
Think of this as your quick-reference guide, designed to give you clear, straightforward answers so you can finish the job with confidence.
How Long Does It Really Take to Bleed a Cooling System?
This is usually the first thing people want to know, and it's a two-part answer. The active, hands-on part of the job—where the engine is running and you've got the funnel attached—typically takes about 15 to 30 minutes. You're mostly just waiting for the engine to warm up, the thermostat to open, and the last of the air bubbles to work their way out.
But a thorough job doesn't stop there. The engine needs to cool down completely, which can take several hours, sometimes even overnight. Once it's fully cooled, you have to do a final check of the coolant level in both the radiator and the reservoir. So, while the main work is pretty quick, plan for the entire process to span a few hours to get it done right.
Can I Just Drive My Car to Get the Air Out?
It’s a common myth that just driving your car will eventually push all the air bubbles out of the cooling system. While it's possible a tiny air pocket might find its way out in some much older vehicles, this is definitely not a reliable or safe method for modern cars.
Trying to "drive the air out" is a big gamble. A significant air pocket can cause sudden, dangerous temperature spikes that can do serious damage to your engine, especially in stop-and-go traffic.
Actively bleeding the system is the only proven and safe way to ensure all trapped air is removed. It protects your engine from overheating and makes sure your heater works right away. Don't leave it to chance.
What Happens If I Don't Bleed the System After a Coolant Change?
Skipping this final step is just asking for trouble. When you drain and refill your coolant, you're introducing a lot of air into the system. If that air isn't bled out, it gets trapped and creates blockages, often called "air locks," which prevent coolant from circulating like it should.
This leads to a whole cascade of problems that are both frustrating and potentially very expensive:
- Engine Overheating: This is the biggest and most immediate danger. Air pockets create hot spots where coolant can't reach, leading to a rapid spike in temperature.
- A Heater That Blows Cold Air: An air lock in the heater core is a classic symptom. You'll be left shivering in the winter because hot coolant isn't making it through.
- Water Pump Damage: If an air pocket gets stuck around the water pump, it can cause the pump to run dry, leading to premature failure.
Worst-case scenario? These issues can lead to catastrophic engine failure, like a warped cylinder head or a blown head gasket. Those are repairs that can easily run into thousands of dollars—all because a simple bleeding procedure was overlooked.
Do I Need to Bleed the System After Just Topping Off Coolant?
It really depends on how much coolant you added and where you added it. If you're just adding a little bit of fluid to the coolant reservoir (the overflow tank) to bring it up to the "COLD" fill line, then no, a full bleed isn't necessary. The reservoir is designed for minor top-offs.
However, it's a different story if you had to add a large amount of coolant directly into the radiator, or if the system was so low that it might have sucked air in. For a deeper dive, you can learn more about the difference between engine coolant and antifreeze and how they work in our related article.
A full bleed is absolutely essential after any repair where the system is opened up, such as:
- Replacing a radiator or heater hose
- Installing a new thermostat
- Changing the water pump
- Performing a complete coolant flush
Any time the system is opened, air gets in. Bleeding is the final, critical step to make sure everything works perfectly.
If you've tried bleeding the system yourself and are still dealing with overheating, or if you'd just rather have the peace of mind that comes with professional service, the ASE-certified technicians at Kwik Kar Oil Change and Auto Care are here to help. We use state-of-the-art equipment to guarantee a perfectly bled, leak-free cooling system. Schedule your appointment with us today at https://www.kkrichardson.com.