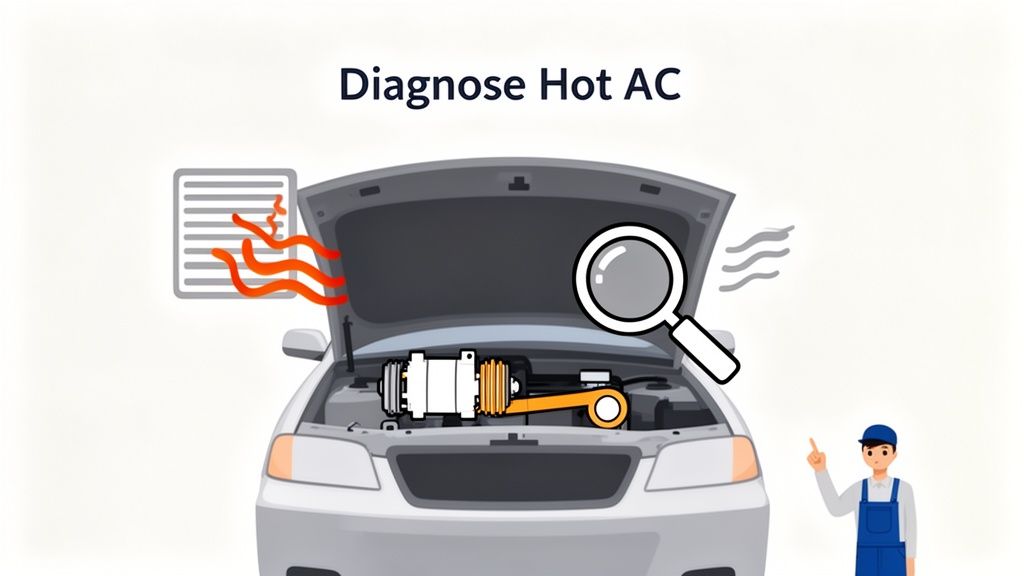
When the AC in your car starts pumping out hot air, the first instinct is often to brace for a hefty repair bill. But before you panic, it's worth remembering that many common AC problems are surprisingly simple to diagnose right in your own driveway.
That first blast of hot air on a scorching Richardson day is your car’s way of telling you something’s up. But it’s not always a catastrophe. Often, the culprit is hiding in plain sight, and a methodical check can save you a lot of time and worry.
Start with the Obvious: A Quick Look and Listen
Before diving under the hood, your first step is simply to be an observer. With the engine running, turn the AC to its highest setting and just listen.
Do you hear a distinct "click" coming from the engine bay every so often? That's a good sign. It's the sound of the AC compressor clutch engaging, which means the system is at least trying to work. If you hear nothing but the fan, the problem might be electrical, a bad clutch, or low refrigerant pressure.
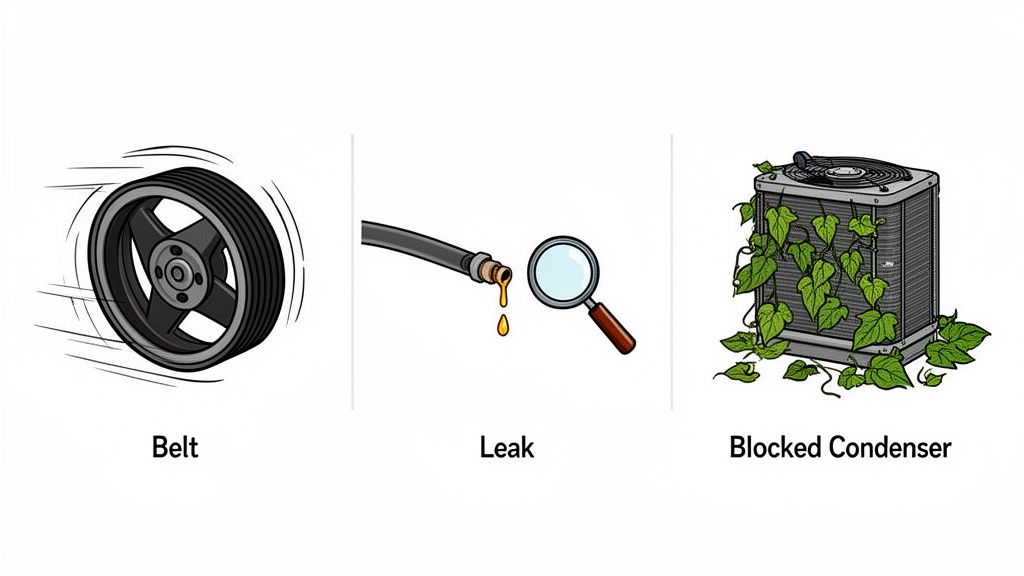
Next, pop the hood and take a look. You don't need to be a certified mechanic to spot some of the most common issues. Is the serpentine belt that drives the compressor still there and spinning properly? Check it for cracks or fraying.
Now, find the AC compressor pulley. Is the center part (the clutch) spinning along with the outer pulley? If it's just sitting there while the belt zips around it, your compressor isn't engaged. While you're under there, scan the AC lines and connections for any oily, greasy residue. This is a classic tell-tale sign of a refrigerant leak.
A broken AC isn't just a comfort issue in the Texas heat—it can genuinely lead to driver fatigue and reduced concentration. The single most common cause of a car AC blowing warm air is a refrigerant leak, which stops the system from pulling heat out of the cabin.
Matching Symptoms to Potential Causes
To help you connect what you're seeing and hearing to a likely cause, we've put together a quick-glance table. This should help you narrow down the possibilities before deciding on your next move.
Common Car AC Problems and Potential Causes
| Symptom You're Experiencing | Most Likely Cause | Next Step (DIY Check or Pro) |
|---|---|---|
| No cold air, fan works fine | Low refrigerant (leak), compressor not engaging | DIY: Check for clutch engagement. Pro: Leak test & recharge. |
| Air is cool, not cold | Low refrigerant, blend door actuator issue | DIY: Check cabin air filter. Pro: System pressure test. |
| Weak airflow from vents | Clogged cabin air filter, failing blower motor | DIY: Inspect/replace cabin air filter. Pro: Blower motor diagnosis. |
| Strange noises (hissing, grinding) | Hissing = leak; Grinding = failing compressor | Pro: Immediate professional diagnosis is needed. |
This table is a great starting point, but for a more guided approach, a diagnostic flowchart can be incredibly helpful.
This flowchart walks you through a logical diagnostic path, starting with the simplest checks and moving toward more specific issues like weak airflow or strange noises.
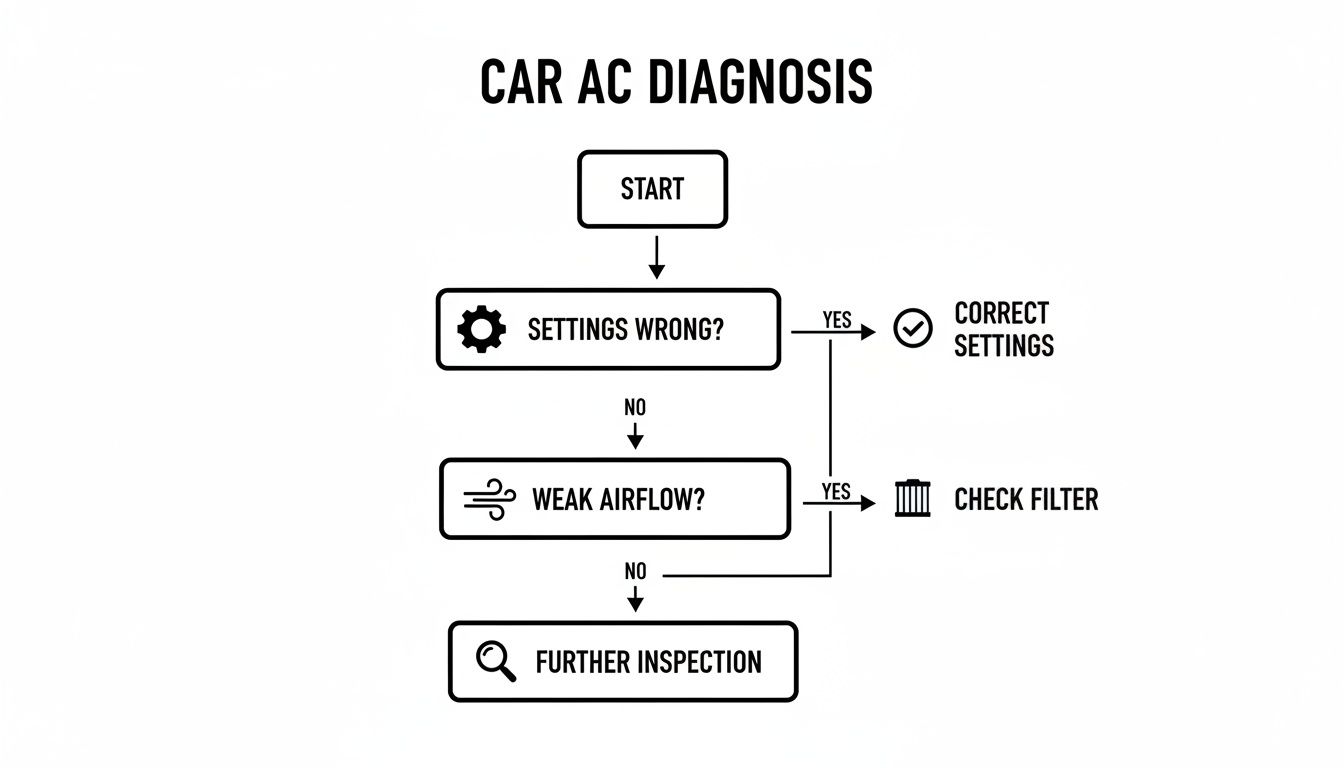
By answering a few simple "yes or no" questions about your AC's behavior, the flowchart points you toward the most probable cause, taking the guesswork out of the equation.
A working AC system is a critical component, especially somewhere like Richardson where summer temps routinely soar. The global automotive AC market was valued at an impressive USD 21,631.19 million in 2022 and continues to grow, showing just how essential these systems are. For an even deeper dive, some modern vehicle health monitoring systems can even offer preliminary insights into system failures.
This initial diagnostic phase is a lot like other basic vehicle maintenance. Just as you’d check your oil or coolant, a quick look at your AC system can give you a baseline. If you're new to poking around under the hood, our guide on how to check car fluids is a great way to get comfortable. Catching a small leak or a worn belt now can prevent a much bigger and more expensive failure down the road.
DIY AC Checks You Can Perform at Home
Before you assume the worst and start thinking about expensive repairs, there are quite a few things you can check right in your own driveway. Many common A/C headaches can be diagnosed—and sometimes even fixed—with a few simple checks that don't require any special tools. All you need are your eyes and ears.
This initial once-over helps you rule out the easy stuff. Plus, if you do end up needing a pro, being able to tell a technician, "I don't hear the compressor clutch clicking on," is a lot more useful than just saying, "the A/C is broken." It gives us a head start on getting you cool again.
Your First Tools: Your Eyes and Ears
Your senses are your best friends here. Find a safe spot to park, pop the hood, and have a friend hop in to start the engine and crank the A/C to its coldest, highest setting. Now you can start your detective work.
Listen for the "Click": The very first thing you want to listen for is a sharp "click" coming from the engine bay a few seconds after the A/C is switched on. That's the sound of the AC compressor clutch engaging. Hearing that click is a good sign—it means the system is getting the command to start and is trying to work. If you hear nothing, it could point to an electrical problem or a system that's critically low on refrigerant.
Watch the Compressor Clutch: Find the A/C compressor; it’s one of the accessories driven by the main serpentine belt. Zero in on the very front of its pulley. When the A/C is running, that center part (the clutch) should be spinning right along with the outer pulley. If the outer pulley is turning but the center is just sitting there, the clutch isn't engaging.
Hunting for Obvious Signs of Trouble
With the engine still running (and being careful!), take a careful look around the A/C components. You’re searching for anything that just doesn't look right. These clues can quickly lead you to the root of the problem.
- Inspect the Serpentine Belt: Is the belt driving the compressor looking healthy? Check for any cracks, fraying, or a shiny, glazed look. A worn-out or loose belt can slip, failing to turn the compressor properly, and is often the cause of a high-pitched squeal.
- Check the Condenser: At the very front of your car, right in front of the radiator, is the condenser. It needs clean airflow to work. Look for any blockages like leaves, dirt, or plastic bags that might be plastered against it. A clogged condenser can't get rid of heat, which severely cripples your A/C's cooling ability.
- Look for Greasy Clues: Carefully trace the metal A/C lines and rubber hoses. A greasy or oily film around any connection, valve, or component is the classic sign of a refrigerant leak. The system's oil circulates with the refrigerant, so when the gas escapes, it carries a little oil with it that attracts dirt and grime.
Pro Tip: Don't just look—feel! Once the engine is off and cool, gently try to wiggle the A/C lines. They should feel solid. If you find a connection that feels loose or has too much play, that could be the source of a slow, hard-to-find leak.
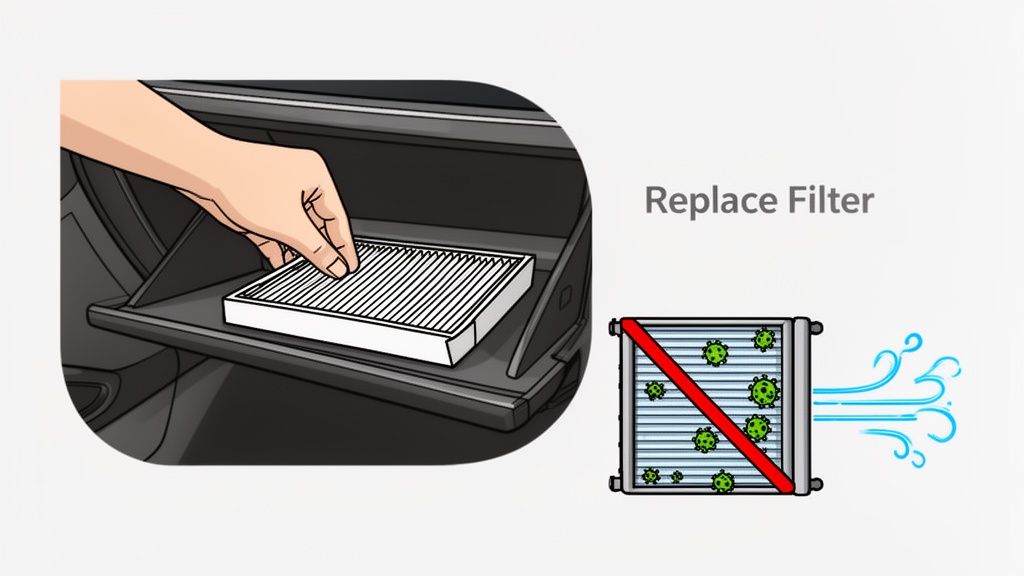
The Most Overlooked Culprit: The Cabin Air Filter
Weak airflow is one of the most common complaints we hear, and it often has nothing to do with refrigerant or complex parts. More often than not, a dirty cabin air filter is to blame, and it's a super easy and cheap fix.
This little filter is responsible for trapping dust, pollen, leaves, and other junk before it gets blown into your car. Over time, it gets so clogged that it becomes a solid wall, preventing air from getting through. The blower fan will sound like it’s working hard, but you’ll only feel a pathetic wisp of air from the vents.
Most cabin air filters are located right behind the glove box. You can usually access and replace one in less than 15 minutes with nothing more than basic hand tools. A fresh filter won't just bring back strong airflow; it'll also make the air you breathe inside the car much cleaner.
If you've gone through these checks and your A/C is still on the fritz, don't be discouraged. You've successfully ruled out all the simple culprits and gathered some valuable intel. Now you have a much better idea of whether the problem is something deeper in the system that needs a professional touch.
Diving Into Compressor and Clutch Issues
Think of your car’s AC system as the heart of your comfort on the road. If that's the case, the AC compressor is its powerful, beating muscle. This is the component that does the heavy lifting, pressurizing refrigerant and pumping it through the system to create cold air. When the compressor or its clutch runs into trouble, the whole operation grinds to a halt, leaving you with nothing but hot air on a sweltering Richardson day.
It's important to know the difference between a minor clutch problem and a catastrophic compressor failure. They work as a team but can fail separately. The clutch is basically an electromagnetic pulley that lets the compressor cycle on and off, while the compressor itself is the actual mechanical pump.
Is the Clutch Engaging Properly?
The AC clutch is a really common failure point, but it's one you can safely observe yourself. With the engine running and the AC cranked to its highest setting, take a look at the pulley on the front of the compressor. The outer part of that pulley will always be spinning along with the engine's serpentine belt. What you need to watch is the very center plate.
- How It Should Work: You’ll hear a distinct "click," and that center plate will lock in and start spinning with the outer pulley. It will cycle on for a bit, then off, then back on. That’s normal.
- What to Look For: If the outer pulley is spinning but that center plate just sits there, the clutch isn't engaging. This could point to a few things: a bad clutch coil, an electrical gremlin like a blown fuse, or the system being so low on refrigerant that the safety pressure switch won't let it turn on.
Sometimes you get the opposite problem. The clutch can seize, getting stuck in the "on" position. This puts a massive strain on both the engine and the compressor itself, often leading to much more serious damage if it's not fixed quickly.
A failing compressor often gives you a heads-up before it completely dies. If you hear a loud grinding or rattling noise that only starts when you turn on the AC, that's a huge red flag. Ignoring it can cause the compressor to lock up, which can shred your serpentine belt and leave you stranded on the side of the road.
Recognizing a Failing Compressor
While a clutch issue might be a manageable repair, a failing compressor is a whole different ballgame—a much more serious and expensive one. The compressor is a complex piece of machinery that simply wears out, especially on vehicles that have seen a lot of Texas miles. The telltale signs of a dying compressor are usually hard to miss.
Loud, unnatural noises are the biggest giveaway. A grinding or high-pitched squealing sound that changes with your engine's RPM when the AC is on is a classic sign of internal compressor failure. Another clue is spotting a leak of refrigerant oil coming from the compressor's body or seals.
In a worst-case scenario, the compressor can suffer a catastrophic internal failure. When this happens, it blasts tiny metal shavings throughout the entire AC system, contaminating expensive parts like the condenser and evaporator. This is why a proper diagnosis is so critical. You can't just swap in a new compressor; a professional has to flush the entire system to get that debris out. You can learn more about the complex parts involved in our complete guide to auto heating and cooling services.
The automotive AC compressor market is a massive industry, hitting USD 8.45 billion in 2021, which just goes to show how common these repairs are. Compressor failures make up a huge chunk of AC problems, especially in high-mileage vehicles common around Richardson. Here at Kwik Kar, our ASE-certified technicians have the specialized tools to diagnose these issues correctly, saving you from spending money on parts you don't need and making sure the job is done right the first time.
Fixing Leaks and Low Refrigerant the Right Way
Feeling warm air from your vents is a classic sign of low refrigerant, and it’s tempting to grab a DIY recharge kit from the auto parts store. But that’s usually a temporary fix that treats a symptom, not the actual problem.
Think of it this way: your car's A/C is a sealed system. Refrigerant doesn’t get “used up” like gas. If it’s low, it means it has escaped somewhere. Adding more without fixing the leak is like pouring water into a bucket with a hole in it. You might feel cool air for a little while, but you haven't solved anything. In fact, you can easily overcharge the system, creating extreme pressure that can destroy expensive parts like your compressor.
Why DIY Recharge Kits Are a Gamble
Those all-in-one recharge cans might look like a quick, cheap solution, but they often do more harm than good to your car’s sensitive A/C system. They just don't have the precision needed for a real repair.
- Inaccurate Gauges: The simple pressure gauges on these kits are notoriously misleading. They don’t account for the outside air temperature, which is a critical piece of the puzzle for getting the pressure right.
- Wrong Refrigerant Type: Not all refrigerants are the same. Older cars typically use R-134a, while most vehicles from 2015 or later use the more eco-friendly (and expensive) R-1234yf. Mixing them can wreck your system and lead to a very costly repair bill.
- Included Sealants Can Clog Systems: Many DIY kits contain "leak stop" additives. Sounds good, right? The problem is, these sticky sealants can clog essential components like the expansion valve or orifice tube, turning a small leak into a system-wide blockage.
For drivers here in Richardson, this is a big deal. Our certified technicians at Kwik Kar often see vehicles come in with major AC damage caused by an improperly used DIY kit. A professional service avoids these risks by accurately diagnosing the leak first.
To help you weigh the options, here’s a look at how a DIY approach stacks up against a professional service.
DIY Recharge Kit vs Professional AC Service
| Feature | DIY Recharge Kit | Kwik Kar Professional Service |
|---|---|---|
| Diagnosis | Relies on a simple, often inaccurate pressure gauge. Cannot pinpoint the source of a leak. | Uses specialized equipment like UV dye and electronic "sniffers" to find the exact leak location. |
| Accuracy | High risk of overcharging or undercharging, which can damage the compressor and other components. | Refrigerant is measured by weight to the exact gram specified by your vehicle's manufacturer. |
| Leak Sealing | May contain "stop leak" additives that can clog and damage the A/C system. | Replaces the faulty component (O-ring, hose, condenser) for a permanent, reliable fix. |
| Refrigerant Type | Risk of using the wrong type of refrigerant (R-134a vs. R-1234yf), leading to system damage. | Guarantees use of the correct refrigerant type and oil for your specific make and model. |
| Moisture Removal | Does not remove air or moisture, which can cause corrosion and poor performance. | The system is put under a deep vacuum to boil off all moisture before recharging. |
| Environmental | Venting refrigerant into the atmosphere is illegal and harmful. | All existing refrigerant is safely recovered and recycled according to federal regulations. |
| Outcome | Often a temporary fix. The leak remains, and the problem will return. | A long-term solution that restores factory performance and reliability. |
Ultimately, while a DIY kit might save you a few bucks today, it could set you up for a much bigger, more expensive repair down the road.
How Professionals Find and Fix AC Leaks
So if just topping it off isn't the answer, what is? The right way involves specialized tools and a methodical hunt to find exactly where the refrigerant is escaping.
First, a technician will recover any refrigerant left in the system, which is required by federal environmental law. Then, the search begins. One of our go-to methods is injecting a special fluorescent UV dye into the system with a bit of refrigerant. After you run the AC for a while, we use a blacklight to inspect every component. Any escaping dye will glow brightly, pointing us straight to the leak.
Another great tool is an electronic leak detector, often called a "sniffer." This handheld device is incredibly sensitive to refrigerant molecules and will sound an alarm when it passes over a leak. It’s perfect for finding those tiny, hard-to-see cracks in hoses or seals.
Common Leak Locations and Permanent Solutions
Leaks can pop up just about anywhere, but we definitely see some repeat offenders.
- Rubber O-Rings and Seals: These tiny rubber rings at connection points can dry out and crack over the years.
- Hoses and Lines: Constant engine vibration and heat can make rubber hoses brittle, while road salt and moisture can corrode the metal lines.
- Schrader Valves: These are the service ports where gauges are connected, and just like the valve on your tire, they can wear out and leak.
- Condenser or Evaporator: The condenser, which sits at the front of your car, is vulnerable to being punctured by road debris. The evaporator, tucked away in your dashboard, can corrode from the inside out.
Once the leak is found, the failing part is replaced. Then, we pull the system into a deep vacuum to remove every last bit of air and moisture. Only then is it recharged with the precise amount and type of refrigerant your car’s manufacturer specifies. This professional process is the only way to guarantee your A/C will blow cold all summer long.
Solving Weak Airflow and Foul Odors
Sometimes your A/C seems like it's working—you can feel cold air—but you’re still sweating through your shirt. The problem might be weak airflow that just can't keep up with the Texas heat, or maybe it's a funky, musty smell that makes you want to drive with the windows down.
When you’re dealing with these kinds of issues, the problem usually isn't with the refrigerant. It’s on the air handling side of your HVAC system.
The good news? The most common reason for weak airflow is also one of the easiest and cheapest fixes you can do yourself. Nine times out of ten, the culprit is a dirty, clogged cabin air filter.
This little filter is the unsung hero of your car’s interior, catching dust, pollen, leaves, and all sorts of road grime. But after thousands of miles, it gets so packed with debris that it basically becomes a solid wall. Your blower motor might be screaming, but only a pathetic little trickle of air can push its way through to the vents.
Tackling a Clogged Cabin Air Filter
Swapping out a cabin air filter is a straightforward job that most people can knock out in under 15 minutes with few, if any, tools. They’re usually located right behind the glove compartment.
- Find the Filter: Your owner’s manual will show you the exact spot. Typically, you just have to unlatch the glove box and let it drop down to see the filter housing panel.
- Pull the Old One Out: Slide the old filter out and give it a look. If it’s dark gray and covered in leaves and fuzz, you’ve found your problem.
- Slide the New One In: Check the new filter for airflow arrows printed on the side—make sure they’re pointing in the right direction—and slide it into place. Pop the glove box back on, and you’re good to go.
A fresh filter doesn't just bring back that strong, cold blast of air; it also massively improves the air quality inside your car. It’s a small price to pay for comfort and your health.
Getting Rid of That Nasty Musty Smell
If the airflow is strong but the smell is foul, you're facing a different beast. That "dirty sock" odor is the classic calling card of mold and mildew growing on your A/C system's evaporator core.
The evaporator is buried deep in your dashboard, and its job is to get ice-cold. Here in Richardson, the humidity causes condensation to form all over it, just like on a glass of sweet tea on a hot day. That dark, damp environment is a perfect breeding ground for smelly bacteria and mold.
Why This Matters: This isn't just about a bad smell. The air blowing from your vents passes directly over this gunk, picking up mold spores and bacteria and blasting them right into the cabin for you and your passengers to breathe.
While those disinfectant bombs you can buy at the auto parts store might help for a little while, they're really just a temporary band-aid. They rarely get deep enough to kill the problem at the source.
For a real, lasting fix, a professional evaporator cleaning service is the way to go. Technicians use special tools and powerful cleaning agents to sanitize the evaporator core and the entire HVAC housing, killing the bacteria and leaving your car smelling fresh again.
The global automotive HVAC market is a huge industry for a reason—every part has to work perfectly. Industry data reveals that clogged evaporators or condensers are responsible for 25% of all AC failures, and that number is even higher in humid places like Texas. Neglected systems can lead to mold growth in an estimated 15% of vehicles each year, which can be a real health concern. You can learn more about these industry trends and their impact.
At Kwik Kar, we know a good A/C system is about more than staying cool—it’s about breathing clean air. Our certified technicians can replace your cabin air filter in minutes or perform a deep evaporator cleaning to get your air quality and airflow back to where they should be.
Common Questions About Fixing Your Car's A/C
The moment your car's A/C stops blowing cold, the questions start flooding in. How much is this going to set me back? Can I fix this myself? It's easy to feel stressed when you're facing a potentially complex and expensive repair. We get these questions every single day from drivers right here in Richardson, so we’ve put together some straight answers to the most common concerns.
Our ASE-certified technicians are here to pull back the curtain on car A/C repairs, giving you the information you need to make a smart decision for your vehicle.
How Much Does Car AC Repair Typically Cost?
This is always the first question, and the honest-to-goodness answer is: it really depends. The final bill is tied directly to what part of the system failed. A simple fix can be surprisingly affordable, but a major component failure is a more significant investment.
Let's look at a few real-world scenarios:
- Minor Fixes: Things like a bad relay, a faulty pressure switch, or even just a clogged cabin air filter are on the low end. You're often in the $50 to $200 ballpark for these. They're quick repairs that get things working again without a lot of labor.
- A/C Recharge Service: If your system is just low on refrigerant (and we've found and fixed the leak!), an evacuation and recharge service typically runs $150 to $350. The cost can shift a bit depending on whether your car uses the older R-134a refrigerant or the newer, more expensive R-1234yf.
- Major Component Replacement: This is where the price can jump. Swapping out a leaky condenser might cost anywhere from $400 to $1,000. If the A/C compressor—the heart of the system—has given up, you could be looking at $800 to over $1,500, depending on your car's make and model.
The bottom line? A proper diagnosis is everything. Spending a little on a professional diagnostic can save you a fortune by preventing you from replacing parts that weren't broken in the first place.
Can I Just Add More Freon Myself?
Grabbing one of those DIY recharge cans from the auto parts store is tempting, we get it. But this is probably the single most common mistake we see. Your car's A/C is a sealed system. If the refrigerant is low, it means you have a leak somewhere. Topping it off is like putting a bandage on a problem that needs stitches—it doesn’t fix the root cause.
Worse, it’s incredibly easy to overcharge the system with those cans. Too much refrigerant creates excessive pressure that can destroy your compressor, turning a small leak repair into a massive, wallet-draining failure. Always find and fix the leak first.
The best approach is always professional service. A trained technician can properly inspect for leaks, find worn parts, and recommend the right repairs to keep your A/C running safely and efficiently.
How Long Does an AC Repair Take?
Just like cost, the time frame for an A/C repair hinges on the job's complexity. The good news is that many common problems can be sorted out pretty quickly, getting you back into a cool car the same day.
Here’s a general idea of what to expect:
- Diagnostics and Recharge: A full leak test and recharge service usually takes about 1 to 2 hours.
- Hose or Seal Replacement: If we trace the leak to an easily accessible hose or O-ring, the repair can often be wrapped up in 2 to 3 hours.
- Compressor or Condenser Replacement: These are the big jobs. They can take anywhere from 4 hours to a full day, simply because we often have to move other components out of the way to get to them.
Here at Kwik Kar, we'll always give you a clear time estimate after our initial diagnosis, so you know exactly what the plan is.
Why Does My AC Smell Bad?
If you're hit with a musty, "dirty sock" smell when you turn on the A/C, you're not alone. That odor is a classic sign of mold and mildew growing on your evaporator core, which is buried deep inside your dashboard. Living in a humid climate like ours in Texas makes this a really common problem.
The evaporator gets icy cold, causing moisture to condense on its fins. This dark, damp spot becomes the perfect breeding ground for bacteria. While you can find DIY spray cleaners, they usually just mask the smell for a short time. A permanent fix requires a professional evaporator cleaning, where we use specialized tools to get to the core and kill the bacteria at its source.
This isn't just about a bad smell; it's about the quality of the air you're breathing in your car. If you want to learn more about keeping your vehicle in prime condition, check out our insights on auto repair in Richardson. Staying on top of services like this is key to avoiding bigger headaches down the road.