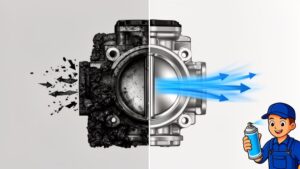
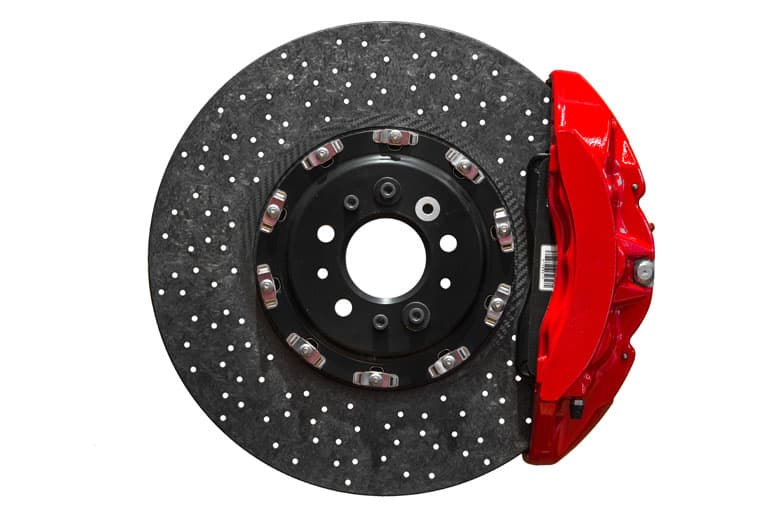
Your brake rotors are the workhorses of your car's safety system. While brake pads get most of the attention, it’s the rotors that do the heavy lifting, and ignoring them can lead to some pretty serious problems.
Understanding what your rotors do and how to spot trouble is more than just routine maintenance—it's one of the most important safety checks you can perform.
Why Your Brake Rotors Are So Critical
Think about what happens when you hit the brakes. Your brake pads squeeze against the rotors—those big metal discs inside your wheels—to create the massive amount of friction needed to stop a heavy vehicle.
This process generates an incredible amount of heat, often spiking above 1,000°F. When rotors are healthy, they provide a perfectly smooth, flat surface for the pads to grip, giving you quick, controlled stopping power.
But when they start to wear down, warp, or get damaged, that reliable connection is gone. That's when you'll start to feel, hear, and see signs you absolutely can't ignore.
Connecting the Symptoms to Your Rotors
The good news is that failing brake rotors usually give you plenty of warning signs. Your car has a way of telling you something is wrong, and learning to listen is key.
Here’s a quick reference guide to help you pinpoint what those symptoms might mean for your brake rotors.
Symptoms of Failing Brake Rotors
| Symptom | What It Feels or Sounds Like | What It Could Mean |
|---|---|---|
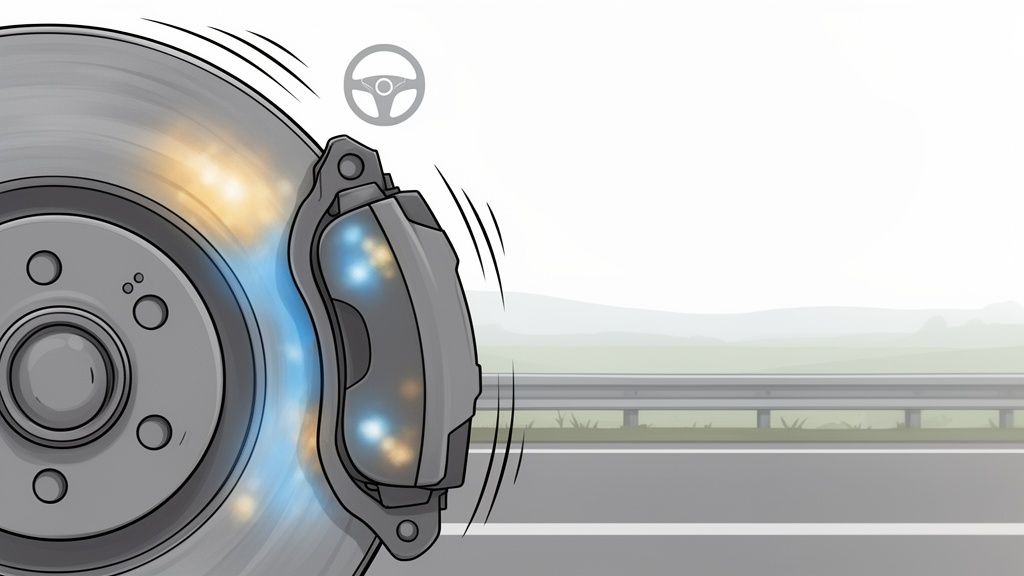
| Vibrations or Shuddering | A shaking steering wheel or pulsing brake pedal when you brake. | Your rotors are likely warped. The surface is no longer flat, causing the brake pads to make uneven contact as the wheel spins. |
| Squealing or Grinding | A high-pitched squeal often points to worn pads, but a deeper, louder grinding noise is more serious. | This usually means the pads are worn down to the metal, and you now have metal-on-metal contact grinding away at your rotors. |
| Visible Grooves or Scoring | You can see or feel deep lines, scratches, or rings on the rotor's surface. | Debris got trapped between the pad and rotor, or the pads wore unevenly. These grooves reduce braking effectiveness. |
These symptoms are your car’s way of asking for help before a minor issue becomes a major safety risk.
These aren't just minor annoyances; they're direct threats to your ability to stop safely. According to 2023 NHTSA data, brake-related issues were a factor in over 100,000 crashes in the U.S. A warped rotor alone can increase your stopping distance from 60 mph by 10-15 feet—a gap that could easily be the difference between a near-miss and a collision.
Regular inspection of brake rotors is crucial to prevent catastrophic events such as severe and dangerous consequences that can arise from failed brake truck wrecks.
Understanding how the pads and rotors work together is essential. For a more detailed breakdown, our article explaining the difference between brake pads and rotors is a great place to start. Learning to inspect your rotors gives you the power to catch these problems early, ensuring your car is ready to stop when you need it most.
Setting Up for a Safe and Successful Inspection

Before a single lug nut comes off, let's talk about the most critical part of any brake job: creating a safe workspace. This isn't a step you can rush or cut corners on; it's the foundation for getting the job done right and, more importantly, safely.
Always work on a flat, solid surface like a concrete garage floor or a level paved driveway. Trying to do this on a slope, or on soft ground like grass or gravel, is asking for trouble. The ground can shift, and that's the last thing you want when your car is in the air.
Your Essential Tool Checklist
Getting all your tools together before you start makes the whole process smoother and safer. There’s nothing worse than being halfway through a job and realizing you're missing something crucial. Here’s what you’ll want to have within arm's reach.
- Hydraulic Jack: A good floor jack is far more stable and user-friendly than the scissor jack that came with your car.
- Jack Stands (at least two): This is your most important piece of safety equipment. A jack can fail, but jack stands are built to hold the vehicle's weight securely.
- Wheel Chocks: These simple but vital tools will keep the car from rolling while you’re jacking it up.
- Lug Wrench or Breaker Bar: You'll need this to get the lug nuts off. A breaker bar with the right socket gives you much better leverage.
- Torque Wrench: This is non-negotiable for reassembly. It ensures you tighten the lug nuts to the exact manufacturer spec.
- Safety Glasses and Gloves: Brakes create a lot of dust, and metal edges can be sharp. Protect yourself.
Think of the torque wrench as your final quality check. Overtightening lug nuts can actually warp a brand-new rotor, and under-tightening them could lead to a wheel coming loose. Both are bad news.
Safely Lifting and Securing Your Vehicle
Knowing how to lift a car correctly is a core skill for any DIY mechanic. First things first: check your owner’s manual to find the vehicle’s specific jack points. Using the wrong spot can cause serious damage to the frame.
Before you lift anything, firmly place wheel chocks behind the wheels at the opposite end of the car. If you're starting with the front brakes, chock the rear wheels. It’s an extra layer of security you don’t want to skip.
With the chocks in place, position the jack under the correct lift point and raise the vehicle until the tire is a few inches clear of the ground. Now, slide a jack stand right next to the jack, placing it under a solid part of the frame. Slowly lower the jack until the car’s full weight is resting on the stand.
Never, under any circumstances, get under a vehicle that is supported only by a jack. Hydraulic jacks are lifting devices, not holding devices, and they can and do fail without warning. Always use jack stands.
Once the car is securely supported by the stand, you can go ahead and remove the lug nuts and pull off the wheel. Taking this methodical, safety-first approach means you can move on to the inspection with confidence.
What to Look for During a Visual Rotor Check
Once your car is safely jacked up and the wheel is off, you’ve got a direct line of sight to the brake rotor. This is where the real detective work begins. The surface of that rotor tells a story about your braking system's health, and it’s full of visual clues that can tell you exactly what’s going on.
A healthy brake rotor should look smooth and relatively even, with a bit of a sheen to it. You might see some faint, circular lines where the pads make contact—that's totally normal. What you’re looking for is anything that stands out from that clean, uniform surface.
Identifying Surface Grooves and Scoring
The first thing I always do is check for scoring. These are noticeable grooves or deep scratches cut into the rotor's surface. Just run your fingertips gently across the rotor, from the inside hub toward the outer edge. Do you feel any deep ridges or valleys?
Minor lines are one thing, but if you feel a groove deep enough to catch your fingernail, that’s a problem. Scoring is usually caused by road debris getting stuck between the pad and rotor. It can also be a tell-tale sign that the brake pads have worn all the way down to the metal backing plate, creating that awful metal-on-metal grind.
Think of it this way: deep grooves reduce the flat surface area your brake pads have to grab onto, which directly hurts your stopping power.
Checking for Discoloration and Heat Damage
Next, take a close look at the rotor's color. A thin layer of surface rust is perfectly normal, especially if the car has been sitting in damp weather—it'll wipe right off the first time you brake. You're looking for permanent discoloration that signals a deeper issue.
- Heat Spots: Keep an eye out for distinct bluish or purplish patches. These are classic signs of overheating, meaning the rotor has gotten far hotter than its normal operating range. This can be caused by aggressive driving, towing a heavy load, or a brake caliper that's sticking and not releasing its grip.
- Glazing: Does the rotor have a super shiny, almost mirror-like finish? That’s called glazing. It happens when extreme heat causes the brake pad material to melt and crystallize on the rotor, creating a hardened, ultra-smooth surface that kills friction. You can learn more about how this impacts your safety by reading our detailed guide on glazed brake rotors.
Heat damage is especially dangerous because it often leads to a warped rotor. A warped rotor will make your brake pedal and steering wheel pulsate or vibrate when you brake, as the pads try to squeeze an uneven, wobbling surface.
Searching for Cracks and Edge Lips
The last and most important part of your visual check is looking for any signs of structural failure. Scan the entire rotor surface very carefully for cracks. They can start as tiny hairline fractures but can grow into much larger, obvious splits.
Any crack, no matter how small, means the rotor is compromised and must be replaced immediately.
Finally, run your finger along the very top and bottom edges of the rotor's contact surface. Do you feel a raised ridge or a "lip"? This lip builds up over thousands of miles as the brake pads wear down the center portion of the rotor. A significant lip is a clear indicator of heavy wear.
This isn't just a cosmetic flaw. Brake problems are a huge safety issue. AAA estimates that around 12 million brake repairs happen each year in the U.S., and rotors fail in 35% of those cases due to this kind of wear. An edge lip over 0.015 inches (0.4 mm) can cause vibration and a 15-20% loss in braking power during hard stops.
This quick visual check is your first line of defense in diagnosing rotor issues. What you see—the grooves, colors, and cracks—has a direct impact on how your car stops and stays safe on the road.
Taking Accurate Rotor Thickness and Runout Measurements
A good visual once-over is a great start, but to really know what's going on with your brake rotors, you have to break out the measuring tools. This is where we move from a simple inspection to a proper diagnosis.
Think of it this way: a visual check might spot a symptom, but precise measurements tell you the full story. This is the data that separates a rotor that's safe to keep on the road from one that's a serious liability.
Measuring Brake Rotor Thickness
This is easily the most critical measurement you'll take. Every brake rotor has a minimum thickness specification stamped right on it—look for "MIN TH" followed by a number in millimeters. This isn't a suggestion; it's a hard safety limit. A rotor that's too thin can't handle heat properly, which dramatically increases the risk of it cracking or failing completely under pressure.
To get an accurate number, you'll need a digital caliper or, even better, a brake rotor micrometer. The micrometer is the pro's choice because it's designed to measure past the slight lip that forms on the rotor's edge, giving you a truer reading of the pad contact surface.
Here’s how to get a reliable measurement:
- Clean the Rotor Surface: First, give the rotor a quick scrub with a wire brush. Any rust or caked-on brake dust can throw off your reading.
- Measure in Several Spots: Don't just measure once. Take readings at a few different points around the rotor, like you're checking the 12, 3, 6, and 9 o'clock positions on a clock face.
- Check Inner, Middle, and Outer Areas: At each of those spots, measure near the inside, middle, and outside of the path where the brake pad makes contact.
This simple flowchart helps visualize those initial checks you should perform before you even grab a measuring tool.
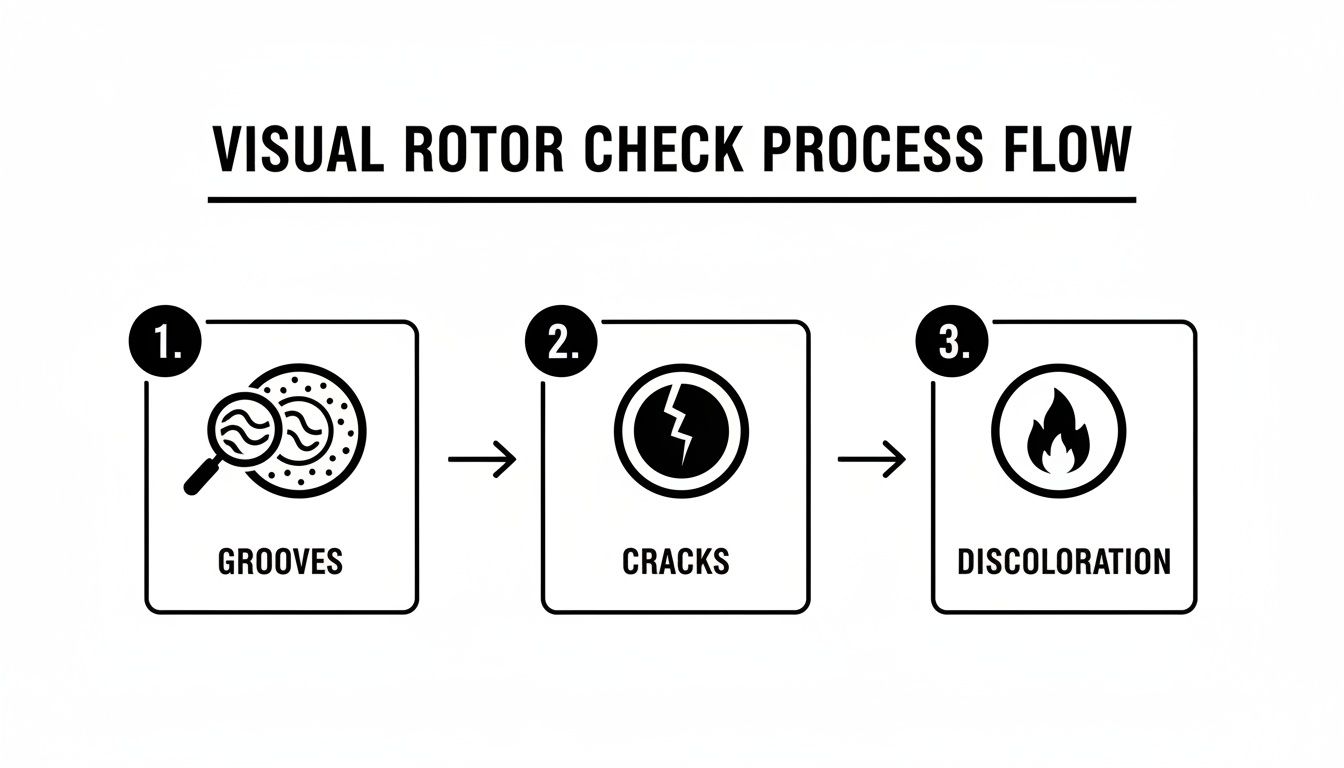
Once you've cleared the visual inspection for major flaws, you can confidently move on to measuring.
Find the lowest number you recorded and compare it to that "MIN TH" spec. If your measurement is at or below that number, the rotor must be replaced. No exceptions.
Checking for Lateral Runout or Warping
Ever feel a pulsing or shuddering in the brake pedal, especially when stopping from a higher speed? That's almost always a sign of excessive lateral runout, which is just the technical term for a warped rotor.
It means the surface of the rotor isn't perfectly flat anymore. As it spins, it wobbles side-to-side, and you feel that wobble through the brake pedal. We're talking about incredibly small deviations here—far too small to see with the naked eye. The right tool for this job is a dial indicator with a magnetic base.
The acceptable tolerance for lateral runout is incredibly small—often just 0.002 inches (0.05 mm) or less. For a little perspective, the average human hair is about 0.003 inches thick. Anything more than that tiny margin will cause a noticeable vibration.
Getting the dial indicator set up correctly is key:
- Mount the Base: Secure the magnetic base to something solid and unmoving, like the steering knuckle.
- Position the Plunger: The tip of the dial indicator's plunger should rest on the rotor face, about a half-inch in from the outer edge.
- Zero the Dial: Gently push the plunger against the rotor to "preload" it, then turn the dial's face until the needle is pointing to zero.
- Rotate and Read: Turn the rotor one full, slow rotation by hand. Watch the needle's movement. The total distance it sweeps from the lowest to the highest reading is your runout measurement.
If that number is higher than the manufacturer's spec, the rotor is warped. At this point, you have two choices: get it resurfaced if there's enough thickness left, or replace it entirely to get back that smooth, safe stopping power.
To help you keep these measurements straight, here's a quick guide to what they are, the tools you need, and what the readings are telling you.
Brake Rotor Measurement Guide
This table breaks down the two most important measurements for rotor health.
| Measurement | Tool Required | Typical Safe Tolerance | What an Out-of-Spec Reading Means |
|---|---|---|---|
| Rotor Thickness | Digital Caliper or Micrometer | Above the "MIN TH" stamped on the rotor | The rotor is too thin to safely dissipate heat and must be replaced. |
| Lateral Runout | Dial Indicator with Magnetic Base | Typically less than 0.002 inches (0.05 mm) | The rotor is warped, causing vibration, and needs to be resurfaced or replaced. |
Using the right tools for these checks takes all the guesswork out of the equation. It provides clear, factual data that lets you make the right call on whether to resurface or replace your rotors for a safe and effective brake job.
Making the Call: Resurface or Replace Your Rotors
Alright, you’ve done the inspection and have your measurements. Now comes the moment of truth, the question every mechanic and DIYer faces: do you resurface these rotors or just replace them? This isn't just about saving a few bucks; it's a critical decision that directly impacts your ability to stop safely.
I often tell people to think of a brake rotor like a thick block of ice. When it's new, it has plenty of mass to soak up heat from braking and cool down effectively. But as it wears down and gets thinner, it loses that ability. A thin rotor just can't handle the heat, which is why it's more likely to warp or even crack under pressure. Your measurements tell you exactly how much "ice" you have left to work with.
When Resurfacing Makes Sense
Resurfacing, sometimes called machining or "turning" a rotor, shaves off a paper-thin layer of metal from the surface. The goal is to create a perfectly smooth, flat finish, getting rid of light grooves, glazing, and minor warping. It essentially gives your new brake pads a fresh slate to grip onto.
Resurfacing can be a fantastic, cost-effective option, but only if the rotors are in the right condition. Here’s what we look for:
- Plenty of Thickness: The rotor has to be well above the minimum thickness spec stamped on it. A technician will always measure first to ensure there's enough material to machine away while still staying safely above that "discard" limit.
- Only Minor Flaws: The problems have to be skin-deep. We're talking about light scoring you can barely feel, minor glazing, or a slight wobble (runout) that's easily correctable.
- No Structural Damage: This is a big one. The rotor must be completely free of cracks, hard spots from extreme heat, or any other signs that its integrity is compromised.
For example, say a rotor has some light grooves but currently measures 24.5 mm thick, and its minimum thickness is 22 mm. In a case like that, resurfacing is almost always a solid, safe choice.
When Replacement Is the Only Safe Option
While machining a rotor can breathe new life into it, it's not a magic bullet. Many modern cars come with thinner, lighter rotors from the factory to save weight, and they're often considered non-serviceable. For these, and for any rotor with significant damage, replacement is the only responsible move.
You absolutely have to replace your rotors if you find any of these red flags:
- At or Below Minimum Thickness: If your caliper or micrometer shows the rotor is at or below its "MIN TH" spec, its life is over. There's no safe amount of metal left to remove.
- Severe Warping: If your dial indicator showed a runout way past the usual 0.002-inch tolerance, machining it flat might require removing too much metal, making it unsafe.
- Deep Grooves or Scoring: If you can easily catch your fingernail in a groove, it's probably too deep to be safely machined away.
- Any Cracks, Period: This is non-negotiable. A cracked rotor is a major safety hazard that could fail completely. It must be replaced immediately.
A critical factor to consider is stopping distance. A rotor with parallelism out of spec by as little as 0.002 inches can increase braking distance from 70 mph by 8-12 feet.
Damage like this often points to other problems, too. For instance, glazing happens when rotor temperatures exceed 600°F, which can slash stopping power by 15%. While resurfacing can fix grooves less than 0.030 inches, you also have to find out why they happened—a sticking caliper is a common culprit. With data showing that vehicles with properly inspected brakes have 27% fewer crashes, making the right call is vital. You can learn more about how brake system integrity impacts road safety from automotive market reports.
Ultimately, the choice comes down to safety and simple logic. Resurfacing can save a viable part, but replacement gives you a brand-new component engineered to perform perfectly from day one. If there's any doubt in your mind, replacing the rotors is always the smarter, safer bet.
When you bring your vehicle to Kwik Kar, our ASE-certified technicians will give you an expert, honest assessment. We’ll show you the measurements and help you make the most informed decision for your car and your peace of mind.
When to Trust a Professional With Your Brakes
There’s a lot of satisfaction in doing your own vehicle maintenance, but the smartest DIYers know their limits. While inspecting your brake rotors is a great skill to have, some symptoms are clear signals that it’s time to hand the keys over to a certified technician. Your safety is one thing you can't compromise on.
Sometimes, the problem isn't the rotor at all. You might finish your inspection, find a perfectly smooth and thick rotor, and still be left scratching your head about that weird noise or vibration. This is exactly when a professional diagnosis is crucial, because the issue could be hiding somewhere else in the braking system.
Red Flags That Point to a Deeper Problem
Certain warning signs are more than just a hint—they’re a clear indication that the problem goes beyond a simple rotor swap. If you experience any of these, it's best to schedule a service appointment right away.
- A Spongy or Soft Brake Pedal: This is a classic symptom of a hydraulic issue. It could be air in the brake lines or even a failing master cylinder, both of which require specialized knowledge and tools to fix correctly.
- A Sticking Brake Caliper: Ever notice a burning smell from one wheel after a drive, or is one wheel hub way hotter than the others? That’s a tell-tale sign of a seized caliper. It’s forcing the brake pad against the rotor constantly, which can destroy both parts in a hurry.
- An Activated ABS Light: Your anti-lock braking system is a complex safety feature. When that light comes on, it means the system's computer has detected a fault. Only a professional with a diagnostic scanner can read the error codes and figure out what’s wrong.
Bringing your car to a professional team gives you peace of mind that the job is done right. Technicians have access to precision equipment like on-car brake lathes and advanced scanners that go beyond just treating the symptom—they fix the root cause.
A professional inspection is also the perfect second opinion, especially if your own check leaves you with more questions than answers. For example, if you're trying to diagnose a front-end shake when braking, an expert can quickly tell if it's a warped rotor or something more complex like a worn suspension component.
At Kwik Kar, our ASE-certified technicians have the experience and equipment to get to the bottom of any brake issue. We can confirm what you found, spot underlying problems you might have missed, and get the repair done to the highest safety standards. When you need an expert you can trust, don't hesitate to reach out.
Got Questions About Brake Rotors? We Have Answers
Even after a thorough inspection, you might still have a few questions about your brake rotors. That's perfectly normal—we're talking about your vehicle's single most important safety system, so getting it right is what matters most.
We've pulled together some of the most common questions our technicians hear to give you clear, straightforward advice.
How Often Should I Inspect My Rotors?
This is a big one. For a quick visual check, we recommend taking a look every time you rotate your tires. That’s typically every 5,000 to 7,500 miles.
A more hands-on inspection, where you’re actually measuring thickness and runout, should happen at least once a year. Of course, if you notice any strange noises, vibrations, or a spongy pedal, don't wait—check them immediately.
Can I Just Replace One Rotor?
We get this question a lot, usually from drivers looking to save a bit on repair costs. The answer, in no uncertain terms, is no. You should always replace brake components in pairs, meaning both front rotors or both rear rotors at the same time.
Why? Because replacing just one rotor creates an imbalance. The new rotor will have a different thickness and surface finish than the old one on the other side. This can cause your car to pull sharply to one side during braking, especially in an emergency stop. It also puts uneven stress on your new brake pads, causing them to wear out prematurely.
Expert Tip: For your safety and your vehicle's performance, always replace rotors and brake pads as a complete axle set. This ensures braking force is distributed evenly, giving you stable, predictable control when you need it most.
Are Performance Rotors Worth the Extra Cost?
You've probably seen them—rotors with holes drilled through them or slots cut into the surface. They definitely look impressive, but are they right for your daily driver?
Those high-performance rotors are specifically engineered to vent the extreme heat generated during aggressive driving, like what you’d see on a racetrack or when towing a heavy trailer down a mountain. For the stop-and-go traffic most of us deal with every day, they're usually overkill.
For the vast majority of drivers, a set of high-quality, solid "blank" rotors provides the quiet, dependable stopping power you need. The best choice really comes down to how you use your vehicle.
If your inspection turned up something you're not comfortable handling, or if you just want a professional opinion, the expert team at Kwik Kar Oil Change and Auto Care is ready to help. We provide professional brake inspections and services to make sure your vehicle is safe for the road ahead.
You can schedule your appointment by visiting us at https://www.kkrichardson.com.