To check your car battery's health with a multimeter, you'll need to test its voltage in three different states. First, turn the dial on your multimeter to 20V DC. With the car off, connect the red probe to the positive (+) terminal and the black probe to the negative (-) terminal. A healthy, fully charged battery should give you a reading of at least 12.6 volts. This quick test is your first snapshot of the battery's basic charge.
Understanding Your Car Battery's Vital Signs
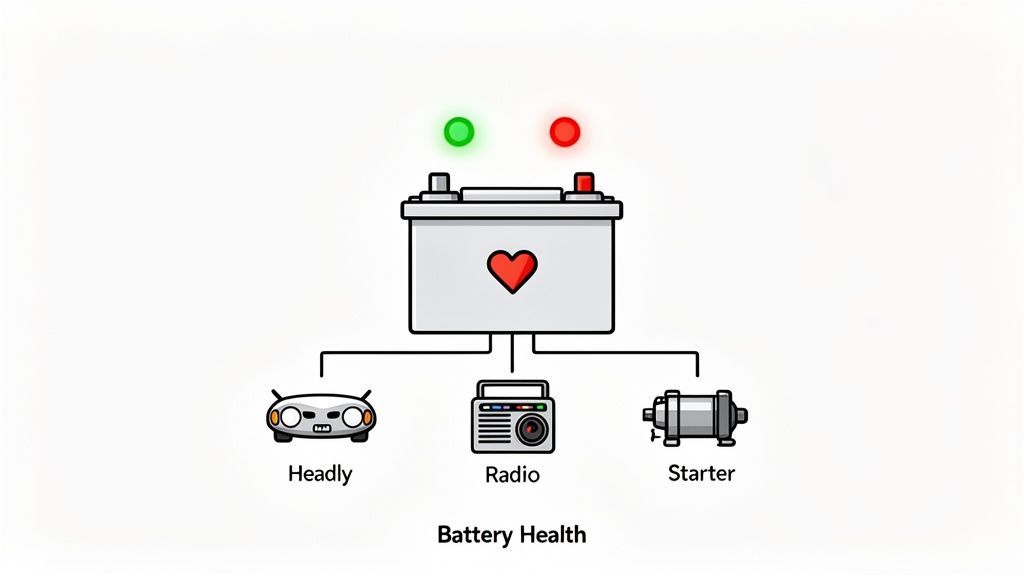
Before you even pop the hood, it helps to appreciate what your car battery is really doing. It’s more than just a box that fires up your engine; it's the stable, beating heart of your vehicle's entire electrical system. It powers everything from your radio to your headlights, and—maybe most importantly—it shields your car's sensitive computers from damaging power surges. Letting its health slide is a surefire way to get stranded, usually when you can least afford the hassle.
This is exactly why a simple multimeter is one of the most powerful tools in a car owner's garage. Think of it as a stethoscope for your car's electrical system, letting you get straight to the facts and skip the guesswork. Instead of waiting for that dreaded click-click-click of a dead battery, you can proactively check its condition and learn what the voltage is really telling you.
Why Voltage Matters More Than You Think
Voltage is the single best indicator of your battery’s state of charge and its overall health. A fully charged battery doesn’t just mean the engine will turn over. It means it has enough juice to handle the electrical demands of all your car's systems at once. A weak battery, on the other hand, can trigger a whole host of bizarre and seemingly unrelated electronic glitches.
To make sense of the numbers you see on your multimeter, you first need to understand what VDC means. This stands for Volts of Direct Current, which is the type of power your battery stores and supplies. Getting comfortable with these VDC readings is the first real step to becoming your own battery expert, saving you from the stress and expense of an unexpected failure.
A battery can seem perfectly fine one day and give up the ghost the next, so knowing its typical lifespan provides some much-needed context. For more on that, you can check out our guide on how long a car battery should last.
The growing complexity of modern cars is a huge reason why tools like multimeters are no longer just for the pros. The global market for digital multimeters was valued at over USD 1.18 billion and is expected to climb, driven in large part by the needs of the automotive world. It just goes to show how important these simple diagnostic tools have become for everyday car care.
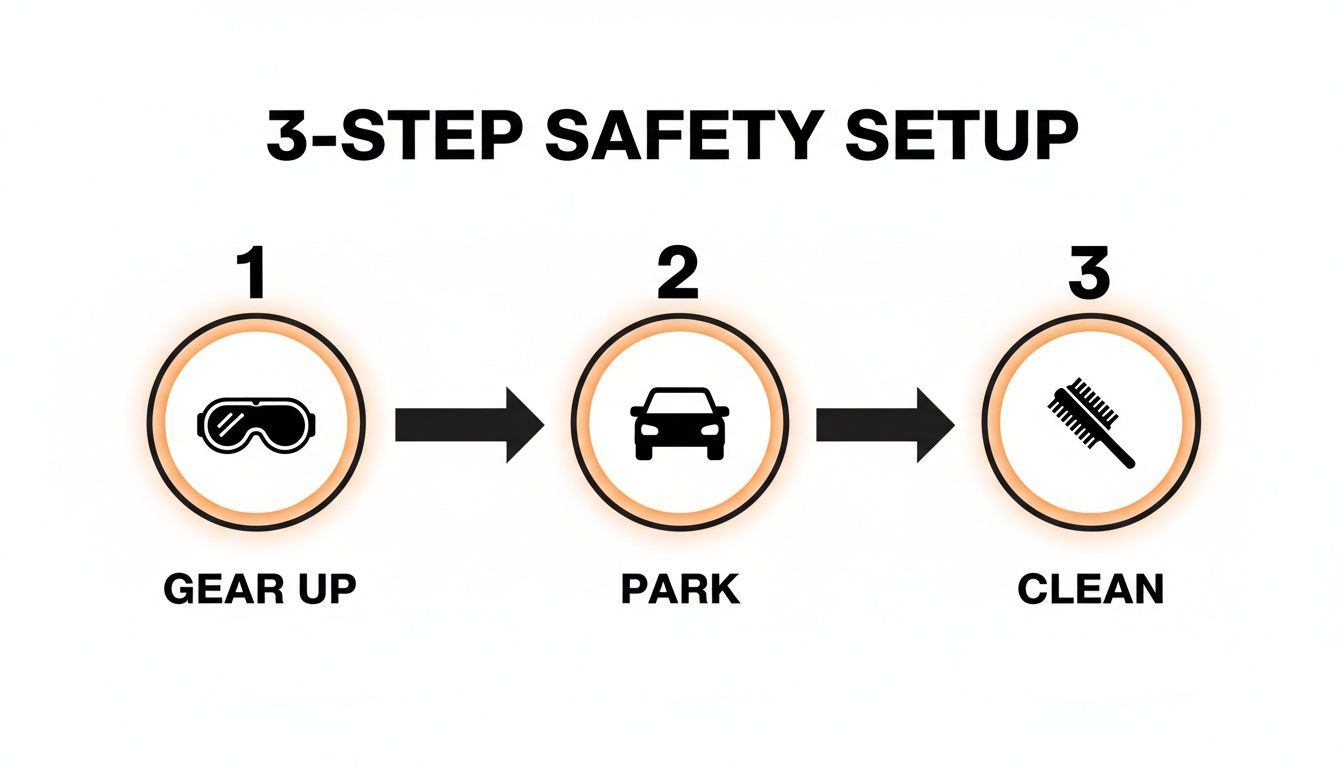
Before you even think about connecting a multimeter, let's talk prep. Taking just a few minutes here is honestly the most important part of getting a real, accurate battery test. It's like setting the stage for a proper diagnosis—rush this, and you’ll either get misleading results or, worse, create a dangerous situation.
First things first: gear up. You'll need three key items: a digital multimeter, safety glasses, and a pair of insulated gloves. Car batteries have sulfuric acid inside and can give off flammable hydrogen gas. Protecting your eyes and hands from potential sparks or corrosive gunk is non-negotiable.
Creating a Safe Workspace
Find a good spot to work. Park your car on a flat, level surface, ideally somewhere with good airflow like an open garage or your driveway.
- Kill the Power: Make sure the engine is completely off. But don't stop there—turn off every single accessory. Headlights, radio, interior lights, A/C, all of it.
- Keys Out: Pull the keys from the ignition. This ensures nothing can accidentally turn on and start drawing power.
Doing this gets rid of any active electrical loads, which is the only way to measure the battery's true resting state. Even a tiny dome light can throw off your multimeter reading just enough to confuse the issue.
A classic mistake is testing a battery right after a drive. The alternator gives it a "surface charge," which makes the voltage look higher than it really is. This can easily hide a problem. For a truly accurate reading, let the car sit for a few hours, or even better, overnight.
Prepare the Battery Terminals
With your safety gear on, pop the hood and find the battery. You'll see the two terminals: one marked positive (+) and the other negative (-). More often than not, you'll also see some fuzzy, whitish-green buildup caked around them.
That corrosion is an insulator, and it will absolutely prevent your multimeter probes from getting a clean connection. You've got to get it off. Use a wire brush or a special terminal cleaning tool to scrub the posts and the clamps until you see clean, shiny metal. A solid, clean connection is the final piece of the puzzle for learning how to test a battery with a multimeter the right way.
Taking Your Car's Electrical Pulse: The Three Must-Do Multimeter Tests
Alright, with your multimeter in hand and the battery terminals sparkling clean, it's time to find out what's really going on with your car's electrical system. We're not just looking for a simple "yes" or "no" answer. Instead, we'll run three specific checks to get the full story.
Think of it like a checkup. First, we'll take the battery's resting heart rate. Then, we'll see how it handles a bit of stress—starting the engine. Finally, we’ll make sure the alternator is doing its job to keep everything charged up. Each test reveals a different piece of the puzzle.
These checks show how the battery, starter, and alternator are all working together as a team. While we're focused on voltage here, a multimeter is a versatile tool. For example, knowing how to test continuity with a multimeter is another handy skill for tracking down broken wires or bad connections, but for now, let's stick to the battery.
Before you touch a single probe to a terminal, take a moment for safety.
This isn't just about ticking boxes. Gearing up, parking safely, and cleaning those terminals are non-negotiable first steps for getting an accurate and safe diagnosis.
Measuring Resting Voltage
First up is the Resting Voltage Test. This is the baseline, the fundamental health check of your battery. It tells you how much charge the battery is holding all on its own, with the car completely off.
For an accurate reading, your car needs to have been sitting off for at least a few hours. Overnight is even better. This lets any "surface charge" from your last drive fade away, which could otherwise give you a falsely optimistic number.
Here's how you do it:
- Turn the dial on your digital multimeter to 20V on the DC voltage setting. You'll usually see a V with a solid line and a dashed line next to it.
- Carefully connect the red probe to the positive (+) terminal on your battery.
- Then, connect the black probe to the negative (-) terminal.
The multimeter display should give you an instant reading.
So, what are you looking for? A healthy, fully charged 12-volt battery should read between 12.6 and 12.8 volts. If you see 12.2 volts, your battery is only at about a 50% charge. Anything below 12.0 volts means it's seriously discharged and might not have the juice to start your car.
Key Takeaway: A resting voltage below 12.4V is a red flag. It strongly suggests the battery is either on its way out or needs a good, long charge from a dedicated battery charger before you can rely on it.
Conducting the Cranking Voltage Test
Now for the stress test. The Cranking Voltage Test shows how well your battery holds up under the intense pressure of starting the engine. A weak battery might look okay at rest, but this is where it will show its true colors. You’ll probably want a helper for this one.
Have your multimeter somewhere you can see it from the driver's seat, or ask your helper to keep a close eye on the screen.
- Keep the Probes Connected: Leave the red and black probes on the battery terminals, just like in the first test.
- Crank the Engine: Have your helper turn the key and crank the engine for about 5-10 seconds.
- Watch the Voltage Drop: As the starter motor kicks in, the voltage will drop sharply. This is totally normal. The number you care about is the lowest voltage it hits during the crank.
A strong, healthy battery shouldn’t drop below 9.6 volts while cranking. If it dives below that number, the battery just doesn't have the cranking amps it needs to do its job reliably, especially when the weather gets cold. It's a sure sign that replacement is in your near future.
Checking the Charging System
Last but not least, the Charging System Test. This one isn't about the battery itself, but about the component that recharges it: the alternator. A brand-new battery won't last long if the alternator isn't pulling its weight.
With the engine running, keep the multimeter probes connected to the battery. The voltage reading should now be higher than your initial resting voltage because the alternator is actively sending a charge back to the battery.
At idle, you should see a voltage between 13.8 and 14.4 volts.
If your reading is below 13.5 volts, your alternator is likely struggling to produce enough power. On the flip side, if the voltage is creeping above 14.7 volts, the alternator is overcharging the battery, which can boil the electrolyte and cause long-term damage.
How to Interpret Your Multimeter Readings
You've got the numbers from your multimeter, which is great. Now it's time to figure out what they're actually telling you about your car's electrical system. These voltage readings tell a story, and learning to read them is the last step before you know exactly what to do next.
A simple voltage reading gives you more than just a pass or fail—it reveals the battery's true state of charge. This is way more useful than just knowing if the car will start right now. A battery might have enough juice to crank the engine today but could be just one cold morning away from leaving you stranded.
This ability for everyday people and pros to do on-the-spot diagnostics is a big deal. In fact, the market for battery testing equipment is expected to hit USD 864.02 million by 2031, with handy tools like multimeters leading the charge. This just goes to show how important reliable, easy-to-use diagnostic tools have become.
Decoding the Resting Voltage Test
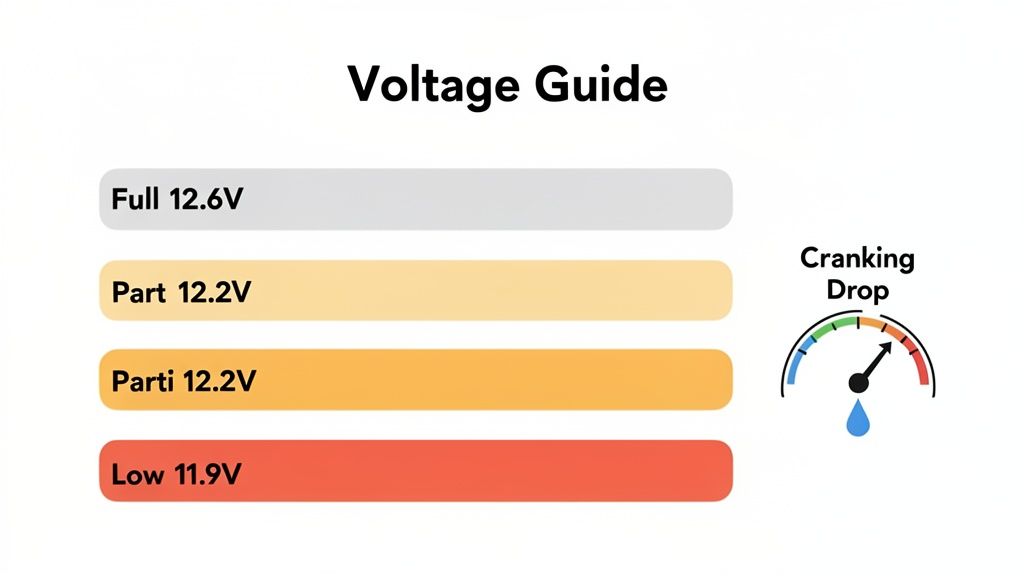
The resting voltage is your battery's baseline health score. After the car has been sitting for a few hours, this number shows you how well the battery is holding a charge on its own.
- 12.6V or Higher: This is the gold standard. Your battery is fully charged and in great shape.
- Around 12.4V: Your battery is about 75% charged. It’s still healthy but could probably use a good drive or a trickle charge.
- Around 12.2V: Now we're at a 50% state of charge. You might start to notice the engine cranking a little slower at this point.
- 12.0V or Below: The battery is considered discharged. It needs immediate charging and might not be reliable anymore.
To give you a clearer picture, here's a quick reference chart breaking down what those numbers mean.
Car Battery Voltage Chart
This table will help you quickly assess your battery's condition based on its resting voltage reading.
| Resting Voltage | State of Charge | Condition & Action Needed |
|---|---|---|
| 12.6V+ | 100% | Excellent. Your battery is fully charged and healthy. No action needed. |
| 12.4V | 75% | Good. The battery is in good condition but could benefit from a charge. |
| 12.2V | 50% | Fair. The battery is partially discharged. Monitor it closely and consider charging it soon. |
| 12.0V | 25% | Weak. The battery is significantly discharged and may struggle to start the engine. |
| 11.8V or less | 0% | Discharged/Dead. The battery needs immediate charging and may be failing. |
Think of this chart as your go-to guide for a quick diagnosis before digging deeper into other potential issues.
A healthy, happy battery should easily hold a charge above 12.4V. If you charge it up and it keeps settling below that number, that's a classic sign of an aging battery that's losing its ability to store energy.
Analyzing the Cranking Voltage Drop
The cranking test is the moment of truth for a weak battery. This is the biggest demand your electrical system will ever make, and it's where a struggling battery shows its true colors. A battery can read a perfect 12.6V at rest but then fall flat on its face under load.
The key number to watch is the lowest voltage you see while the engine is turning over. A healthy battery shouldn't drop below 9.6V during this test.
If your multimeter dips into the 8s or lower, the battery just doesn't have the cranking amps to do its job reliably, especially when it gets cold. This is one of the most definitive signs that you'll be shopping for a new battery very soon.
What the Charging System Test Tells You
Finally, this test checks your alternator, not the battery itself. A brand-new battery won't do you any good if the system responsible for recharging it is on the fritz.
With the engine running, your multimeter should show a steady voltage between 13.8V and 14.4V.
Here's how to read those results:
- Below 13.5V: Your alternator isn't generating enough power to charge the battery and run the car's electronics. This means your battery is actually being drained while you drive.
- Above 14.7V: This is a sign of overcharging. The alternator is pushing too much voltage, which can literally boil the electrolyte inside your battery and drastically shorten its life.
If your charging voltage is outside that sweet spot, the problem is most likely your alternator or voltage regulator. Before you rush out to buy a new battery, you should definitely investigate this further. You can learn more by checking out our guide on the common symptoms of a bad alternator.
Next Steps for Common Battery and Charging Issues
Sometimes, the results from your multimeter test aren’t a simple pass or fail. You might get numbers that seem fine, but your car is still giving you trouble. This is where you move beyond basic testing and into some real-world troubleshooting.
A common head-scratcher is a new battery that keeps dying. If your resting, cranking, and charging voltages all look perfect, you might be dealing with a parasitic draw. This is a sneaky electrical drain that slowly saps your battery’s power when the car is turned off. It’s often caused by a faulty component—like a glove box light that won’t shut off or a malfunctioning radio—that just keeps pulling a little bit of current.
When Good Readings Mask a Problem
Another tricky scenario is when the battery tests perfectly, yet your car still groans and struggles to turn over. A healthy 12.6V reading is a great sign, but it doesn't guarantee a flawless start-up. The issue might not be the battery itself but the components connected to it.
If your battery checks out but the car won’t start, look for these common culprits:
- Loose or Corroded Connections: Go back and double-check that your battery cables are tight and the terminals are perfectly clean. Even a little corrosion can create enough resistance to prevent the starter from getting the amperage it needs.
- Failing Starter Motor: The starter itself could be on its way out. It might be drawing way too much current, making even a healthy battery seem weak.
- Damaged Battery Cables: Take a close look at the entire length of the positive and negative cables. Fraying, cracks, or hidden corrosion can restrict the flow of electricity.
Pro Tip: If your battery voltage is solid but you hear a single, loud click when you turn the key, that's a classic symptom of a starter problem, not a battery issue. That click is the starter solenoid engaging, but the motor itself isn't turning over.
Knowing When to Call for Professional Help
While a multimeter is an incredible diagnostic tool, it has its limits. Some electrical problems require specialized equipment and years of expertise to track down safely and accurately. Trying to chase down complex electrical faults without the right training can easily lead to more problems.
It’s time to consult an ASE-certified technician at Kwik Kar if you run into these situations:
- Persistent Parasitic Draw: Finding the source of a hidden drain is like finding a needle in a haystack. Our pros have advanced tools to pinpoint exactly which circuit is causing the problem.
- Intermittent Starting Issues: If the problem comes and goes, it can be incredibly frustrating to diagnose. A professional can use advanced scanners to read fault codes and identify the root cause.
- Charging System Faults: If your alternator test results are off, a technician can confirm whether the alternator, voltage regulator, or wiring is to blame before you start replacing expensive parts.
The automotive service industry is constantly advancing to keep up with vehicle complexity. In fact, the global market for battery test equipment is valued at USD 1.2 billion and is projected to grow significantly. This investment in technology highlights why professional shops are better equipped to handle tough electrical mysteries. Discover more insights about the expanding battery test equipment market. Bringing your vehicle to a pro ensures you get a definitive and lasting fix.
Frequently Asked Questions About Battery Testing
Even with a step-by-step guide, real-world situations can throw you a curveball. Testing a car battery isn't always a perfect, by-the-book process. Let's tackle some of the most common questions that pop up once you've got the multimeter in your hand.
How Soon Can I Test My Battery After Driving?
This is a big one, and getting it wrong can completely throw off your results. You need to wait. A good rule of thumb is to let the car sit for at least four hours, but waiting overnight is even better.
Here’s why: right after you shut off the engine, the alternator leaves a temporary surface charge on the battery. This makes the voltage read artificially high, giving you a false sense of security. It might show a perfect 12.8V, but that’s not the battery's true resting state. A few hours later, that same weak battery could easily drop to a problematic 12.2V.
Does Outside Temperature Affect Battery Readings?
Absolutely. Cold weather is a battery's worst enemy. The chemical reactions that generate power slow down dramatically as the temperature drops, which directly impacts its voltage and cranking power.
For example, a fully charged battery showing a healthy 12.6V on a warm 80°F day might only read 12.4V at 32°F (0°C), even though it hasn't lost any of its actual charge. So, if you're testing in the cold, expect slightly lower numbers. The key thing to watch is the cranking test—a healthy battery should still stay above 9.6V when starting, even on a chilly morning.
A battery loses about 35% of its starting power at freezing and a staggering 60% when the temperature hits 0°F (-18°C). This is exactly why a battery that seemed fine all summer suddenly gives up the ghost on the first truly cold day of the year.
Can I Test a Battery That Is Still in the Car?
Yes, and you should! All the tests we've covered—resting, cranking, and charging—are specifically designed to be done while the battery is fully installed and connected.
In fact, you can't properly test the cranking and charging systems if the battery isn't in the car. The only time you'd really need to disconnect or remove it is if you're trying to track down a tricky parasitic drain or if you plan on using a standalone charger to bring it back to life. For a deeper look into battery maintenance, our guide on professional battery services offers additional insights.
If your tests point to a problem or you’d just rather have an expert take a look, don’t guess. The ASE-certified technicians at Kwik Kar Oil Change and Auto Care have the advanced diagnostic tools to pinpoint any electrical issue quickly and accurately. Stop by or schedule a visit at https://www.kkrichardson.com to make sure your vehicle is in the best hands.