Your car looks clean, rides smoothly, and starts without complaint. So what could possibly be wrong? Plenty. The gap between what a vehicle appears to be and what it actually is mechanically can be wide enough to create serious safety risks or costly surprises. That is exactly why understanding what is vehicle inspection checklist explained matters so much for any owner or buyer. A checklist is not just paperwork. It is a structured tool that reveals what your eyes alone cannot catch, from worn brake pads hiding behind clean wheels to fluid leaks lurking beneath the chassis. This article walks you through every dimension of vehicle inspection checklists: what they include, how to use them, and why they belong in every car owner’s regular routine.
Table of Contents
- Key takeaways
- What a vehicle inspection checklist actually is
- How to conduct a vehicle inspection step by step
- Why vehicles fail inspections and how to prepare
- Professional inspections vs. DIY checks
- Using checklists for ongoing maintenance and safety
- My honest take on vehicle inspection checklists
- Get your vehicle inspected by ASE-certified technicians
- FAQ
Key takeaways
| Point | Details |
|---|---|
| Checklists catch hidden problems | A car that looks and drives fine can still harbor safety-critical defects that only a structured inspection reveals. |
| Know what to include | A solid checklist for vehicle inspection covers brakes, tires, lighting, fluids, suspension, and emissions at minimum. |
| Documentation creates value | Recorded inspection findings support maintenance planning, resale value, and legal compliance over time. |
| DIY has real limits | Professional inspections cover 100 to 200 evaluation points that most owners cannot replicate without tools or training. |
| Routine checks prevent big bills | A brief weekly visual check focused on tires, fluids, and warning lights can prevent thousands of dollars in repairs. |
What a vehicle inspection checklist actually is
A vehicle inspection checklist is a formalized list of systems, components, and conditions that need to be evaluated to confirm a vehicle’s safety, functionality, and compliance with applicable regulations. Think of it as a diagnostic blueprint. Rather than relying on general impressions, a checklist forces you to examine each system in isolation and document its condition precisely.
The scope of a standard vehicle inspection depends on the type of inspection being performed. The most common types include:
- Safety inspections: These focus on the systems most directly tied to preventing accidents. Brakes, steering, tires, lighting, mirrors, windshield wipers, and seat belts all fall here.
- Emissions inspections: Required in many states, these check exhaust output and onboard diagnostic systems to verify the vehicle meets environmental standards.
- Pre-purchase inspections: Designed for buyers evaluating a used vehicle, these are the most thorough because the stakes are highest. Professional pre-purchase inspections typically cover 100 to 200 evaluation points and take one to two hours.
- Commercial vehicle inspections: Governed by the DOT and CVSA, these are the most regulated. A CVSA Level I inspection involves a 37-step procedure covering driver credentials and critical mechanical components, with compliance decals valid for only three months.
Checklist formats have evolved significantly. Paper checklists are still common, but digital inspection tools now allow photo and video evidence to be attached directly to each line item, making reports far more transparent and useful for customers and technicians alike. Whether paper or digital, the format is secondary to the discipline of completing every item.
How to conduct a vehicle inspection step by step
Using a checklist for vehicle inspection effectively requires a logical sequence. Jumping around between systems wastes time and creates gaps. Here is a proven order that professional inspectors use.
-
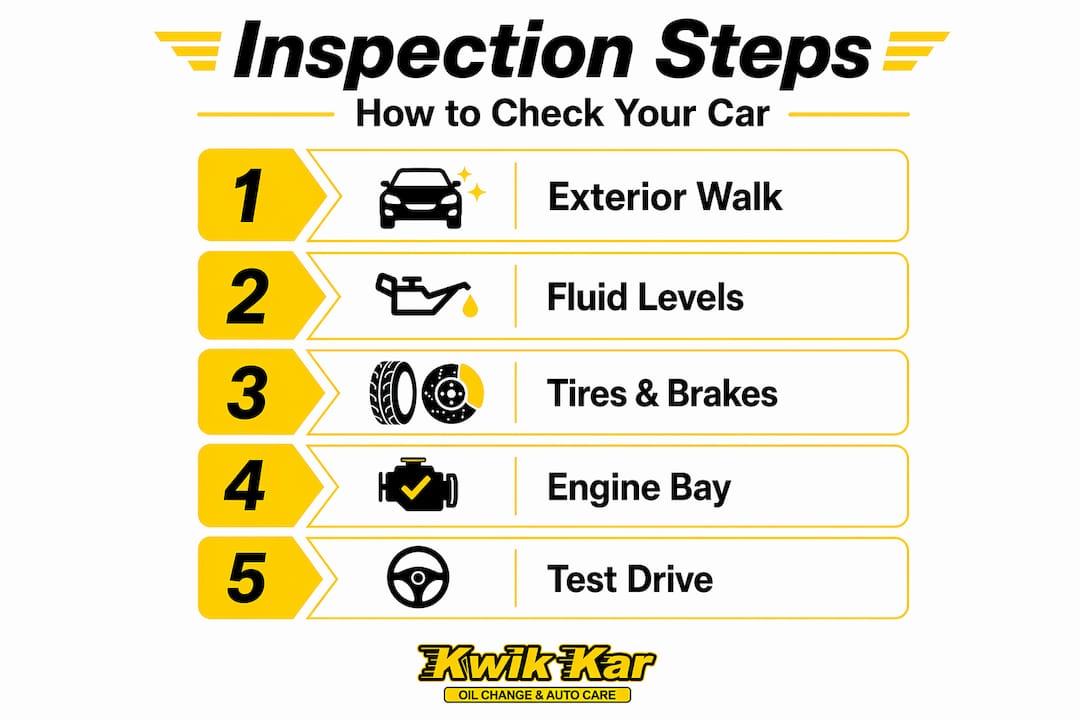
Start with the exterior and body. Walk around the entire vehicle in good lighting. Look for rust, dents, misaligned body panels, cracked glass, and paint inconsistencies that might suggest prior collision repair. Gaps between panels that are uneven can signal frame damage that was never properly corrected.
-
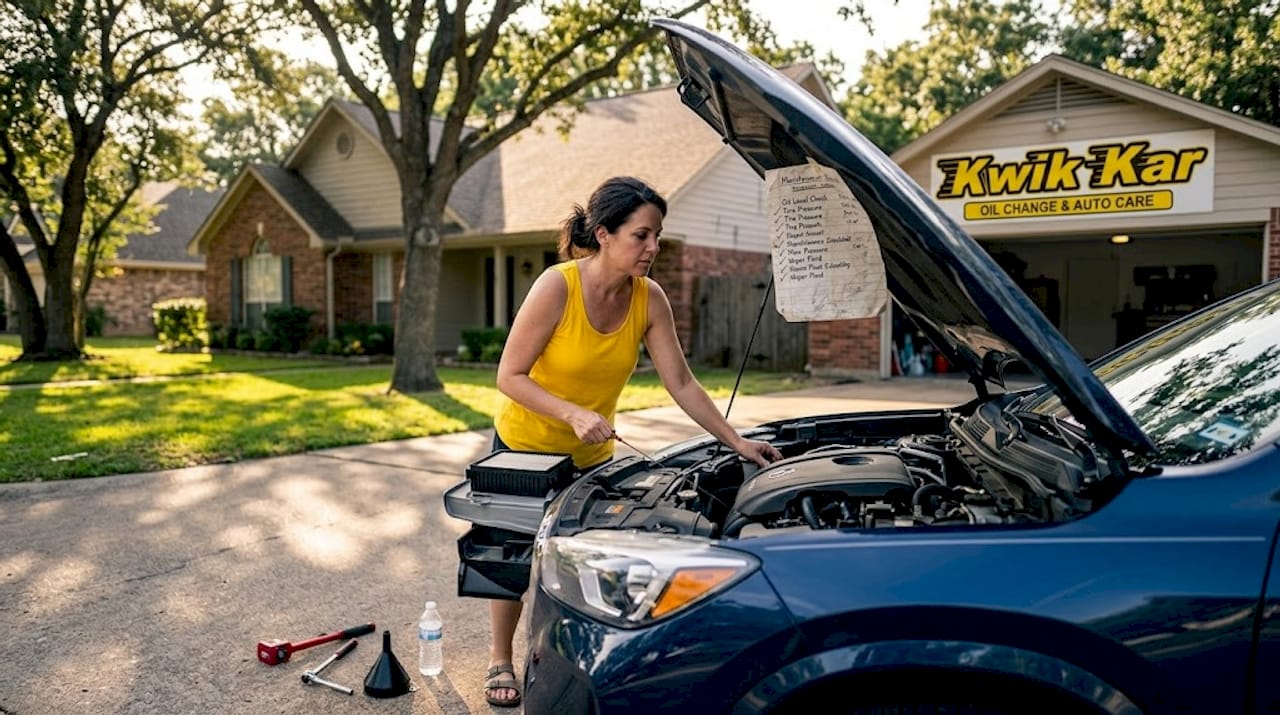
Open the hood and inspect under it. Check engine oil level and color (dark brown or black signals it is overdue), coolant level and concentration, brake fluid clarity, power steering fluid, and windshield washer fluid. Inspect belts for cracking or fraying and hoses for soft spots or swelling. A hose that collapses when you squeeze it is quietly failing you.
-
Get under the vehicle. Look at the frame for cracks or corrosion. Inspect the exhaust system for rust-through holes or loose hangers. Check the suspension components for worn bushings or damaged shock absorbers. Frame cracks and suspension wear are classified as critical violations in DOT inspections because structural failures can cascade rapidly into catastrophic loss of vehicle control.
-
Move to the interior. Test every electrical control: windows, locks, mirrors, climate controls, and hazard lights. Check that the horn works. Sit in each seat and inspect belts for cuts or retractor failure. Scan the instrument cluster for any warning lights that remain illuminated after startup.
-
Assess tires and brakes closely. Measure tread depth using a quarter. Insert it into the groove with Washington’s head pointing down. If you can see the top of his head, the tread is dangerously low. Check tire sidewalls for bulging or cracking. For brakes, listen for squealing during low-speed stops and feel for pulsation in the pedal, which can indicate warped rotors.
-
Conduct a road test. Drive the vehicle at varied speeds on both city streets and a brief highway stretch if possible. Listen for clunks over bumps, vibration at speed, pulling to one side under braking, and hesitation during acceleration. The road test exposes problems that no stationary check can reveal.
-
Document every finding immediately. Do not rely on memory. Note conditions as pass, requires monitoring, or needs immediate repair. This documentation is what transforms an inspection from a moment-in-time glance into a defensible maintenance record that supports future decisions.
Pro Tip: Many inspectors experience checklist fatigue on long lists, which leads to skipped items near the end. Keep your checklist focused on safety-critical items that are always completed rather than exhaustive lists that risk partial completion.
Why vehicles fail inspections and how to prepare
Understanding what typically causes inspection failures helps you address problems before they become official violations. The most common failure points are not exotic. They are routine maintenance items that were quietly neglected.
- Brake deficiencies: Worn pads, low fluid, or a spongy pedal are among the top reasons vehicles are rejected. Brake service is often straightforward but frequently delayed by owners who misjudge how much life remains.
- Tire tread or condition issues: Tires below legal tread depth or with sidewall damage fail automatically. Many owners do not realize that age alone can disqualify a tire even if tread depth appears acceptable.
- Lighting malfunctions: A burned-out headlight, tail light, or brake light will fail a safety inspection in virtually every state. These are the easiest problems to fix before your appointment.
- Check engine light: An illuminated check engine light almost always triggers a failure, even if the car seems to run fine. The light indicates an active fault code that must be diagnosed and resolved.
- Windshield damage: Cracks in the driver’s line of sight are automatic failures in most jurisdictions.
To prepare your vehicle ahead of time, do a thorough walkthrough using your routine maintenance checklist at least two weeks before the inspection date. That gives you time to address any issues without rushing. Know your state’s requirements: in states with mandatory annual inspections, safety inspections cost between $35 and $50, while combined safety and emissions inspections range from $70 to $95.
If your vehicle fails, you will receive a rejection notice specifying which items did not meet standards. Repair those items and schedule a retest. Many states offer a retest window, sometimes at no additional charge, within a specific time frame.
Pro Tip: Keep all your maintenance receipts and service records organized. Inspectors and mechanics alike rely on documented history to make better-informed decisions, and records of recent brake or tire work can provide crucial context.
Professional inspections vs. DIY checks
| Factor | DIY inspection | Professional inspection |
|---|---|---|
| Cost | Free to minimal | $100 to $200+ for pre-purchase |
| Time required | 20 to 45 minutes | 1 to 2 hours |
| Equipment needed | Basic tools, flashlight | Lifts, diagnostic scanners, specialty gauges |
| Depth of evaluation | Surface and visible systems | 100 to 200+ point evaluation |
| Documentation quality | Notes or photos | Formal report with photos and video |
| Best for | Routine monitoring | Pre-purchase, annual compliance, commercial use |
DIY inspections are genuinely valuable for ongoing awareness. If you check for early issues weekly, you will catch most developing problems before they become expensive repairs. But DIY has a hard ceiling. You cannot evaluate your own antilock brake system performance, run an OBD-II scan to read fault codes, or inspect critical suspension geometry without proper equipment.
Professional inspections are non-negotiable in certain situations. Before purchasing any used vehicle, a professional pre-purchase inspection is one of the most financially sound decisions you can make. Remember that VIN history reports alone cannot detect concealed structural or cosmetic damage that never made it into official records. Physical inspection fills that gap. For Texas owners specifically, understanding your state inspection requirements clarifies exactly what a licensed inspector is evaluating and why certain items carry automatic failure status.
Using checklists for ongoing maintenance and safety
The most underused application of a vehicle inspection guide is not the pre-purchase check or the annual state inspection. It is the routine, habitual use of a condensed checklist to monitor your vehicle between formal evaluations. This is where the real long-term value lives.
A practical weekly and monthly checklist habit might include:
- Weekly (10 minutes or less): Tire pressure and visible condition, fluid levels under the hood, operation of all exterior lights, and a scan of the dashboard for any new warning lights.
- Monthly: Brake pedal feel, wiper blade effectiveness, battery terminal condition, and a visual check of belts and hoses.
- Every 3 months or with each oil change: A full under-hood review, tire tread measurement, and inspection of all safety-related systems.
The importance of a vehicle inspection checklist goes beyond the moment of inspection itself. Structured records create an auditable history that supports smarter maintenance decisions and carries real weight when you sell the vehicle. A buyer presented with documented inspection records has a concrete reason to trust the asking price.
Regular use of checklists also keeps you aligned with both state and federal regulations without scrambling to catch up. Compliance is never a surprise when you are already tracking the systems that regulators care about most.
My honest take on vehicle inspection checklists
I have seen enough vehicles come through our bays at Kwik Kar Oil Change & Auto Care to say this with confidence: most owners dramatically underestimate what a structured inspection reveals. They bring in a car that “seems fine,” and within twenty minutes we have found a brake caliper seizing on one side, a coolant leak that has been slow-draining for weeks, or a tire with internal belt separation invisible from the outside.
What I have learned from years of this work is that disciplined diagnostics start with a systematic process, not intuition. A checklist removes the bias of familiarity. When you drive the same car every day, you stop noticing its gradual decline. A checklist forces you to look at it fresh.
I also want to be direct about vehicle history reports. They are useful starting points, but I have personally inspected vehicles with clean histories that had repaired structural damage, mismatched paint under door seals, and non-original VIN plates. Physical inspection finds what records do not reflect.
My advice: treat your checklist as a living document. Update it when your vehicle develops a quirk, note it when a repair is made, and review it before any long trip. The owners who avoid surprise breakdowns and expensive repair bills are almost always the ones who have made this a habit, not a reaction.
— Kwik Kar
Get your vehicle inspected by ASE-certified technicians
If working through a checklist has revealed concerns you are not equipped to diagnose or repair yourself, Kwik Kar Oil Change & Auto Care in Richardson, TX is ready to help. Our ASE-certified technicians perform thorough vehicle inspections with transparent reporting, so you know exactly what your car needs and why.
Whether you need a Texas state inspection, a brake evaluation, or full engine diagnostic service, we handle it with the same precision and honesty we apply to every vehicle. We are recognized by CARFAX and RepairPal, and we offer special discounts for military members and first responders. Explore our full range of auto repair and maintenance services and schedule your inspection today. Your car may look fine. Let us confirm that it actually is.
FAQ
What does a vehicle inspection checklist include?
A vehicle inspection checklist covers brakes, tires, lighting, steering, suspension, fluid levels, emissions systems, and interior safety features like seat belts and warning lights. The exact items vary depending on whether it is a safety, emissions, or pre-purchase inspection.
How long does a professional vehicle inspection take?
Professional vehicle inspections typically take one to two hours and cover 100 to 200 evaluation points, providing a detailed report with photos and documented findings.
Can I do a vehicle inspection myself?
You can perform a meaningful DIY check of visible systems like tires, lights, and fluid levels, but a professional inspection is needed for brake system diagnostics, OBD-II fault code reading, and undercarriage evaluation requiring a lift.
What are the most common reasons a vehicle fails inspection?
The top failure causes are worn brake components, tires below legal tread depth, burned-out lights, an illuminated check engine light, and windshield cracks in the driver’s line of sight.
How much does a vehicle inspection cost?
In states that require mandatory inspections, safety inspections typically cost between $35 and $50, while combined safety and emissions inspections range from $70 to $95 depending on the state.