US-75 traffic gives you plenty of chances to think about your brakes. You ease forward, stop hard at a light, roll again, then do it all over on the way to work, school pickup, or a run across Richardson. Most drivers pay attention to pads and rotors because they can hear them. Brake fluid is different. It operates without drawing attention until it doesn’t.
That matters because every press of the brake pedal depends on clean hydraulic fluid moving pressure through the system. If that fluid is contaminated, your pedal feel changes, braking confidence drops, and hidden damage can start inside parts you cannot see from the driver’s seat.
A lot of drivers ask about how to flush brake fluid when they notice a soft pedal or when they are catching up on maintenance. That is a fair question. The better question is what a flush can tell you besides whether the fluid is old. In the shop, a brake fluid service is not just a fluid exchange. Done properly, it is also a chance to watch flow, inspect components, and spot warning signs before they turn into a dragging brake, a sticking caliper, or a hose problem that strands the vehicle.
The Unsung Hero of Your Car's Safety System
Brake fluid sits low on most maintenance lists because you never see it working. Oil gets changed. Tires get rotated. Wiper blades squeak and demand attention. Brake fluid stays in the background.
That is why it gets overlooked in daily driving around Richardson. A family SUV that spends its week in school traffic and weekend errands may brake hundreds of times without the owner thinking once about the fluid transferring that pedal force to each wheel.
What the pedal is really doing
When you press the pedal, the master cylinder pushes brake fluid through lines and hoses to the calipers or wheel cylinders. That hydraulic pressure is what clamps the brakes and slows the vehicle. If the fluid is in good condition, the system feels firm and predictable.
If the fluid is contaminated or the system has internal problems, the symptoms can be subtle at first. The pedal may feel a little softer. The vehicle may not stop with the same confidence during repeated braking. Some owners describe it as the brakes feeling “off” without being able to explain why.
Why this service deserves more attention
A proper brake fluid flush does two jobs at once:
- It restores fluid condition so the hydraulic system can work the way it was designed to.
- It creates a diagnostic window where a technician can watch how fluid moves through each corner of the vehicle.
That second part gets missed in most online advice. In a service bay, fluid behavior tells a story. Uneven flow, dark contamination, or a restricted bleeder stream can point to issues that are still developing.
A brake fluid flush is one of those services that looks simple on paper but reveals a lot about the health of the whole brake system when you perform it carefully.
Drivers do not need to become brake engineers to make a good maintenance decision. They just need to know what the fluid does, why it degrades, and when a flush brake fluid service moves from “nice to do” to “needs attention.”
Why and When Your Brake Fluid Needs a Flush
A brake fluid flush is not just routine maintenance. It is one of the better chances to catch hydraulic problems before they turn into a bad pedal, uneven braking, or a more expensive repair.
Brake fluid changes because of chemistry. It is hygroscopic, which means it absorbs moisture over time. Even in a sealed system, small amounts of moisture enter through normal venting, seals, and hose material. That moisture lowers the fluid’s boiling point and starts corrosion inside parts you cannot inspect by sight.
What old brake fluid does inside the system
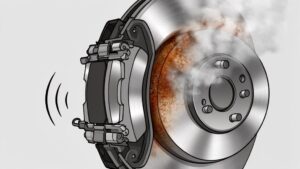
Heat is the main problem. Brakes create a lot of it, especially in traffic, on long downhill grades, or during repeated hard stops. If moisture-contaminated fluid gets hot enough to boil, vapor can form in the system. Unlike fluid, vapor compresses. That is how a firm pedal can start feeling soft or inconsistent.
Corrosion is the slower problem, but I see it just as often in the shop. Moisture can rust steel lines from the inside, pit caliper and wheel cylinder bores, and damage the fine internal passages in ABS hydraulic units. Fluid that looks dark in the reservoir does not always tell the whole story, but it often tells me the system deserves a closer inspection.
When to schedule a flush
A good starting point is the manufacturer’s maintenance schedule. If the owner’s manual is vague or says to inspect rather than replace, a practical rule is to service the fluid every few years, especially on a daily driver. Kwik Kar Richardson also outlines how often brake fluid should be flushed based on mileage, time, and driving conditions.
Earlier service makes sense for vehicles that tow, drive in hilly areas, sit for long periods, or see frequent stop-and-go use. Those conditions heat the brakes more and put more stress on the hydraulic side of the system.
The clues a flush can reveal
This is the part many articles miss. During a proper flush, a technician is not only replacing fluid. He is also watching how the system behaves at each wheel.
Restricted flow at one corner can point to an internally collapsed rubber brake hose. Old hoses sometimes fail inward first, where you cannot see it from the outside. The pedal may feel normal in the bay, but fluid does not release or move correctly under load. A sticky caliper, dragging brake, or pull complaint can start there.
A bleeder screw that barely passes fluid can also point to corrosion in the caliper, contamination in the line, or a problem upstream in the ABS hydraulic circuit. Uneven fluid color between wheels matters too. If one corner looks much worse than the others, that can help narrow down where debris, heat, or component wear is building up.
That diagnostic value is one reason I do not view a flush as a simple liquid exchange.
Signs your vehicle should be checked sooner
Drivers usually notice the change before they can describe it. The pedal may feel softer in morning traffic. The brakes may feel less consistent after several stops. A vehicle with aging fluid can also overlap with symptoms from other issues, so it helps to compare what you are feeling with these top car brake problems.
Watch for these clues:
- Soft or spongy pedal feel
- Brake response that changes as the vehicle warms up
- Dark or contaminated fluid in the reservoir
- Calipers that seem slow to release
- Brake work already being done, especially calipers, hoses, or a master cylinder
If pedal feel has changed and the fluid service history is unknown, inspection is the right call. On a brake system, small clues matter.
Your Toolkit for a DIY Brake Fluid Flush
A clean brake job starts before the first bleeder screw turns. Most DIY problems happen during setup, not during the actual bleeding cycle. Wrong fluid, poor vehicle support, a loose hose on the bleeder bottle, or brake fluid spilled on paint can turn a basic service into a headache.
What you need on hand
For a manual flush brake fluid job, gather the parts and tools before opening the reservoir.
- Correct brake fluid: Use the DOT specification listed on the reservoir cap or in the owner’s manual. Do not guess.
- Enough fluid for the vehicle: A small passenger vehicle often takes about a quart for a full exchange, but always keep extra on hand in case the process takes longer.
- Turkey baster or fluid extractor: Useful for removing most of the old fluid from the master cylinder reservoir before refilling.
- Clear plastic tubing: Lets you see fluid color and air bubbles at the bleeder.
- Catch bottle: Any clean bottle that keeps the hose submerged and controls mess.
- Proper wrench for bleeder screws: A snug fit matters. Rounded bleeders create unnecessary trouble.
- Jack and jack stands: If wheel access requires lifting the vehicle, support it correctly on a level surface.
- Wheel chocks: Prevent rolling while the vehicle is lifted or while someone is inside pumping the pedal.
- Shop towels and brake cleaner: Help manage spills and keep work areas clean.
If you are sorting through replacement items, material choices, or fitment options for an aging vehicle, a general overview of new aftermarket auto parts can help you think through sourcing before you start. For fluid specification basics, this DOT brake fluid overview is also useful.
Safety rules that are not optional
Wear nitrile gloves and safety glasses. Brake fluid is harsh on skin and eyes, and it damages painted surfaces quickly.
Work on a level surface with wheel chocks in place. If the vehicle moves while someone is under or beside it, the job has already gone wrong.
Preparation habits that save the job
A professional setup is about control.
Keep the brake fluid bottle sealed until you are ready to use it. Brake fluid absorbs moisture from the air, so an open bottle should not sit around longer than necessary. Protect painted panels around the master cylinder with towels because one careless drip can etch the finish.
If you are using a service option instead of doing it yourself, Kwik Kar Oil Change and Auto Care is one example of a shop that performs a brake flush using DOT 3 or DOT 4 fluid and inspects the brake system during the process.
The Manual Two-Person Brake Flushing Procedure
A manual flush works when the vehicle is set up correctly, the fluid is right, and both people understand the sequence. The job is simple in theory. In practice, most mistakes come from rushing, losing track of the reservoir level, or opening the bleeder at the wrong time.
Prepare the master cylinder first
Start with the vehicle parked on level ground and secured. Locate the master cylinder reservoir under the hood.
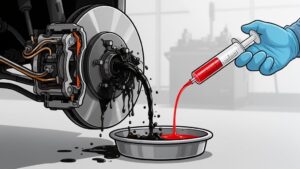
Remove about 80% of the old fluid from the reservoir with a turkey baster or extractor, then refill it to the max line with the correct new DOT 3 or DOT 4 fluid, as outlined in Brake Performance’s manual flush procedure. Do not empty the reservoir completely. Leaving some fluid in place helps avoid introducing air into the system from the start.
Brake fluid damages paint, so wipe spills immediately.
Follow the correct wheel sequence
Most passenger vehicles are bled from the wheel farthest from the master cylinder to the closest. A common sequence is:
- Right rear
- Left rear
- Right front
- Left front
That order helps move old fluid out of the longer hydraulic paths first and gives you a more complete exchange.
Set up the bleeder the right way
At the first wheel, place the clear tubing over the bleeder valve and route the other end into a catch bottle. Keep the hose end submerged in fluid inside the bottle if possible. That makes it easier to see air and reduces the chance of drawing it back.
Crack the bleeder loose first, then snug it back down before beginning the pedal cycle. That way you know it will open when needed.
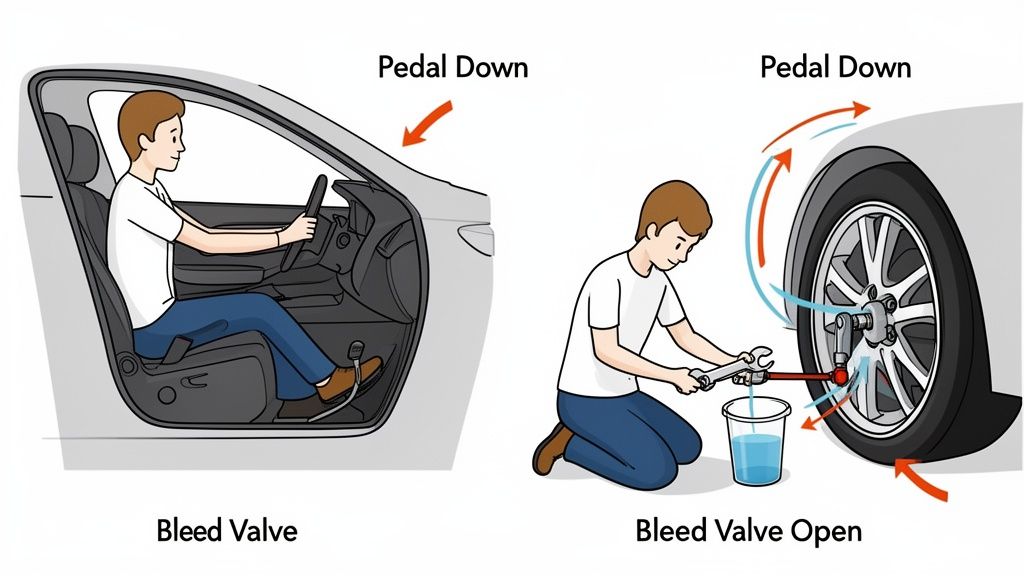
Use the pump and hold method exactly
The assistant inside the vehicle should pump the brake pedal 4-5 times until firm, then hold steady pressure, according to Brake Performance’s procedure. With the pedal held down, open the bleeder valve to release old fluid and any air, then close the valve before the pedal bottoms out.
Repeat that cycle until the old dark fluid changes to clean fluid. The exact number depends on line length, system condition, and how much old fluid remains in that branch.
Communication matters. The person at the wheel should say “open,” “down,” and “closed” clearly each cycle so the driver never releases the pedal with the bleeder still open.
Here is a visual walkthrough of the general process:
Watch the reservoir constantly
This is the part DIYers miss most often. Brake Performance notes that letting the master cylinder run dry happens in about 30% of amateur attempts, and when that happens the process has to be restarted because air enters the system.
Check the reservoir frequently and top it off before it gets low. A good habit is to inspect fluid level every few pump cycles rather than waiting until a wheel is finished.
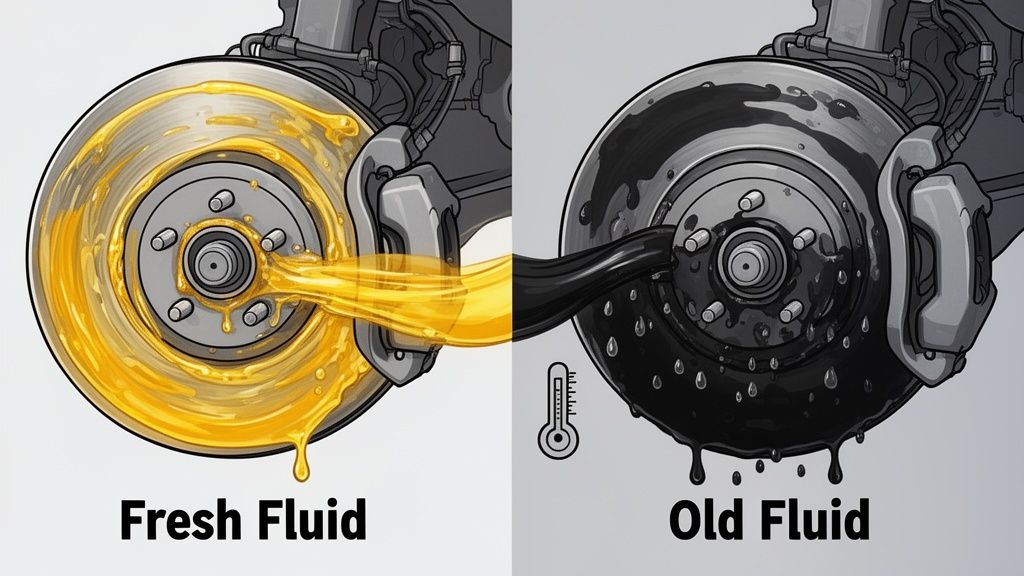
Read what the fluid is telling you
Color change is the obvious signal. Dark fluid moving to lighter, cleaner fluid tells you fresh fluid has reached that corner.
Flow behavior also matters. A steady stream is what you want. If one corner releases fluid much more slowly than the others, that can point to a restricted passage, a seized bleeder, or a brake hose issue that needs closer inspection. That diagnostic side is one reason a flush can reveal more than just old fluid.
Finish carefully, not quickly
After the last wheel, bring the reservoir to the proper level and tighten the cap. Wipe any spilled fluid off painted or coated surfaces.
Then check the pedal. It should feel firm, not sinking or springy. If the pedal still feels soft, air may still be trapped or the bleeding sequence may need to be repeated.
Before normal driving, do a controlled road test in a safe area. Confirm the vehicle stops straight, the pedal stays consistent, and there is no brake warning light.
What works and what usually does not
A manual flush works well when:
- Two people stay coordinated
- The wheel sequence is followed
- The reservoir never runs low
- The correct fluid is used
It tends to go badly when:
- One person improvises the sequence
- The pedal is released with the bleeder open
- Bleeder screws are forced or rounded
- The job is treated like a quick fluid swap instead of a hydraulic service
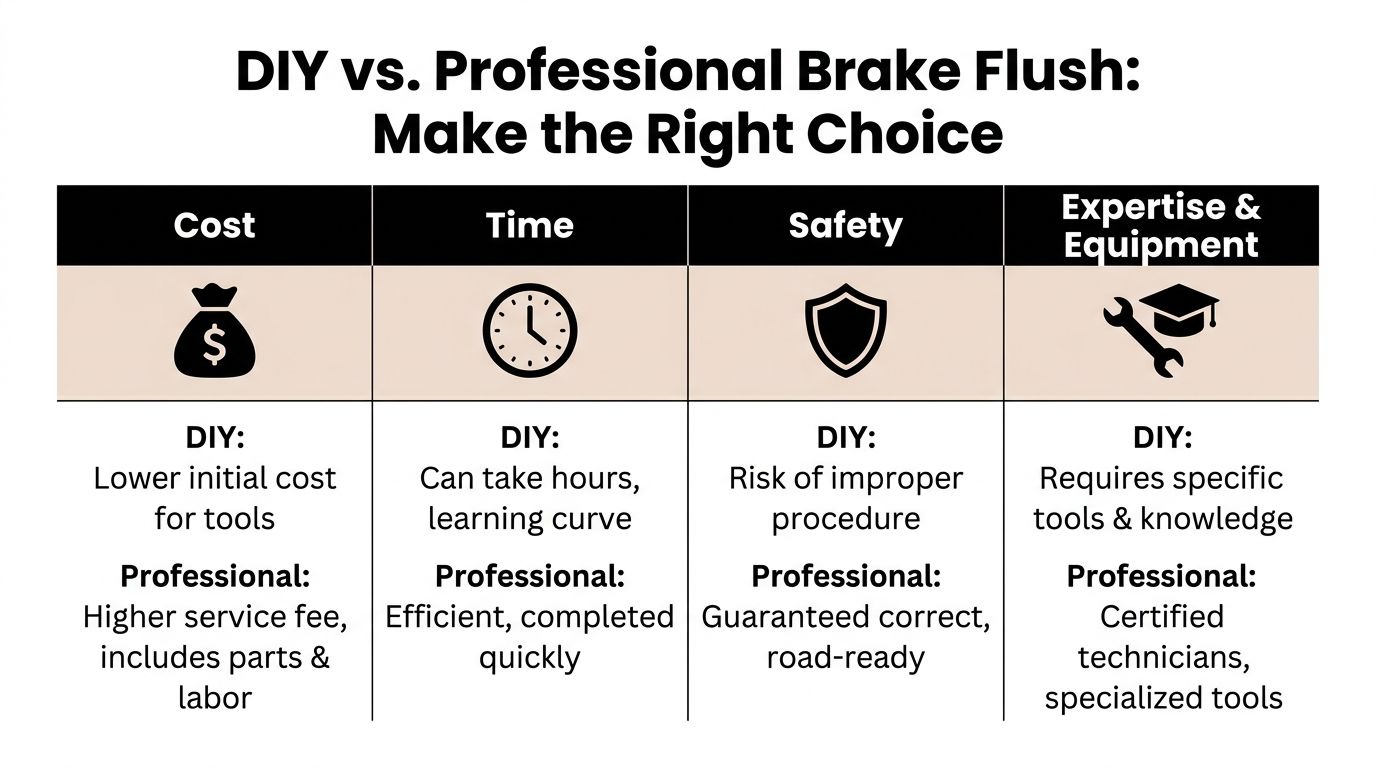
DIY Project vs Professional Kwik Kar Service
The choice between doing it yourself and having a shop perform the service comes down to more than labor. Time, completeness, equipment, and risk all matter.
A DIY flush can be reasonable for a hands-on owner who has the right tools, the right helper, and enough patience to follow the procedure exactly. Professional service makes more sense when the vehicle has an unknown maintenance history, a modern ABS system, seized hardware, or symptoms that suggest a deeper problem.
What the machines change
Professional flush machines maintain constant pressure at 15-20 psi and can achieve 99% contaminant removal in 15-20 minutes, according to Kenvo’s brake fluid change guide.
That is a 50% time reduction compared with a manual flush, which can take 45-60 minutes and usually achieves 85-90% fluid exchange, with a 20-30% redo rate due to air introduction, from the same source. Those are not minor differences. They affect consistency, especially on vehicles that are hard to bleed or are in regular service.
Side by side decision points
| Factor | DIY manual flush | Professional machine flush |
|---|---|---|
| Time | Slower, depends on setup and helper | Faster and more consistent |
| Fluid exchange | Good when done carefully, but less complete | More complete exchange |
| Air risk | Higher if reservoir runs low or timing is off | Lower because pressure stays constant |
| Diagnosis | Limited by experience and tool access | Better for spotting system issues during service |
When DIY still makes sense
DIY is a workable route if the vehicle is straightforward, the bleeders are in good shape, and you are comfortable checking your work. Some owners also prefer to inspect each corner personally while the wheels are off.
That said, saving labor only helps if the job is completed correctly. If air gets into the system, a bleeder breaks, or the pedal stays soft, the vehicle may still end up in a shop after extra time and extra mess.
When professional service earns its keep
Professional service is the better call when the brake pedal already feels questionable, the fluid has been neglected for a long time, or the vehicle is older and more likely to have rust, hose deterioration, or sticky bleeders.
The biggest advantage is control. Pressure or vacuum equipment keeps fluid moving steadily, tops the reservoir automatically, and reduces the chance of introducing air. In a busy shop, that also means the technician can focus more attention on what the system is doing instead of managing the pedal cycle.
If your goal is to exchange fluid, DIY can work. If your goal is to exchange fluid and catch hidden brake problems early, professional service usually gives you more information with less risk.
Your Trusted Brake Service Partner in Richardson
A brake fluid flush should do more than replace old fluid. It should answer a bigger question. Is the hydraulic system healthy all the way to each wheel?
That is where professional inspection adds real value. One of the most overlooked clues shows up during a slow gravity-based flush, where restricted flow can reveal failing internal brake hoses, according to AutoZone’s brake fluid flush discussion. That kind of hose degradation is common in vehicles over 5-7 years old, can cause brake drag or failure, and is linked to over 1,200 NHTSA-reported incidents annually in the US, from that same source.

Why that diagnostic angle matters
A collapsed hose can act like a one-way restriction. Pressure goes to the brake, but release is delayed. The driver may notice brake drag, uneven braking, or a vehicle that does not roll freely after stopping.
A basic fluid swap can miss that. Watching how fluid moves at each bleeder gives a technician another layer of information.
A practical fit for Richardson drivers
This matters for several kinds of local drivers:
- Families with aging vehicles: A flush can uncover issues before they affect daily reliability.
- Commuters in stop-and-go traffic: Consistent pedal feel matters when the brakes are used constantly.
- Fleet managers: Preventive brake inspection helps reduce downtime and surprise repairs.
- Military, first responders, and healthcare workers: Reliable service and clear estimates matter when schedules are already tight.
If you want a service that includes fluid replacement and a closer look at overall brake condition, this brake flush service page explains the process in more detail.
A good brake fluid service is not just maintenance. It is an inspection opportunity. That is especially important on high-mileage vehicles where internal hose problems and corrosion do not announce themselves clearly at first.
Frequently Asked Questions About Brake Fluid
What is the difference between a brake fluid flush and a brake bleed
A brake bleed removes trapped air from part of the system. That usually happens after a repair, a leak, or a soft pedal complaint.
A brake fluid flush replaces old fluid through the full hydraulic system. In the shop, that service can also show us how each wheel circuit is flowing. If one corner bleeds weakly or releases unevenly, that can point to a restricted hose, a sticking caliper, or corrosion in the line. That diagnostic value is one reason a flush is more than routine fluid replacement.
Can I mix DOT 3 and DOT 4 brake fluid
Use the fluid listed on the reservoir cap or in the owner’s manual. That is the safe starting point.
Some DOT 3 and DOT 4 fluids are chemically compatible, but compatibility is not the same as correct for your vehicle. Boiling point, ABS performance, and seal compatibility matter. If there is any doubt, match the manufacturer specification and keep the system on one fluid type.
How often should brake fluid be changed
A good rule is to service brake fluid on a regular schedule and verify the interval in the owner’s manual. Many vehicles end up in the every-two-to-three-year range, but the right answer depends on the vehicle, driving conditions, and service history.
Fluid condition matters just as much as the calendar. Brake fluid absorbs moisture over time. That lowers boiling resistance and supports internal corrosion. On older vehicles, a scheduled flush also gives a technician a chance to catch small hydraulic problems before they turn into a sticking brake or uneven braking complaint.
What color should brake fluid be
Fresh brake fluid is usually clear to light amber. Dark fluid means the system needs a closer look.
Color by itself does not tell the whole story. I have seen fluid that looked only slightly dark but tested poorly, and I have seen dark fluid in a system that still had another issue hiding underneath. During service, pedal feel, moisture content, fluid movement at the bleeders, and the condition of rubber parts all help paint a complete picture.
How much does a professional brake fluid flush cost
Cost depends on the vehicle, the fluid specification, and what condition the brake system is in when the car arrives. A straightforward flush on a well-maintained vehicle takes less time than one with seized bleeder screws, contamination, or signs of hose restriction.
That inspection piece matters. If a technician finds a dragging caliper, a blocked hose, or contaminated fluid in one part of the system, fixing that early is usually less expensive than waiting for pad damage, rotor heat spots, or repeat brake work.
If your brake pedal feels different, your vehicle is due for scheduled brake fluid service, or you want a technician to check for hidden hose and hydraulic problems, Kwik Kar Oil Change and Auto Care can inspect the system and recommend the right next step for your vehicle.